21
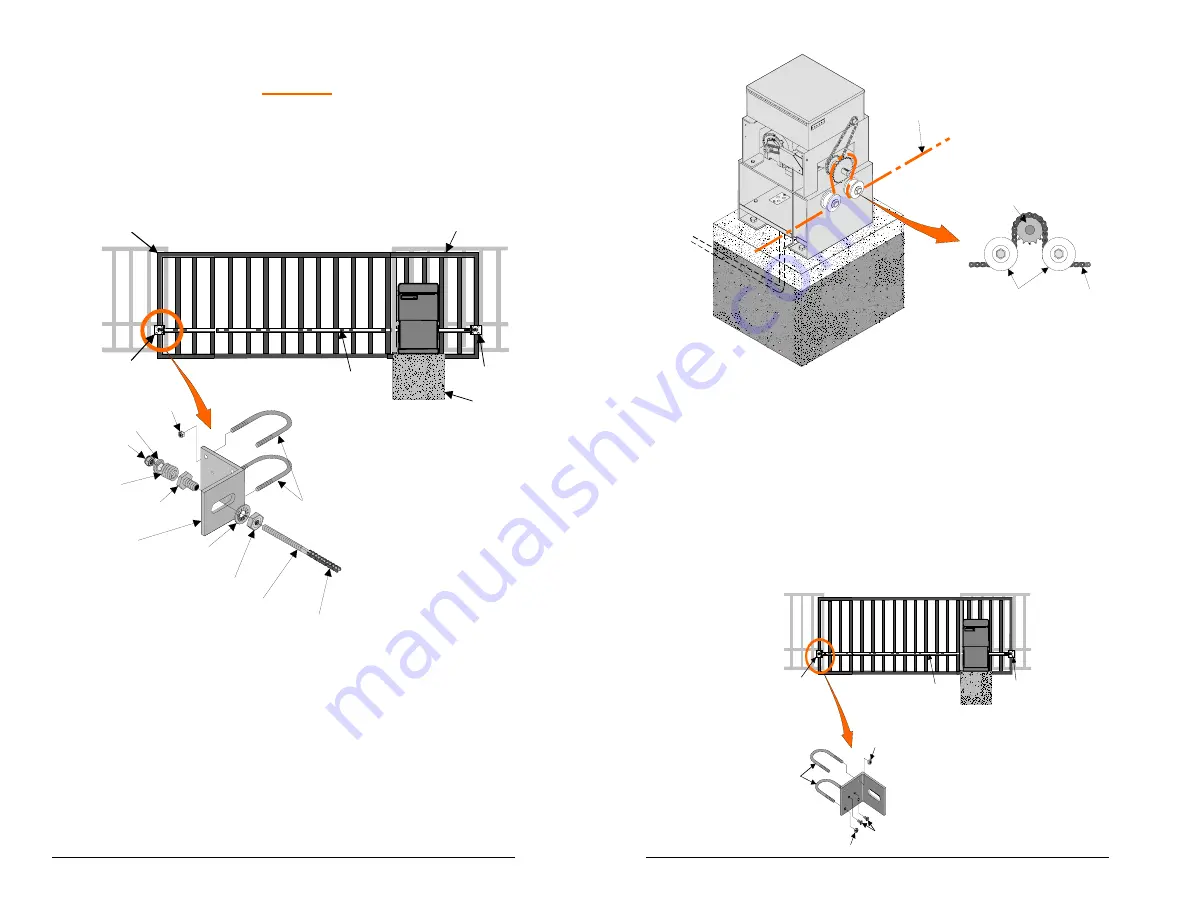
3. Install spring fittings into gate brackets using 3/4” nuts
and lock washers.
DO NOT
tighten.
4. Install chain take up bolt, previously attached to the
chain, into spring fitting in furthest gate bracket.
Secure it in position with spring, spring washer, and
1/2” elastic stop nut.
Cement Pad
Gate
Leading Edge
Gate
Extension
Gate
Bracket
Drive Chain
Gate
Bracket
Gate
Bracket
1/2-13 Elastic
Stop Nut
Spring
Washer
Chain
Tensioning
Spring
Spring
Fitting
3/4 Internal Tooth
Lock Washer
3/4-10 Jamb Nut
Chain take-up Bolt
#50 Connecting Link
Nut
3/8"
U-Bolts
P owerMa ster
5. Thread chain under first idler roller, up and over drive
sprocket, then under the second idler roller.
6. Move gate to tighten drive chain between operator
drive sprocket and gate bracket.
7. Secure gate position with rope or chock.
8. Measure out required length of drive chain needed for
attaching to remaining gate bracket.
22
Drive Chain
Drive
Sprocket
Idler
Rollers
9. Cut the chain to the correct length, attach remaining
chain take-up bolt and install in the gate bracket as in
steps 2 through 4.
10. Adjust the gate bracket height at both ends of the
gate to insure the drive chain aligns with the operator
idler rollers.
11.
Tighten the gate brackets securely and lock in
position with the setscrews provided.
Gate
Bracket
Drive Chain
Gate
Bracket
U-Bolts
Nut
Nut
Set
Screw
PowerMaster


