

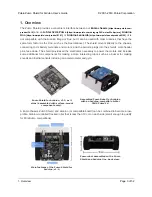


one 1×10 header, two 1×8 headers, and one 1×6 header; older Arduino boards use two 1×8 headers
and two 1×6 headers (the two pairs of pins highlighted above in red should not be populated if you are
using this board with an older Arduino that does not support these additional pins). Please make sure
you solder the appropriate headers for your particular Arduino!
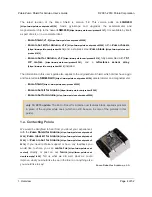
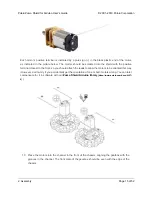
An easy way to line up the Arduino headers for soldering is to plug them into an Arduino, then place
the shield upside-down on top of them, as shown in the picture below. Be careful to insert the header
pins into the correct set of holes before you begin soldering.
Note:
if you use this alignment technique,
make sure your soldering iron temperature is not excessively hot and avoid holding the iron on a single
pin for more than a few seconds as this could melt the Arduino’s female headers.
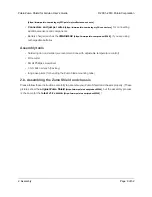
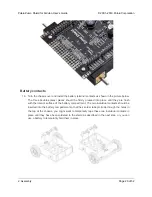
4. On the bottom of the board, trim the four Arduino header pins closest to the front of the board
on each side to prevent them from contacting the motor housings. If you think there is a
chance these pins might still touch the motor cases, you can put some electrical tape on the
motors to act as insulation.
Pololu Zumo Shield for Arduino User’s Guide
© 2001–2019 Pololu Corporation
2. Assembly
Page 11 of 52


