


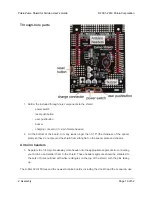


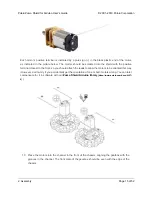


Through-hole parts
1. Solder the included through-hole components to the shield:
◦ power switch
◦ reset pushbutton
◦ user pushbutton
◦ buzzer
◦ charging connector (1×2-pin female header)
2. On the bottom of the board, trim any leads longer than 1/16″ (the thickness of the spacer
plate) so they do not prevent the shield from sitting flat on the spacer plate and chassis.
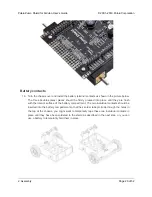
Arduino headers
3. Separate the 1×40-pin breakaway male header into the appropriate segments for connecting
your Arduino and solder them to the shield. These header segments should be soldered to
the sets of holes outlined with white rectangles on the top of the shield, with the pins facing
up.
The A-Star 32U4 Primes and the newest Arduino boards, including the Uno R3 and the Leonardo, use
Pololu Zumo Shield for Arduino User’s Guide
© 2001–2019 Pololu Corporation
2. Assembly
Page 10 of 52


