E
-12
Note
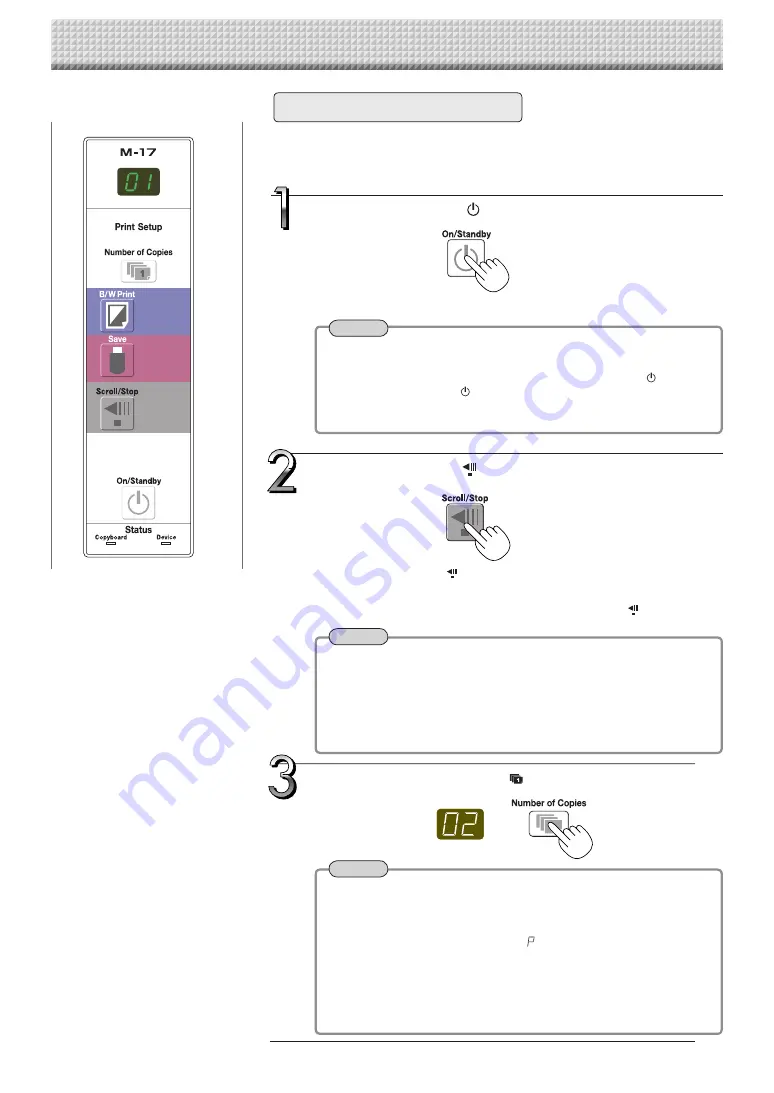
Press the ON/Standby
button and switch on the power.
Press the Scroll/Stop
button and display the sheet sur-
face you want to print.
A press of the Scroll/Stop
button scrolls the sheet surface one screen
portion left and automatically stops it.
To stop the operation part way through, press the Scrol/Stop
button again.
Prepare the printer. (See the previous page.)
• When turning on the power, wait about 5 seconds after connecting the
copyboard's AC power plug to the wall power outlet or after turning off
the power (standby mode) before pressing the ON/Standby
button.
• Press the ON/Standby
button to switch on the power. The LED of the
display window will light.
• Turn on the copyboard’s power before turning on the printer’s power.
Note
Note
Press the Number of Copies
button and select the
number of copies.
Printing
Basic Printing Operation
• The one-screen that is visible is printable position.
• To fine-adjust the sheet surface position, with the sheet stopped,
move the sheet slowly by hand. The sheet can be moved either to
the left or to the right.
• Printing of the portion located around the sheet surface might not be
possible. Please see “Effective reading size” on Page E-5.
• "01" is selected when the power is turned on.
• Up to 10 copies can be specified and displayed on the display
window.
• The number of copies increases by 1 each time the Number of
Copies button is pressed, and "
" is displayed after "10" (this is
used for test printing). When the button is pressed again, the display
switches to "01". The number switches continuously if the button is
held in.
• After setting the number of copies, proceed to step 4 within 1
minute. The number of copies is reset to "01" if no operation is per-
formed within 1 minute.
Preparation:
Preparation: Check that the AC power plugs of the copyboard and printer are
connected to wall power outlets. See Page E-10.
Summary of Contents for M-17S
Page 28: ...26 4613 12A ...


