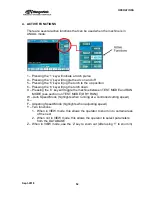
INSTALLATION
Sept-2018
46
3.8.
Power On
Once all the cables are plugged in, the machine can now be powered on.
1. Close the door on the CNC Control Cabinet
2. Power on the circuit breaker from the supply line.
3. Turn on the CNC control disconnect (NOTE: Door must be closed or
interlock will not allow power to be turned on)
4. Ensure all E-stops are out. (Two on the side of the bridge and one on the
CNC control)
NOTE:
It is important that all the Emergency Stop buttons are disengaged
before switching on the power, otherwise errors will be produced
and machine will not function.
5. Turn on the power switch
6. Press F2 on the keyboard to get into the manual mode. Once in manual
mode, you should be able to jog the gantry and control movement using
the arrows keys on the keyboard.
NOTE:
Before running the machine, you will need to set machine zero. Refer
to the MAINTENANCE section of the manual.
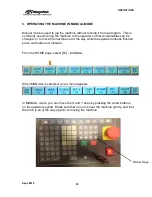
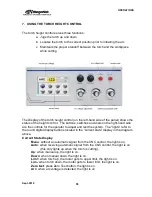
Emergency
Stop
Button
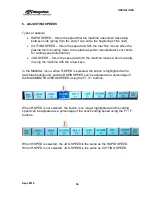
Welcome
Screen
Power
Switch
Summary of Contents for CNC Plasma Cutting Table
Page 2: ......
Page 4: ...TABLE OF CONTENTS Sept 2018 4...
Page 22: ...SAFETY Sept 2018 22...
Page 24: ...INSTALLATION Sept 2018 24...
Page 88: ...PROGRAMMING Sept 2018 88...
Page 117: ...PIPE CUTTING ATTACHMENT Sept 2018 117 Pipe Supports Pipe Cutter Base...
Page 124: ...PIPE CUTTING ATTACHMENT Sept 2018 124...
Page 128: ...PIPE CUTTING ATTACHMENT Sept 2018 128 j Then press F2 SYSTEM to see the following...
Page 136: ...PIPE CUTTING ATTACHMENT Sept 2018 136...
Page 140: ...WATER MIST CHILLER Sept 2018 140...
Page 144: ...APPENDIX A FastCAM SETUP Sept 2018 144 4 Choose the functions you need and Enter...
Page 154: ...APPENDIX A FastCAM SETUP Sept 2018 154...
Page 159: ...APPENDIX A FastCAM SETUP Sept 2018 159...
Page 164: ...APPENDIX A FastCAM SETUP Sept 2018 164...
Page 170: ...APPENDIX B Parametric Shape Library Sept 2018 170 9 Fla X 10 Lad 11 Rec 12 Rec8...
Page 172: ...APPENDIX B Parametric Shape Library Sept 2018 172 19 Rec 20 Rec c 21 Circle4 22 Rec...
Page 174: ...APPENDIX B Parametric Shape Library Sept 2018 174...


