Advanced setup
11
79
En
2
Select ‘DATA COPY’ then press ENTER.
3
Select CUSTOM1 or CUSTOM2 then use the
/
(cursor up/down)
buttons to select the setting you
want to copy.
• You can also copy from one custom setting to
another. For more on the
ALL CH ADJUST
and
FRONT ALIGN
settings, see
Setting the Acoustic
Calibration EQ automatically
above.
4
Select ‘Exit’ to copy and confirm.
You will return to the Acoustic Cal EQ setup menu.
Checking your Acoustic Calibration EQ settings
If you want to manually adjust the Acoustic Calibration
EQ (see
Setting the Acoustic Calibration EQ manually
above), we recommend copying the
ALL CH ADJUST
or
the
FRONT ALIGN
settings from the
Auto
setup above
(or from
Automatically setting up for surround sound
on
page 12) to one of the custom settings. Instead of just a
flat EQ curve, this will give you a reference point from
which to start.
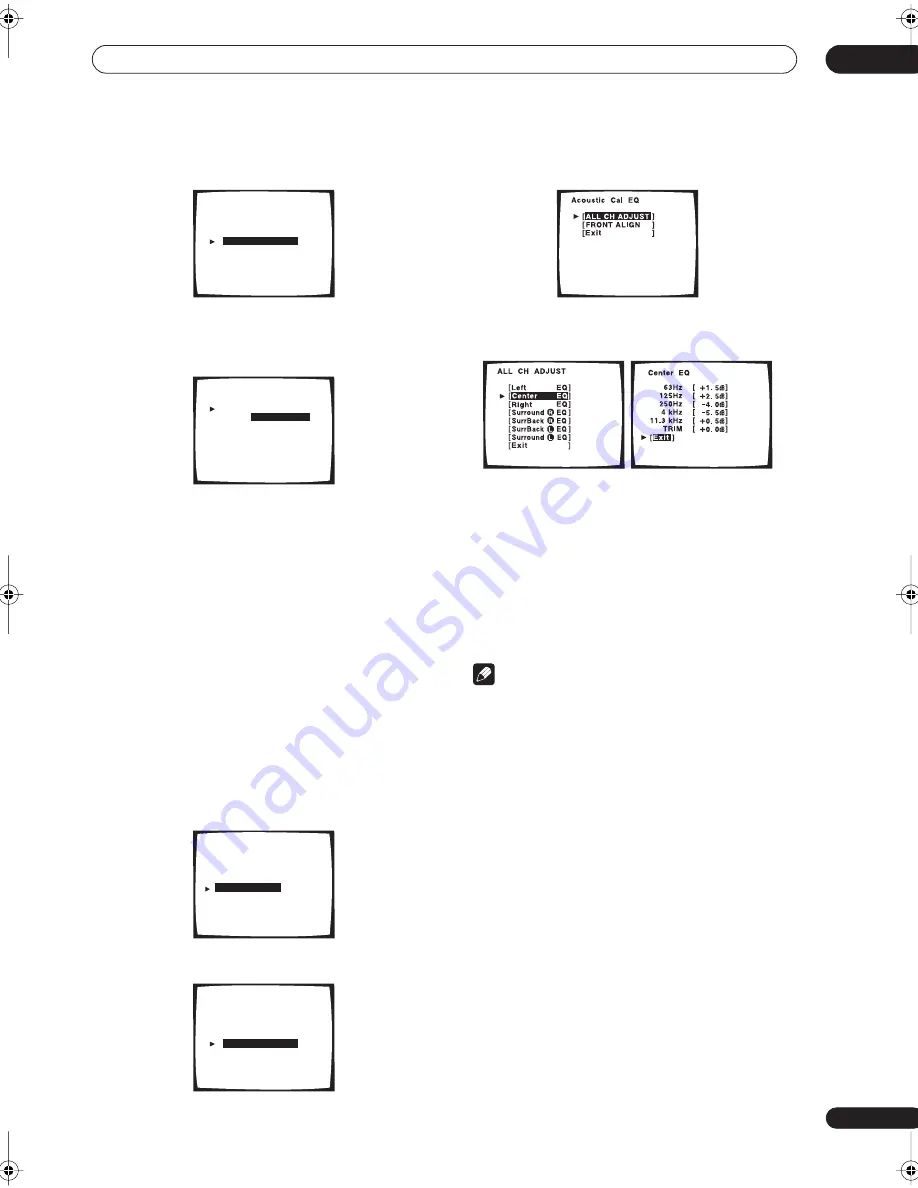
1
Select ‘Acoustic Cal EQ’ from the Expert setup
menu.
2
Select ‘DATA CHECK’ then press ENTER.
3
Select the setting you want to check.
4
Select the channels you want, selecting ‘Exit’
when you’re finished checking each one.
5
When you're finished, select ‘Exit’.
You will return to the Acoustic Cal EQ setup menu.
Professional Acoustic Calibration
This setup minimizes the unwanted effects of room
reverberation by calibrating your system based on the
direct sound coming from the speakers. It can also
provide you with a graphical output of the frequency
response of your room.
Note
• Before setting up with Professional Acoustic
Calibration, you should finish calibrating using the
Auto Surround Setup on page 12.
How to use Professional Acoustic Calibration
If you find that lower frequencies seem overly reverberant
in your listening room (i.e. it sounds ‘boomy’), or that
different channels seem to exhibit different reverb
characteristics, use the Auto Pro setup to calibrate the
room automatically. This should provide a more balanced
calibration than simply using the standard Acoustic
Calibration EQ. The manual setup allows you to
customize your system calibration with the help of a
graphical output that can be displayed on-screen, or
using a computer (with software available from
Pioneer—see
Connecting a PC for Advanced MCACC
output
on page 70 for more on this).
[ EQ AUTO SETTING ]
[
CUSTOM1 ADJUST ]
[ CUSTOM2 ADJUST ]
[
DATA COPY
]
[ DATA CHECK
]
[ Professional
]
[ Exit
]
Acoustic Cal EQ
CUSTOM1
CUSTOM2
[
]
EQ DATA COPY
ALL CH ADJUST
[
]
NOT DATA COPY
[Exit]
Expert
[ Crossover Network
]
[ Fine Channel Level ]
[ Fine Channel Delay ]
[
Acoustic Cal EQ
]
[ Bass Peak Level
]
[ D-Range Control
]
[ Exit
]
[ EQ AUTO SETTING ]
[
CUSTOM1 ADJUST ]
[ CUSTOM2 ADJUST ]
[
DATA COPY
]
[
DATA CHECK
]
[ Professional
]
[ Exit
]
Acoustic Cal EQ
VSX-54TX_0430.book 79 ページ 2004年5月6日 木曜日 午後8時7分


