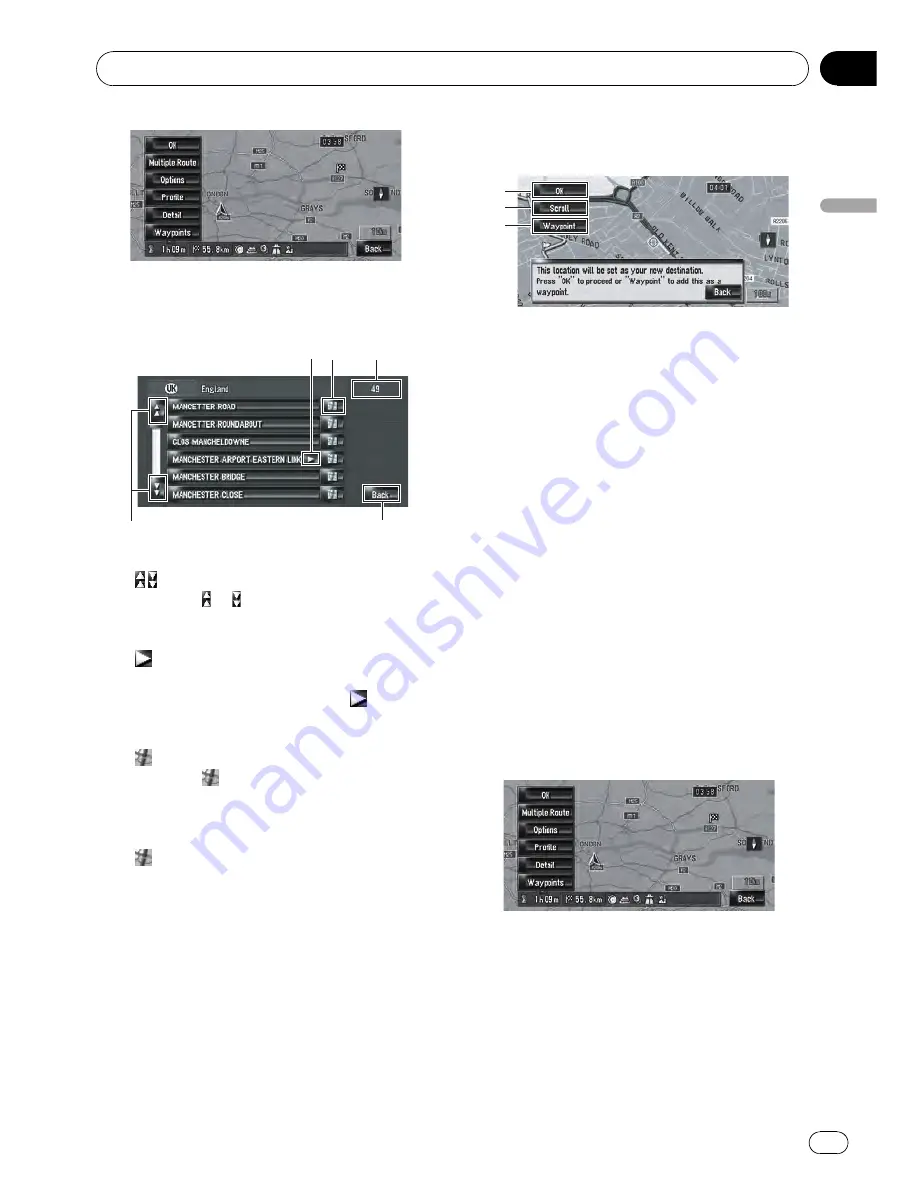
When the route calculation is completed,
“
Route confirmation screen
”
appears.
#
Operation of street list screen
3 4
5
1
2
1
Number of possible choices
2
:
Touching
or
on the scroll bar scrolls
through the list and allows you to view the
remaining items.
3
:
If all of characters cannot be displayed with-
in the displayed area, touching
to the
right of the item allows you to see remain-
ing characters.
4
:
Touching
displays a map of the place
you have selected. (Possibilities for place
names may appear with the list screen.)
You can also set a destination by touching
to the right of the list. Touch [
OK
] to set
the location indicated by the scroll cursor
as your destination.
5
[
Back
]:
Returns previous screen.
#
Checking the location on the map
Location confirmation screen
1
2
3
1
Calculating the route to the destination
Route calculation starts. When the route
calculation is completed,
“
Route confirma-
tion screen
”
appears.
p
If you press
MAP
button or
MENU
but-
ton during route calculation, the calcu-
lation is cancelled and the map screen
appears.
2
Scrolling the map
The map display changes to the scroll
mode. You can fine-tune the location in the
scroll mode, and then you can set the loca-
tion as your destination or do various opera-
tions by using the shortcut menu.
=
For details, refer to
Shortcut menu
on
page 40
3
Setting the location as a waypoint
The location indicated by the scroll cursor
will be set as a waypoint.
=
For details, refer to
Editing Waypoints
on
page 32
9
Touch [OK] to decide your route.
Basic Operation
Engb
27
Chapter
03
Basic
Operation


