


1
1
FEATURES
※
Original patented oblique paper-sensor. Detect the paper precisely, even if the paper is stuck to the end
of paper slot or paper roll is in different position (desktop or hang on the wall).
※
Special paper cutter design (the movable cutter is on the upper side). In this case, paper jam problem
can be solved by simply opening the printer cover. Currently ordinary printers cannot solve the paper
jam problem easily, only by pull back the gear to return the cutter.
※
With black mark sensor.
※
Optional automatically Paper-cutter module.
※
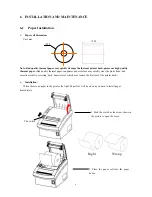
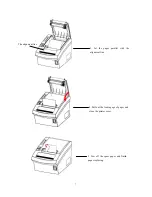
Unique mechanism to make paper installation easily.
※
With water-proof design. The rubber sticker in the paper outlet is able to prevent from water, oil.
※
Support with ESC/POS command collection, in addition to Aclas protocol.
※
POS printer: supermarket, restaurants, retails to print the sales receipt.
※
Can work as a fiscal printer, by adding optional displays (client&operator) and functional keys.
2
SPECIFICATIONS
Print Method
thermal print
Resolution 203dpi
Speed
150mm/s (PP7MX); 250mm/s (PP7HX)
Printer Head Life
50km
Effective Width
72mm
Paper Width
80mm±0.1
Paper Feed
roll feeding
Power Supply
DC24V 2A Adapter (AC100~240V)
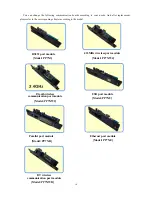
Interface
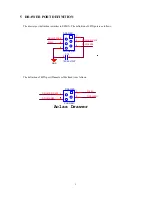
1 cash drawer interface compatibles with EPSON
1 USB port (PP7XU)
1 parallel port (PP7XD)
1 Ethernet port (PP7XE)
1 RS232 port (PP7XW4/PP7X3/PP7XW2/PP7XWB)
Work Temperature
0
℃
~ 40
℃
Work Humidity
5% ~ 85%
Weight approx.
0.82kg
Size 196.5*145*135mm
Summary of Contents for PP7X Series
Page 1: ...PP7X PRINTER OPERATION MANUAL Pinnacle Technology Corp ...
Page 2: ......
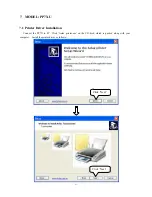
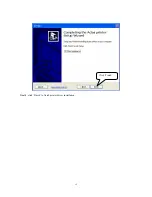
Page 17: ...14 Click Finish to finish USB driver installation Click Install ...
Page 18: ...15 Finally click Finish to finish printer driver installation Click Finish ...
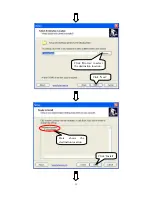
Page 20: ...17 Select the connecting port Click it ...
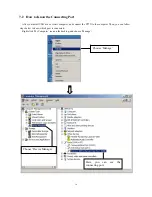
Page 25: ...22 Choose Device Manager Here you can see the connecting port ...
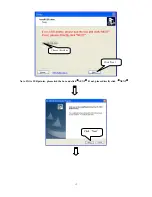
Page 30: ...27 Input the printer IP address Click Next ...
Page 31: ...28 Choose device type we suggest that you choose the standard type Click Next Click Finish ...
Page 32: ...29 Click it ...
Page 39: ...36 Select this item Click Next ...
Page 41: ...38 Installing the BT device automatically Here shows the connecting port is COM3 Click Finish ...
Page 43: ...40 Click Next Click Install ...
Page 44: ...41 Click Finish ...
Page 46: ...43 Double click it to search Double click it ...
Page 47: ...44 Double click it Input the passkey 0000 to create paired relationship ...
Page 76: ...DPP701ENV0 12 ...