THERMOMARK ROLL 2.0
PHOENIX CONTACT
108716_en_01
2.4.2
Inserting Leporello labels
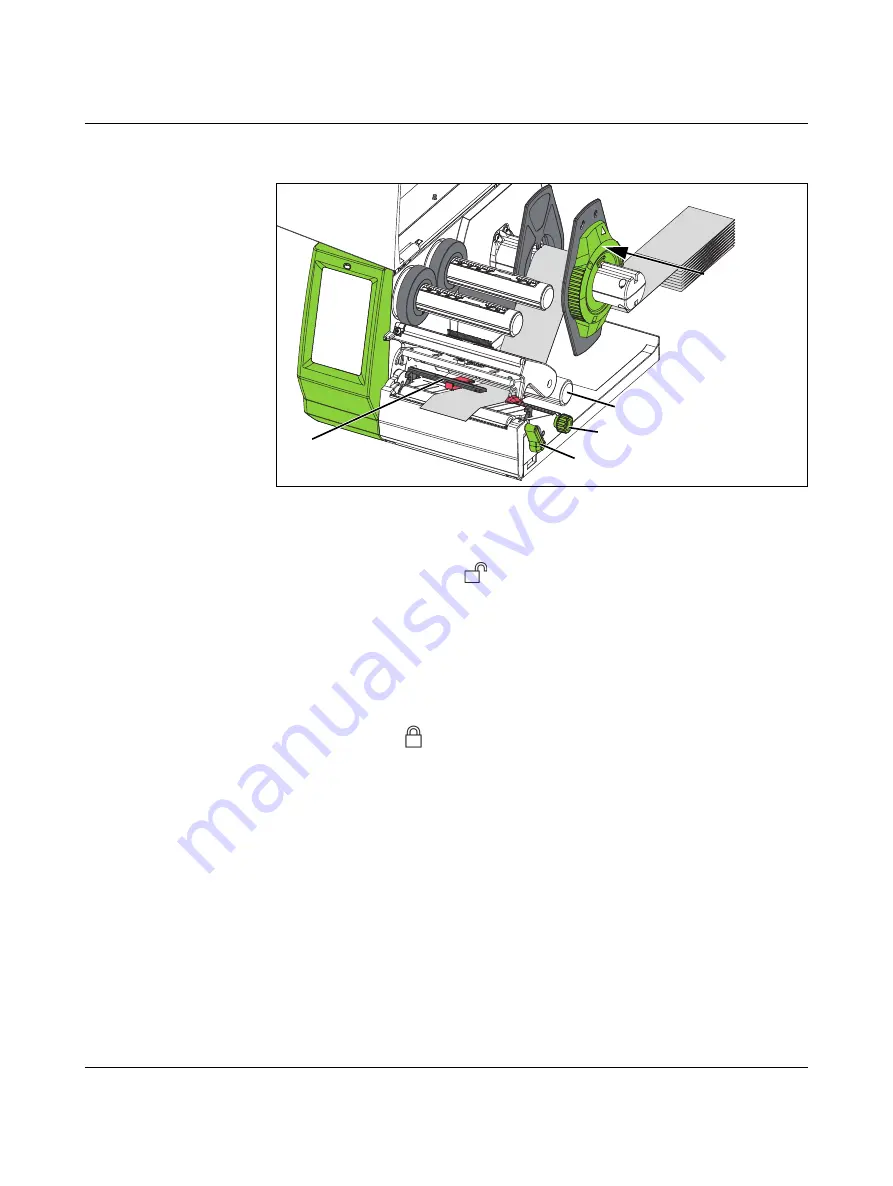
Figure 2-4
Material feed path with Leporello labels
Inserting Leporello labels
•
Open the cover.
•
Release the margin stop (1). To do this, turn the green adjustable ring counterclockwise
until the arrow points to the
symbol.
•
Position the margin stop in such a way that the material fits between the two margin
stops.
•
Place the label stack behind the printer. Make sure that the material side to be printed
is facing upwards.
•
Guide the Leporello labels over the holder for the material roll.
•
Check the position of the margin stop. The material must make contact on both sides
but must not jam.
•
Clamp down the margin stop. To do this, turn the adjustable ring clockwise until the ar-
row points to the
symbol.
Inserting material in the
printhead
•
To lift the printhead, turn the green lever (4) counterclockwise.
•
Turn the green knurled screw (3) until the material fits between the red guides.
•
Push the material below the guide roller (2) towards the printing unit. Guide the material
through below the label sensor (5).
•
Move the guides close to the edges of the material. The material must not become
jammed.
•
To close the printhead, turn the green lever clockwise.
3
4
1
2
5


