16
Go to cover page
202P7 CRT
OSD Adjustments (Continued)
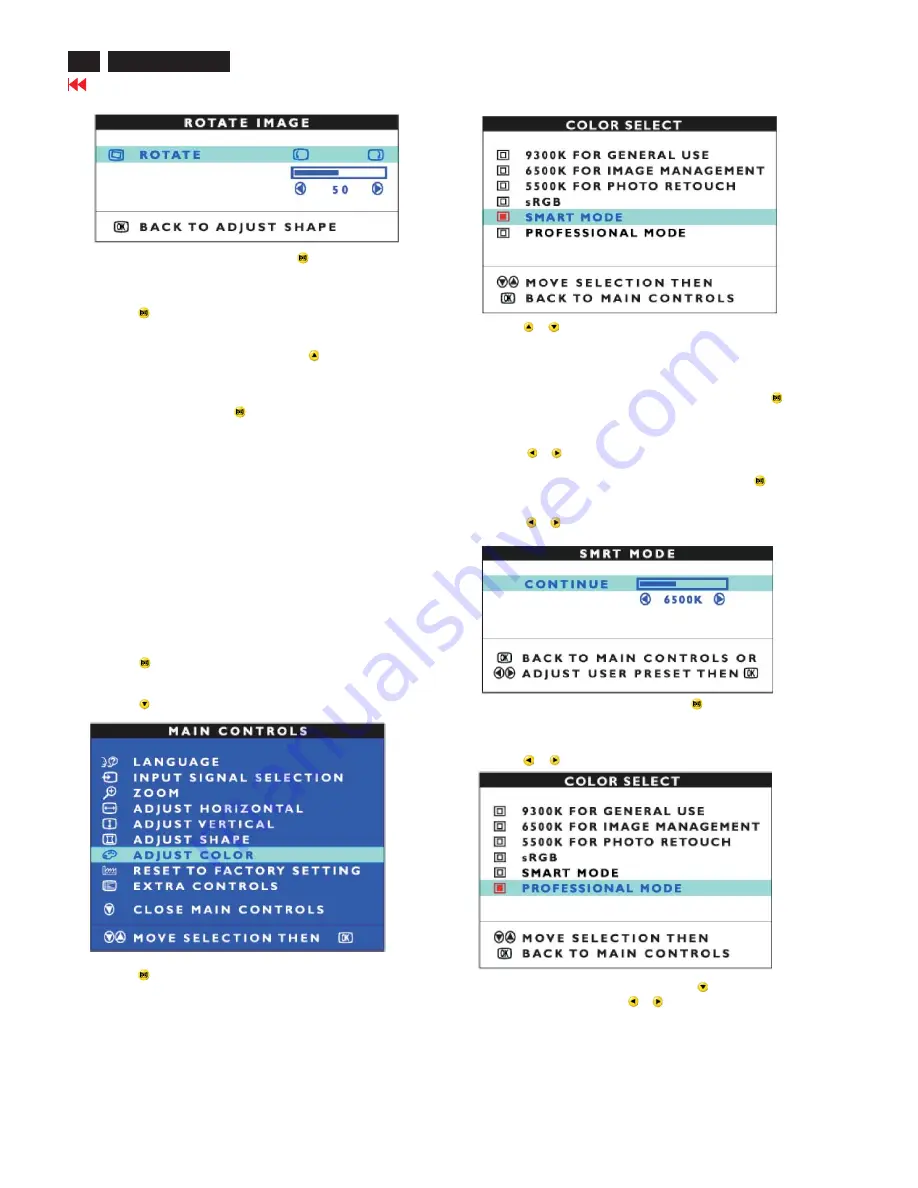
7) When the rotation is adjusted, press the
button to return to
the ADJUST SHAPE window. BACK TO MAIN CONTROLS should
be highlighted.
8) Press the
button to return to MAIN CONTROLS.
Smart Help
After returning to MAIN CONTROLS...
... To continue to ADJUST COLOR, press the
button until ADJUST
COLOR is highlighted. Next, start with step 3 under ADJUST COLOR
and follow the directions.
... To exit completely, press the
button twice.
ADJUST COLOR
1) Press the
button on the monitor. The MAIN CONTROLS window
appears.
2) Press the
button until ADJUST COLOR is highlighted.
Your monitor has three preset options you can choose from. The first
option is for GENERAL USE,which is fine for most applications. The
second option is for IMAGE MANAGEMENT, which includes projects
such as desktop publishing, viewing a DVD from your DVD player or
pictures on the World Wide Web, and playing video games. The third
option is for PHOTO RETOUCH, which is for working with pictures
you have imported into your computer and want to alter.
When you select one of these options,
the monitor automatically adjusts itself to that option.
The fifth
option is for sRGB, which provides standard sRGB color performance
to match another sRGB output.
There are also
two options, smart model and professional model, which allows you
to adjust colors on your screen to a setting you desire for high-end
application.
3) Press the
button. The ADJUST COLOR window appears.
4) Press the
or
button to highlight 9300K for GENERAL
USE. 6500K for IMAGE MANAGEMENT,5500K for PHOTO
RETOUCH, USER PRESET or sRGB.
5) Once you have highlighted the GENERAL USE,
, press the
button to confirm your selection and return to the MAIN CONTROLS
window. CLOSE MAIN CONTROLS will be highlighted.
IMAGE
MANAGEMENT, PHOTO RETOUCH or sRGB
6a) Press the
or
button to highlight SMART MODEL.
6b) Once you have highlighted SMART MODEL press the
button
to confirm your selection.
6c) Press the
or
button to adjust the color temperature. (
Adjustment range 4000K-10000K)
6d) When adjustments is complete, press the
button to confirm
your adjustments and return to the MAIN CONTROLS window.
CLOSE MAIN CONTROLS will be highlighted.
7a)Press the
or
button to highlight PROFESSIONAL MODEL.
7b) USER PRESET is highlighted, press the
button to highlight
RED GAIN. Next, press the
or
button to adjust the color
red gain.
Summary of Contents for 202P70/00
Page 37: ...37 202P7 CRT Go to cover page Wiring Diagram ...
Page 41: ...41 202P7 CRT Go to cover page Main Board C B A 1 ...
Page 42: ...42 Main Board C B A 2 Go to cover page 202P7 CRT ...
Page 44: ...44 Go to cover page Video Board C B A 1 202P7 CRT ...
Page 45: ...45 202P7 CRT Go to cover page Video Board C B A 2 ...
Page 47: ...47 202P7 CRT Go to cover page TERMINAL Board C B A 1 ...
Page 48: ...48 TERMINAL Board C B A 2 Go to cover page 202P7 CRT ...
Page 50: ...50 Driver Board C B A Go to cover page 202P7 CRT ...
Page 51: ...51 202P7 CRT Go to cover page KEY CONTROL Schematic Diagram C B A ...
Page 52: ...52 MHR Schematic Diagram C B A Go to cover page 202P7 CRT ...


