BASIC OPERATION – FREQUENTLY USED CONTROLS continued
The Power button
is surrounded by a red glow when the 7100 is turned off to show that it is
plugged into a live AC outlet and that its rear panel AC Power switch is in the On position.
The Volume/Select knob
normally controls listening volume levels, but pressing any of the
buttons (see below) temporarily turns it into the selector for sources, surround modes, remote
zone operation and the setup menu.
The
Zone
,
Source
and
Surround buttons
on the lower row temporarily override the knob’s
volume function. After one of these buttons is pressed, the knob becomes a selector for that
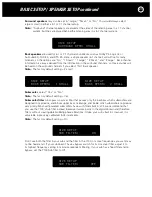
button’s function. The front-panel display will show a circular arrow indicating that you can make
selections for that function by turning the knob.
After you press the
Zone button
, the
Volume/Select knob’s
Zone control functions remain
active for 10 seconds, or for as long as you keep altering zone control settings with the knob.
After 10 seconds it returns to its volume function.
After you press the
Source
or
Surround button
the
Volume/Select knob’s
Surround mode
select function remains active for 5 seconds, or for as long as you keep altering source of
surround settings with the knob. After 5 seconds it returns to its volume function.
Note:
The
Power button
has the red standby glow around it when the remote Zone B is turned
on while the Main Zone is turned off. When both zones are turned off, you can turn on the
remote Zone B by first pressing the
Zone button
(or the remote’s
ZONE Device button
),
then pressing the
Power button
(or the remote’s
ON button
).
•
The
Zone button
selects whether the front-panel adjustments for volume, mute and source
select will affect the main zone (where the 7100 is) or the remote zone (B). While the
Zone
button
is active, front-panel and remote-control commands for volume, mute and source
select affect the remote zone in the same way they’d normally affect the main zone. The
display clearly shows when the 7100 is in remote zone mode.
•
The
Source button
converts the control knob into an input selector that cycles backward and
forward through the source inputs.
•
The
Surround button
converts the control knob into a selector that cycles backward and
forward through the available sound patterns (surround modes). These patterns include
various flavors of real and generated surround, stereo, and mono; the selection changes to
match whatever source you’ve currently selected.
•
The jack at the far left side of the panel is for your stereo
headphones
. It accepts typical
3.5mm (1/8”) headphone plugs. When you plug headphones in, the 7100 shuts off all main
zone outputs and combines, or “downmixes” all the channels of surround sources into the L
and R stereo channels. Recording and remote-Zone B outputs are not affected. When head-
phones are plugged in. Volume level on the front-panel display will change from “VOL” to
“PHON.” Volume in headphone mode is controlled by the regular Volume/Select knob
Note:
If your headphones use 6.3mm (1/4”), plug you will need an adapter.
To the right of the jack are four small buttons which do not affect the Volume/Select knob’s function.
•
The
Mute button
(which cuts off the audio outputs in whichever zone you’re controlling at
the time), and the
Dim button
(which you press to adjust the front panel display brightness
between its normal and dimmed).
Note:
Make sure mute is turned off before you increase volume with the knob so you don’t hear
an unexpected loud burst of sound by turning off the mute at the higher volume level.
Mute turns off automatically when you press the remote’s
VOL +
or
VOL – button
.
•
Press the
Menu button
when you want to make new selections or to modify original setup
selections.
•
Press the
Exit button
to exit the setup menu, without saving any new menu selections you
may have just made. It is equivalent to the
ESC button
on the remote.
Note:
The
Mute
and
Menu button
functions remain active until you press the buttons again to
turn them off.
27


