BASIC OPERATION
Operating the 7100
After you’ve connected your TV, a few source components, power amplifiers, speakers and
subwoofer, your system is ready for its shake-down cruise. Select the TV’s input to be the
same as its Video Input jacks connected to the 7100
Video Out jack
.
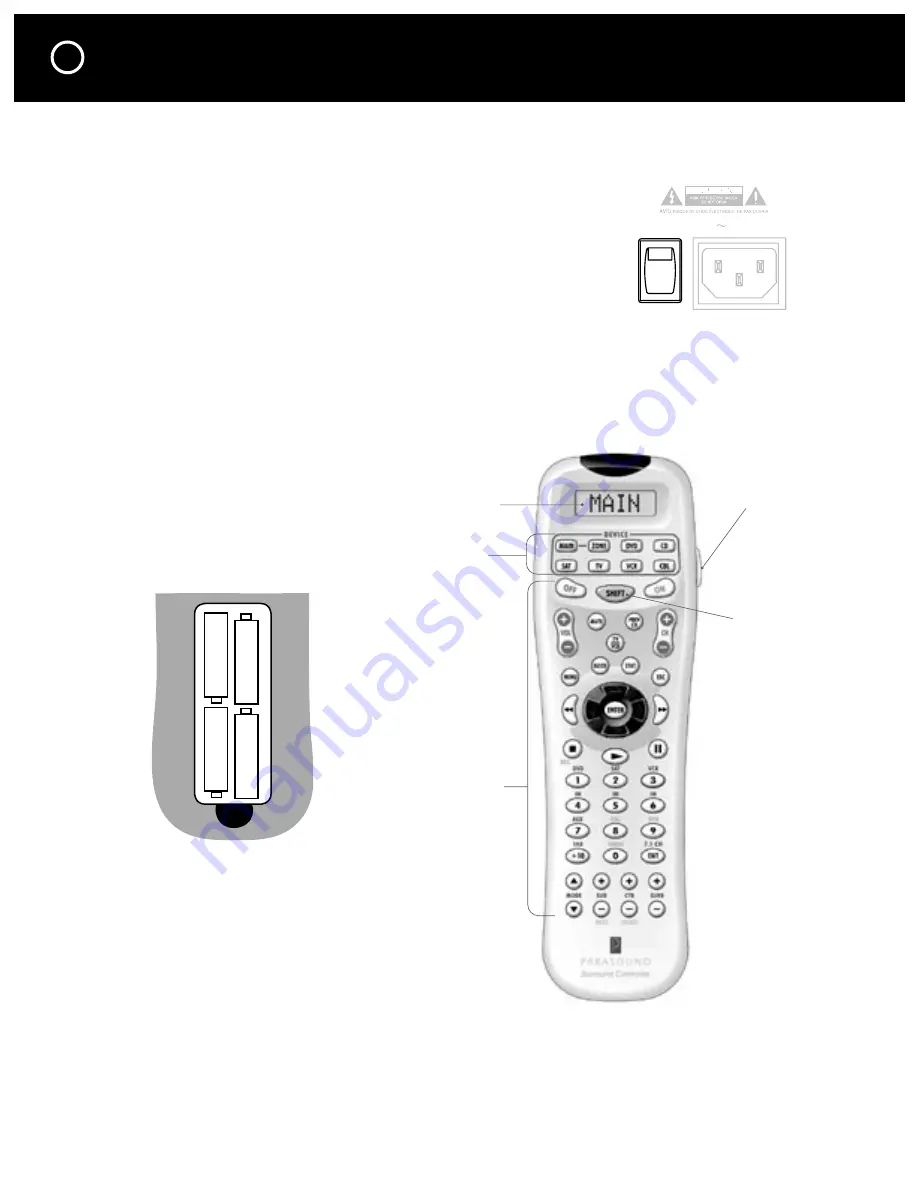
Press the rear panel master AC Power switch to its On position.
When you look at the front panel of the 7100 you should notice a
faint glow around its
Power button
. The red glow indicates that the
7100 is in a Standby mode, ready to turn on after you press its
Power
button
or press the remote handset’s
ON button
.
(Almost) Instant Gratification
The 7100 comes with certain setup choices already made for you so you can see and hear a DVD,
satellite broadcast or videotape right away. It is much quicker to use the remote control for most
operations, including navigating the menu to make other settings or to change the factory settings.
Remote Control Handset - preview
Open the battery compartment cover
and install the batteries, making sure
their directions match the
markings on the remote.
14
LIGHT
Button
SHIFT
Button
FUNCTION
Buttons
DISPLAY
DEVICE
Buttons
+
+
+
+
-
-
-
-
To Prevent Fire Or Shock
Hazard, Do Not Expose This
Unit To Rain Or Moisture.
To Prevent Electric Shock,
Do Not Remove Top Cover.
No User-Serviceable Parts
Inside. Refer Servicing To
Qualified Service Personnel.
WARNING:
Power Consumption:
65W
Main On
Master Off
AC Power
100V-240V
50Hz-60Hz
AC
Pb
Y
Pr


