BASIC SETUP / SPEAKER SETUP continued
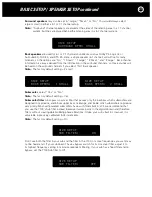
Level setup
For proper surround, the sounds reaching you from
the different speakers should have the same relative
levels as the movie’s producer and audio mixing
engineer intended. Because home systems and
home theater environments vary, the simplest way
to do that is to send a standard test signal through
each of the speakers in turn, listen to each speaker’s
volume levels at the main listening position, and
then adjust each channel’s volume level so that all
the speakers sound equally loud.
Note:
Speakers entered as “No” in the “Size
setup” menu will be shown as “None” in the
Level setup menu, and the test noise will not
be sent to them.
To adjust the test noise level, press the
left
and
right cursor buttons
to adjust its volume level
down or up. The noise should be reproduced at a
fairly loud level; if you adjust the Left front speaker
to “0dB” and match the levels of the other speakers
(and sub) to it, that’s a good starting point.
Note:
You can stop the auto cycling of the test
noise by pressing the
up
or
down cursor
buttons
to manually send the test noise to
the previous speaker or advance it to the next
speaker.
Note:
You can go to the “Level setup” menu
simply to review levels, without making any
changes.
After you set the level for your Sub, press the
cursor down button
so the menu cursor (
>
) is
by Exit. Press the
ENTER button
to save your
settings and return to the Speaker Setup page.
Calibrating with an SPL Meter
While you can calibrate speaker levels reasonably
well by ear, you might wish to purchase an
inexpensive SPL (sound-pressure-level) meter to
make more accurate measurements. Two popular
SPL meters are sold by Radio Shack:
http://www.radioshack.com/
product.asp?catalog_name=CTLG&product_
id=33-4050
http://www.radioshack.com/
product.asp?catalog_name=CTLG&product_
id=33-2055
The first model has an analog meter and the second model displays numbers digitally for greater
precision and ease of measurement.
Select either SPL meter’s “70 dB” scale, “C” weighting and ”Slow” response.
When you use a meter for calibration you’ll hold the meter in one hand with its microphone end
upright, near where your head would be when you sit in your main viewing/listening seat.
23
SIZE SETUP
EXIT
Speaker setup
Size setup
> Level setup
Distance setup
7.1 Ch in All Large
Exit
LEVEL SETUP
LEFT:
3.0 #
Level setup
> Left
3.0dB
Center
1.0dB
Right
-1.0dB
Right surround
1.0dB
Right back
1.0 #
Left back
0.5dB
Left surround
1.0dB
Subwoofer
-1.5dB
Exit
Level setup
> Left
0.0dB
Center
None
Right
-1.0dB
Right surround
1.0dB
Right back
1.0dB
Left back
0.5dB
Left surround
1.0dB
Subwoofer
-1.5dB
Exit


