OPERATOR MANUAL
Page 17
Operating your Panini Vision X
3.3 Power Cable Connection
Before connecting the scanner to your PC, make sure to position the unit on a flat surface near the PC, away
from direct light and from electromagnetic equipment.
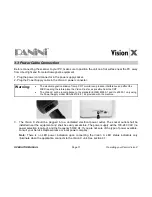
1. Plug the power cord connector in the power supply socket.
2. Plug the Power Supply cable in the Vision X power connector.
Warning:
The electromagnetic emission from a CRT monitor can produce interference and affect the
MICR reading; therefore place the Vision X as far as possible from the CRT.
The Vision X will be in compliance to the standard IEC/EN 60950-1 and UL 60950-1 only using
the Power Supply model DSA-0421S-28 1 42 provided with the machine.
3. The Vision X should be plugged into a dedicated electrical power outlet. The socket outlet shall be
installed near the equipment and shall be easily accessible. The power supply will be 100-240 VAC (no
power selection required), and the frequency 50/60 Hz. If you are not sure of the type of power available,
consult your Service Representative or local power company.
Note:
There is no LED power indication upon connecting the Vision X. LED status indicators only
illuminate when the application connects to the Vision X unit. See section 4.1.
Summary of Contents for Vision X
Page 1: ...OPERATOR MANUAL Page 0 General Operator Manual...
Page 2: ...Panini Vision X Operator Manual...
Page 78: ...OPERATOR MANUAL Page 77 Greek 9 WEEE WEEE Panini WEEE 13 2005 WEEE 2002 96 E...
Page 80: ...OPERATOR MANUAL Page 79 Greek 9 3 Vision X...
Page 81: ...OPERATOR MANUAL Page 80 Japanese 9 WEEE EU WEEE 2002 96 EC WEEE Panini 2005 8 13 WEEE EU...
Page 82: ...OPERATOR MANUAL Page 81 Japanese 9 1 9 2...
Page 83: ...OPERATOR MANUAL Page 82 Japanese 9 3...
Page 84: ...OPERATOR MANUAL Page 83 Chinese 9 WEEE EU WEEE Panini WEEE WEEE 2002 96 EC 2005 8 13...


