background image

HD Camera (KX-HNC800, KX-HNC805, KX-HN1003)

R

Full-color, high-definition camera with night vision and built-in microphone for live monitoring and
recording

R

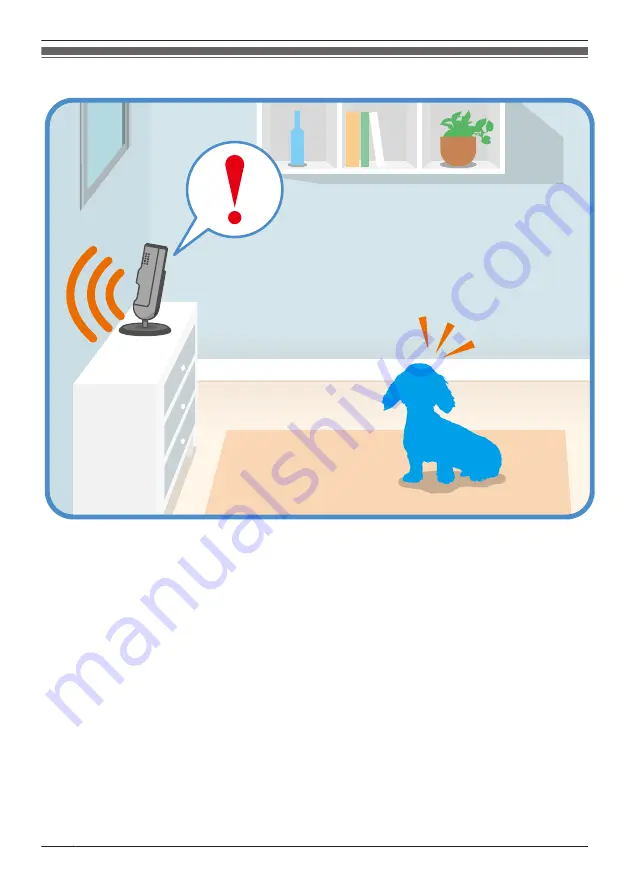
Built-in motion sensor (visual detection), sound sensor, and temperature sensor can be used to trigger
other actions (camera recording, etc.)

R

Built-in microphone and speaker for two-way communication

12

Getting started with the HomeHawk!

Summary of Contents for KX-HNC500

Page 1: ...User s Guide Text entity en_us_201005 Model No ...

Page 2: ...notifications 27 Device LED indicators 28 System expansion 33 System expansion overview 33 Registering devices 33 Mobile device features 34 Mobile device features overview 34 Amazon Alexa features 35 Amazon Alexa features overview 35 Linking with your Amazon Echo Show 36 Using Amazon Alexa to control devices 37 Google Home features 38 Google Home features overview 38 Linking with your Google Home ...

Page 3: ...tic Mode Switching 87 Configuring geo fencing 88 Window camera setup 90 Window camera setup overview 90 Window camera initial setup 90 Registering other mobile devices to the window camera 92 Window camera features 94 Window camera features overview 94 Viewing the camera image recording list screen 94 Viewing the live camera image screen 95 Recording camera images manual recording 97 Taking snapsh...

Page 4: ...LED 140 Updating firmware 141 Resetting camera settings 141 Access point features 141 Access point features overview 141 Recording settings 143 Bit rate settings for Amazon Echo Show and Google Home 143 Time adjustment 143 Displaying device information 144 Updating the firmware 144 Notification settings 144 Login settings 144 Network features 145 Home wireless network SSID features 146 Access poin...

Page 5: ...vices to the HD camera 174 Adding another HD camera 174 Deregistering your mobile device 174 Troubleshooting General information 176 Messages 178 Initial setup 179 Connecting from your mobile device 179 Notification features 180 Shelf camera features 181 General issues 181 Initial setup by WPS 182 Initial setup by Basic Setup 184 Floor camera features 185 General issues 185 Initial setup by WPS 18...

Page 6: ... Overview The Panasonic Home Monitoring Camera is a wireless network of devices that help you monitor your home Its easy to use app allows you to stay in charge even when away from home 6 Getting started with the HomeHawk ...

Page 7: ...view Front door camera KX HNC700 KX HNC705 Registration Registering front door cameras and outdoor cameras Features Front door camera and outdoor camera features overview Outdoor camera KX HNC710 KX HNC715 Overview Outdoor camera KX HNC710 KX HNC715 Registration Registering front door cameras and outdoor cameras Features Front door camera and outdoor camera features overview Maximum number of devi...

Page 8: ... camera setup overview Features Window camera features overview HD camera KX HNC800 KX HNC805 KX HN1003 Overview HD Camera KX HNC800 KX HNC805 KX HN1003 Registration HD camera setup overview Features HD camera main features overview Maximum number of devices that can be registered The maximum number of devices that can be registered to each type of device are listed below R Number of devices that ...

Page 9: ...NB705 R Joins front door cameras and outdoor cameras together R Connects to your wireless router with an Ethernet cable R Supports SD card connection for recording video and audio from cameras 9 Getting started with the HomeHawk ...

Page 10: ...n including color night vision and built in microphone for live monitoring and recording R Built in motion sensor visual detection can be used to trigger other actions alerts etc R Built in microphone and speaker for two way communication 10 Getting started with the HomeHawk ...

Page 11: ... including color night vision and built in microphone for live monitoring and recording R Built in motion sensor visual detection can be used to trigger other actions alerts etc R Built in microphone and speaker for two way communication 11 Getting started with the HomeHawk ...

Page 12: ...on and built in microphone for live monitoring and recording R Built in motion sensor visual detection sound sensor and temperature sensor can be used to trigger other actions camera recording etc R Built in microphone and speaker for two way communication 12 Getting started with the HomeHawk ...

Page 13: ...icrophone for live monitoring and recording R Built in motion sensor visual detection can be used to trigger other actions camera recording sending notifications etc R Built in sound sensor and temperature sensor can be used to trigger other actions sending notifications etc R Built in microphone and speaker for two way communication 13 Getting started with the HomeHawk ...

Page 14: ... and built in microphone for live monitoring and recording R Built in motion sensor visual detection can be used to trigger other actions camera recording sending notifications etc R Built in sound sensor and temperature sensor can be used to trigger other actions sending notifications etc R Built in microphone and speaker for two way communication R Adjustable ambient light high medium low and of...

Page 15: ...e monitoring and recording R Built in motion sensor visual detection can be used to trigger other actions camera recording sending notifications etc R 24 7 recording available for continuous recording R Can distinguishing between motion for people and objects 15 Getting started with the HomeHawk ...

Page 16: ...e screen Page 72 Window cameras See Viewing the live camera image screen Page 95 Front door cameras and outdoor cameras See Viewing the live camera image screen Page 50 HD Camera See Viewing live HD camera images Page 153 I want to know if someone approaches my home while I m out While away from home you can receive a notification on your mobile device if it was detected that someone approaches yo...

Page 17: ...oor cameras See Using night vision shelf cameras and floor cameras only Page 111 Window cameras NIght vision is enabled automatically depending on the lighting conditions Front door cameras and outdoor cameras See Using night vision Page 137 I want to know when my baby wakes up You can configure cameras to notify your mobile device when sound such as a crying baby is detected Supported devices R S...

Page 18: ... app to configure the camera s mode feature See Adjusting the lighting Page 81 R Use the HomeHawk app to configure the camera s geo fencing feature See Automatic Mode Switching Page 87 I want the lights to turn on automatically when I m away on vacation You can configure the floor camera to turn on its light at specified schedules or when it detects motion Supported devices R Floor camera KX HNC85...

Page 19: ...era to notify your mobile device only when motion is detected for a person and not for objects Supported devices R Window camera KX HNC500 KX HNC505 Required procedures R Use the HomeHawk app to set Send Notifications to Person Only See Once motion is detected Page 107 19 Getting started with the HomeHawk ...

Page 20: ...5s and later iPad Air and later iOS 10 0 and later Android devices Android 5 0 and later As of October 2019 Note R The HomeHawk app may not function properly depending on the system environment such as the model of your mobile device the peripherals connected to your mobile device and the apps installed on your mobile device Bluetooth headsets are not supported by the HomeHawk app R Operating syst...

Page 21: ...o your devices This is because it is assumed that in this situation anyone in your home who is using your mobile device is authorized to access your devices Note that even when you are at home you will need to enter the system password if your mobile device is not connected to the same wireless network as your devices This could occur if your mobile device is connected to the Internet using its mo...

Page 22: ... You can turn this feature on and off later if desired Shelf cameras floor cameras and window cameras Login settings Page 116 Access points front door cameras and outdoor cameras Login settings Page 144 HD cameras Login password Page 170 Important R Turning on this feature could allow unauthorized parties to access your devices if they are using your mobile device Privacy information Certain featu...

Page 23: ...ettings for the light floor cameras only G Displays the camera setting screen H Adjusts the brightness for the light floor cameras only I Shows the camera s name 1 Shelf camera mode settings Shelf camera mode settings overview Page 62 Floor camera mode settings Floor camera mode settings overview Page 85 Window camera mode settings Window camera mode settings overview Page 106 Note R For informati...

Page 24: ...y from home When connected away from home i e your mobile device is not connected to the same wireless router as your devices an icon is displayed in the live camera image screen 1 camera image recording list screen 2 and playback screen 3 to indicate that you are connected away from home and whether you are connected via a relay server A relay server is used to make connections with your wireless...

Page 25: ...Front door cameras outdoor cameras Viewing the live camera image screen Page 125 HD cameras Viewing live HD camera images Page 153 Returning to the previous screen iPhone iPad Tap Android devices Press your device s back button Returning to the HomeHawk app home screen Tap or press your mobile device s home button and then start the HomeHawk app again Home screen options While viewing the home scr...

Page 26: ...e device Changing settings Only 1 mobile device can change settings Subsequent mobile devices are blocked from changing settings while settings are being changed by another mobile device Front door camera and outdoor camera features Viewing camera images Up to 4 mobile devices including 2 connected while away from home i e connecting while away from a different network can view images from a maxim...

Page 27: ...sing Note R Information for HD cameras See Status notifications Page 159 Enabling and disabling status notifications See the following for information Shelf cameras Notification settings Page 115 Once motion is detected Page 64 Floor cameras Notification settings Page 115 Once motion is detected Page 87 Window cameras Notification settings Page 115 Once motion is detected Page 107 Access points fr...

Page 28: ...ations panel the app will attempt to connect to the corresponding device Shelf cameras and floor cameras The camera s motion sensor was triggered The selected mode was changed The sound sensor was triggered The temperature sensor was triggered The privacy mode was enabled The privacy mode was disabled A different event other than the above occurred Window cameras The camera s motion sensor was tri...

Page 29: ...amber alternating or Starting up 2 Red Registration failed Yellow amber Power on until start up completed IP address is not obtained or Ethernet cable is not connected to the router 1 You can configure the access point so that its LED indicator does not light in most states See Status LED Page 140 2 It may take some time for the access point to finish starting up Front door camera and outdoor came...

Page 30: ...ng the SETUP button for 3 seconds You can also check the signal level from Camera signal strength Page 136 4 Motion detection can also be checked from Detection test Page 140 Front door camera and outdoor camera charging LED indicator Red Charging is completed Charging Charging failure HD camera LED indicator Off No power or LED indicator is turned off 1 Blue Normal operation connected to wireless...

Page 31: ...evel is good 2 Initial setup is being performed using WPS on your router Blue Registration to your wireless router successfully completed or camera is on 1 White Privacy mode is on 1 Accessing microSD card when privacy mode is on 1 You can configure the camera so that its LED indicator does not light in most states See Status Page 109 2 The signal level strong good weak out of range is shown after...

Page 32: ...ully completed 3 or signal level is strong 2 Registration mode updating Camera is searching for your wireless router Red R Registration failed 3 R Accessing microSD card when using 24 7 recording R Signal level is weak 2 R Streaming data 1 or detecting motion 1 R Accessing microSD card when not using 24 7 recording R Device error fan error R Camera is out of range of your wireless router 2 R Wirel...

Page 33: ...oor cameras Registering your mobile device to additional access points Page 142 HD cameras Registering other mobile devices to the HD camera Page 174 Registering shelf cameras 1 From the HomeHawk app home screen tap Add Camera s 2 Tap SHELF Camera 3 Perform the procedure described in Initial setup Page 45 starting from step 3 Registering floor cameras 1 From the HomeHawk app home screen tap Add Ca...

Page 34: ...ter until the camera s LED indicator blinks slowly in green R Follow the on screen instructions R When registration is complete the camera sounds one long beep R If registration fails the camera sounds several short beeps Note R You can customize the name of each device for easier management For details see Changing the name of cameras Page 140 Registering HD cameras 1 From the HomeHawk app home s...

Page 35: ...u are trying to view camera images 1 From the HomeHawk app home screen tap Settings 2 Tap Mobile Device Settings Remote Access Mode 3 Select the desired value and then tap OK Amazon Alexa features Amazon Alexa features overview You can link your devices with an Amazon Echo Show device or other Amazon devices 1 and control and view images from devices connected to your devices using Amazon Alexa No...

Page 36: ... is opened Follow the on screen prompts to create a Panasonic ID Logging in to the Panasonic server and linking with your Amazon Echo Show If you have a Panasonic ID you can log in to the Panasonic server and then configure your Amazon Echo Show to link with your devices 1 From the HomeHawk app home screen tap Settings 2 Tap Amazon Alexa 3 Select the desired device R An agreement may be displayed ...

Page 37: ...amera name Note R Images stop being displayed after about 1 minute if no operations are performed Enabling disabling the privacy mode shelf cameras and floor cameras only The privacy mode of cameras can be enabled and disabled Enabling privacy mode voice command example R Alexa turn on privacy mode of camera name Disabling privacy mode voice command example R Alexa turn off privacy mode of camera ...

Page 38: ... Note R This feature requires third party equipment and services R Confirm the following before you begin Make sure your Google Home can connect to the Internet Make sure you have installed the Google Home app on your mobile device Creating a Panasonic ID A Panasonic ID is required to log in to the Panasonic server 1 From the HomeHawk app home screen tap Settings 2 Tap Google Home 3 Select the des...

Page 39: ...vailable features and voice commands R If Google Home does not recognize the camera names or mode names assigned to your devices try changing the camera names 1 or mode names 1 1 Front door cameras outdoor cameras Changing the name of cameras Page 140 Floor cameras shelf cameras window cameras Changing the name of cameras Page 113 2 Front door cameras outdoor cameras Mode name Page 134 Shelf camer...

Page 40: ...n check the temperature of the area surrounding the camera Checking the temperature voice command example R OK Google what s the temperature of camera name Adjusting the lighting of cameras floor cameras only You can adjust the lighting of the camera Adjusting the lighting voice command example R OK Google turn on camera name light R OK Google set camera name light to xx R OK Google brighten camer...

Page 41: ... devices registered to the selected device is displayed 4 Select the mobile device that you want to deregister R A dialog is displayed asking whether you want to deregister the device 5 Tap OK Note R Refer to the following if you want to register your mobile device again Access points Registering your mobile device to additional access points Page 142 Floor cameras Registering other mobile devices...

Page 42: ...u want to register your access point again Deregistering front door camera outdoor cameras 1 From the HomeHawk app home screen tap Settings 2 Tap Deregistration Camera s 3 Select the device that you want to deregister R A dialog is displayed asking whether you want to deregister the device 4 Tap OK Note R Refer to Registering front door cameras and outdoor cameras Page 34 if you want to register y...

Page 43: ...ome screen tap 2 Tap Support Camera Installation Removal Guide 3 Select the desired device R Installation removal information is displayed for the selected device Note R This setting is only available when a front door camera outdoor camera or window camera is registered Viewing system information You can view mobile device and system information such as the version of the app and the SSID of the ...

Page 44: ... a complete machine readable copy of the corresponding source code and the copyright notices covered under the GPL and the LGPL Please note that software licensed under the GPL and the LGPL is not under warranty https panasonic net cns pcc support homehawk tolink https panasonic net cns pcc support homehawk Software information R The End User License Agreement EULA for the HomeHawk app is availabl...

Page 45: ... you begin Make sure you have installed the HomeHawk app on your mobile device Make sure your wireless router and the camera are turned on Make sure your mobile device is connected to your wireless router Make sure your mobile device can connect to the Internet Note R If you have completed this procedure and want to register another mobile device to the camera see Registering other mobile devices ...

Page 46: ...ctions 8 Determine if you will complete the initial setup using WPS or without using WPS Basic Setup Set up using WPS Select WPS and proceed from WPS Set up without using WPS Select Basic Setup and proceed from Basic Setup WPS WPS is a function of wireless routers that is used to easily connect wireless devices to wireless routers A WPS button on a wireless router indicates that it has the WPS fun...

Page 47: ...starts searching for the camera R When Linking is displayed wait for up to about 3 minutes until the camera is connected to your wireless network and mobile device 3 Press the SETUP button on the camera for about 2 seconds until the camera beeps R The camera s LED indicator starts blinking in green 4 When prompted create a login password for the camera and then tap Next 5 When prompted enter a nam...

Page 48: ...e icon and proceed to step 6 If the camera s LED indicator lights in a color other than blue or white tap the icon for that color and follow the on screen instructions Note R When Linking is displayed wait for up to about 40 seconds until the mobile device finds the camera on your wireless network 6 Press the SETUP button on the camera for about 2 seconds until the camera beeps R The camera s LED ...

Page 49: ...ure detection is triggered notifications can be sent to your mobile device Additionally built in speakers and microphones allow you to talk to anyone who is near the camera Viewing the camera image recording list screen The camera image recording list screen shows live images and a list of recordings for the selected camera To access the camera image recording list screen tap the desired camera fr...

Page 50: ...the camera Page 54 J Turns sound on off Turning the camera audio on and off Page 52 K Displays the recording list screen where all the images can be displayed for the selected date Viewing the recording list screen Page 54 L Shows today s recorded image list for the selected camera M Displays the recorded images in a list N Displays the recorded images in a timeline Note R When connected away from...

Page 51: ...images is displayed together with the recording duration and details about the recording The recording was started manually The recording was started when motion was detected C Displays the camera setting screen D Displays the temperature of the area surrounding the camera E Shows the bit rate Displaying the bit rate level icon Page 112 F Shows the live camera image G Turns sound on off Turning th...

Page 52: ...heard Camera audio will not be heard Turning the privacy mode on and off Tap the icon to select the desired setting while viewing live images from a camera When privacy mode is enabled images and audio from the camera are unavailable and operations such as recording images and talking with the camera cannot be performed This is useful when you are at home and don t want other people to be able to ...

Page 53: ...d on the camera s SD card 1 View live images from the desired camera 2 Tap to start recording R Recordings include both audio and video To disable audio recording see Recording with sound shelf cameras and floor cameras only Page 110 3 Tap to stop recording Note R The maximum recording time is 15 minutes R If Recording Error Memory full is displayed the camera s SD card is full and new recordings ...

Page 54: ...a s speaker until you release your finger R Talk in turns with the other party While you are talking to the camera you will not be able to hear audio from the camera s microphone Tap and talk 1 View live images from the desired camera 2 Tap R Talk in turns with the other party 3 When finished tap Note R For information about adjusting the camera s speaker volume see Adjusting the talk volume Page ...

Page 55: ...are multiple cameras registered E Shows the camera s name F Goes to rapid playback Rapid playback Page 57 G Displays a thumbnail image for the recording H Shows information about the type of recording Manual Recordings that were recorded manually Motion Recordings that were recorded when a motion sensor was triggered I Shows the time when the recording was made and its duration J Indicates that a ...

Page 56: ... recording R The selected recording starts playing in the playback screen Note R When connected away from home or is displayed on the playback screen See Connection mode when away from home Page 24 for more information R Recorded images can also be played back from the camera image recording list screen Viewing the camera image recording list screen Page 49 Normal playback The normal playback scre...

Page 57: ...y function on your mobile device while downloading is in progress R Only 1 recording can be downloaded at a time R Recordings can only be downloaded when the mobile device is connected to the same wireless network as the camera Rapid playback Rapid playback allows you to play a condensed playback of the selected day s recordings Tap Rapid Playback to start rapid playback The following controls are...

Page 58: ...ist 2 Select the desired camera 3 Tap or the displayed date to select a recording date 4 Select the desired recording 5 Tap R Tap to remove the protection R is displayed in the thumbnail of images to indicate that the image is protected Protecting multiple images 1 From the HomeHawk app home screen tap Recording List 2 Select the desired camera 3 Tap or the displayed date to select a recording dat...

Page 59: ...anges i e even a small change will trigger the sensors Normal The sensors are moderately sensitive to changes Low The sensors are somewhat sensitive to changes Very Low The image sensor is only slightly sensitive to changes i e a large change is required to trigger the sensor 5 When finished tap OK Detection test You can test which areas of the camera image can be detected while viewing live image...

Page 60: ...ect whether the temperature is displayed and specified in Fahrenheit or Celsius and then tap OK Sound sensitivity You can configure the sound sensitivity used for sound detection 1 From the HomeHawk app home screen tap Settings 2 Tap Camera Settings and select the desired camera 3 Tap Detection Sound Sensitivity 4 Select the desired setting and then tap OK High The microphone is very sensitive to ...

Page 61: ... your computer and the SD formatting tool available from the web page listed below www sdcard org downloads formatter_4 tolink http www sdcard org downloads formatter_4 Note R All data stored on the SD card will be erased when it is formatted How recordings are saved on the SD card R Recordings are saved on the camera s SD card in folders based on the recording date in the following path PRIVATE P...

Page 62: ...rmined settings Home This mode is typically used when you are at home Use this in the following situations R You want the camera to Turn on the privacy mode when you arrive home R You don t want the camera to Record images or make sounds when motion is detected Send notifications to you when motion is detected Away This mode is typically used when you are away from home Use this in the following s...

Page 63: ...2 Select the desired mode Turning modes off If you don t want the camera to operate by a mode you can turn off modes by selecting Basic 1 Access the mode screen Accessing the mode screen Page 63 2 Tap Basic Creating new modes You can create new modes to operate your devices when an event occurs such as motion is detected 1 Access the mode screen Accessing the mode screen Page 63 2 Tap 3 Change the...

Page 64: ...he mode screen Page 63 2 Tap Edit and then tap next to the desired mode 3 Tap 4 Tap OK Automatic Mode Switching You can enable modes to be switched automatically depending on your location as determined by geo fencing Geo fencing is a location based feature that can set up virtual boundaries around a geographical location such as your home When devices mobile devices etc enter or exit these bounda...

Page 65: ...he location information of the mobile device is obtained and is used as the base location After this tap Check Map and confirm the location displayed on the map Note R Although the position can be set using the map it may not be set accurately Setting the mode for when you are not at home out of radius You can specify the mode that will be used when your mobile device is outside of the specified r...

Page 66: ...K Note R All mobile devices in the list can be deselected However each mobile device can only be selected enabled by itself and not from other mobile devices R A mobile device can only be selected for use with the geo fencing settings of a maximum of 4 cameras 66 Using a shelf floor and window camera ...

Page 67: ... you begin Make sure you have installed the HomeHawk app on your mobile device Make sure your wireless router and the camera are turned on Make sure your mobile device is connected to your wireless router Make sure your mobile device can connect to the Internet Note R If you have completed this procedure and want to register another mobile device to the camera see Registering other mobile devices ...

Page 68: ...ng WPS Basic Setup Set up using WPS Select WPS and proceed from WPS Set up without using WPS Select Basic Setup and proceed from Basic Setup WPS WPS is a function of wireless routers that is used to easily connect wireless devices to wireless routers A WPS button on a wireless router indicates that it has the WPS function WPS 1 Press and hold the WPS button on the wireless router until the router ...

Page 69: ...ote R Your mobile device starts searching for the camera R When Linking is displayed wait for up to about 3 minutes until the camera is connected to your wireless network and mobile device 3 Press the SETUP button on the camera for about 2 seconds until the camera beeps R The camera s LED indicator starts blinking in green 4 When prompted create a login password for the camera and then tap Next 5 ...

Page 70: ...p the blue or white icon and proceed to step 5 If the camera s LED indicator lights in a color other than blue or white tap the icon for that color and follow the on screen instructions Note R When Linking is displayed wait for up to about 40 seconds until the mobile device finds the camera on your wireless network 5 Press the SETUP button on the camera for about 2 seconds until the camera beeps R...

Page 71: ...talk to anyone who is near the camera Floor cameras also have a light that can be turned on and off and adjusted to 3 different levels Viewing the camera image recording list screen The camera image recording list screen shows live images and a list of recordings for the selected camera To access the camera image recording list screen tap the desired camera from the HomeHawk app home screen Shelf ...

Page 72: ...amera Page 76 K Turns sound on off Turning the camera audio on and off Page 74 L Displays the recording list screen where all the images can be displayed for the selected date Viewing the recording list screen Page 76 M Shows today s recorded image list for the selected camera N Displays the recorded images in a list O Displays the recorded images in a timeline Note R When connected away from home...

Page 73: ...a home screen Page 23 R iPhone iPad Displayed on the right side of the screen R Android devices Displayed on the left side of the screen C When recording images is displayed together with the recording duration and details about the recording The recording was started manually The recording was started when motion was detected D Displays the camera setting screen E Displays the temperature of the ...

Page 74: ... camera after a certain period of time in some conditions This is to minimize data usage If you are disconnected automatically a dialog is displayed asking if you want to connect to the camera again The time out period cannot be changed Turning the camera audio on and off Tap the icon to select the desired setting while viewing live images from a camera Camera audio will be heard Camera audio will...

Page 75: ...nstalled see Talking to the camera Page 76 Adjusting the brightness of the lights You can adjust the brightness of the lights See Adjusting the lighting Page 81 Recording camera images manual recording You can record camera images while viewing live camera images Camera recordings are saved on the camera s SD card 1 View live images from the desired camera 2 Tap to start recording R Recordings inc...

Page 76: ...ra 2 Tap and hold R The audio from your mobile device s microphone is played through the camera s speaker until you release your finger R Talk in turns with the other party While you are talking to the camera you will not be able to hear audio from the camera s microphone Tap and talk 1 View live images from the desired camera 2 Tap R Talk in turns with the other party 3 When finished tap Note R F...

Page 77: ...are multiple cameras registered E Shows the camera s name F Goes to rapid playback Rapid playback Page 79 G Displays a thumbnail image for the recording H Shows information about the type of recording Manual Recordings that were recorded manually Motion Recordings that were recorded when a motion sensor was triggered I Shows the time when the recording was made and its duration J Indicates that a ...

Page 78: ... recording R The selected recording starts playing in the playback screen Note R When connected away from home or is displayed on the playback screen See Connection mode when away from home Page 24 for more information R Recorded images can also be played back from the camera image recording list screen Viewing the camera image recording list screen Page 71 Normal playback The normal playback scre...

Page 79: ...y function on your mobile device while downloading is in progress R Only 1 recording can be downloaded at a time R Recordings can only be downloaded when the mobile device is connected to the same wireless network as the camera Rapid playback Rapid playback allows you to play a condensed playback of the selected day s recordings Tap Rapid Playback to start rapid playback The following controls are...

Page 80: ...ist 2 Select the desired camera 3 Tap or the displayed date to select a recording date 4 Select the desired recording 5 Tap R Tap to remove the protection R is displayed in the thumbnail of images to indicate that the image is protected Protecting multiple images 1 From the HomeHawk app home screen tap Recording List 2 Select the desired camera 3 Tap or the displayed date to select a recording dat...

Page 81: ...tion You can enable the light to turn on if motion is detected when it is dark Slide the Motion Sensor switch to the on position to enable the use of motion detection to turn on the light R Duration Determines how the long the light will be lit after motion is detected Adjusting the brightness of the light You can adjust the brightness level for when the light is turned on through a schedule or mo...

Page 82: ...anges i e even a small change will trigger the sensors Normal The sensors are moderately sensitive to changes Low The sensors are somewhat sensitive to changes Very Low The image sensor is only slightly sensitive to changes i e a large change is required to trigger the sensor 5 When finished tap OK Detection test You can test which areas of the camera image can be detected while viewing live image...

Page 83: ...ect whether the temperature is displayed and specified in Fahrenheit or Celsius and then tap OK Sound sensitivity You can configure the sound sensitivity used for sound detection 1 From the HomeHawk app home screen tap Settings 2 Tap Camera Settings and select the desired camera 3 Tap Detection Sound Sensitivity 4 Select the desired setting and then tap OK High The microphone is very sensitive to ...

Page 84: ... your computer and the SD formatting tool available from the web page listed below www sdcard org downloads formatter_4 tolink http www sdcard org downloads formatter_4 Note R All data stored on the SD card will be erased when it is formatted How recordings are saved on the SD card R Recordings are saved on the camera s SD card in folders based on the recording date in the following path PRIVATE P...

Page 85: ... don t want the camera to operate according to pre determined settings Home This mode is typically used when you are at home Use this in the following situations R You want the camera to Turn on the light when you arrive home Turn on the privacy mode when you arrive home R You don t want the camera to Record images or make sounds when motion is detected Send notifications to you when motion is det...

Page 86: ...en Page 23 Selecting modes 1 Access the mode screen Accessing the mode screen Page 86 2 Select the desired mode Turning modes off If you don t want the camera to operate by a mode you can turn off modes by selecting Basic 1 Access the mode screen Accessing the mode screen Page 86 2 Tap Basic Creating new modes You can create new modes to operate your devices when an event occurs such as motion is ...

Page 87: ...cessing the mode screen Page 86 2 Tap Edit and then tap next to the desired mode 3 Edit the desired settings 4 When finished tap Done Deleting modes 1 Access the mode screen Accessing the mode screen Page 86 2 Tap Edit and then tap next to the desired mode 3 Tap 4 Tap OK Automatic Mode Switching You can enable modes to be switched automatically depending on your location as determined by geo fenci...

Page 88: ...ition tap and hold the area you want to specify for the base position Setting the base position for Android devices Tap Use current location OK The location information of the mobile device is obtained and is used as the base location After this tap Check Map and confirm the location displayed on the map Note R Although the position can be set using the map it may not be set accurately Setting the...

Page 89: ... mobile devices to be used with geo fencing and then tap OK Note R All mobile devices in the list can be deselected However each mobile device can only be selected enabled by itself and not from other mobile devices R A mobile device can only be selected for use with the geo fencing settings of a maximum of 4 cameras 89 Using a shelf floor and window camera ...

Page 90: ...ore you begin Make sure you have installed the HomeHawk app on your mobile device Make sure your wireless router and the camera are turned on Make sure your mobile device is connected to your wireless router Make sure your mobile device can connect to the Internet Note R If you have completed this procedure and want to register another mobile device to the camera see Registering other mobile devic...

Page 91: ... the initial setup using Bluetooth or WPS Set up using Bluetooth Select Bluetooth and proceed from Bluetooth R If Bluetooth is disabled on your mobile device a dialog asking you to enable Bluetooth may be displayed Follow the on screen instructions to enable Bluetooth Set up using WPS Select WPS and proceed from WPS Bluetooth Bluetooth is a wireless technology used for exchanging data between devi...

Page 92: ...a for about 2 seconds R The camera s LED indicator starts blinking in green 6 When prompted create a login password for the camera and then tap Next 7 When prompted enter a name for the camera and mobile device and then tap OK R The camera name setting is used by your mobile device to identify the camera This is useful when you have multiple cameras R The mobile device name setting is used to iden...

Page 93: ...ow the on screen instructions Note R When Linking is displayed wait for up to about 40 seconds until the mobile device finds the camera on your wireless network 6 Press the SETUP button on the camera for about 2 seconds R The camera s LED indicator starts blinking in green 7 When prompted enter the login password for the camera and then tap Next 8 When prompted enter a name for the mobile device a...

Page 94: ...s detected Page 107 to only receive notifications when motion is detected for people You can also filter recordings to only show you recordings where motion was detected for people Additionally 24 7 recording Preset modes Page 106 is also available Viewing the camera image recording list screen The camera image recording list screen shows live images and a list of recordings for the selected camer...

Page 95: ...oxes that indicate where motion is detected Displaying hiding rectangles for motion detection Page 97 I Displays the recording list screen where all the images can be displayed for the selected date Viewing the recording list screen Page 98 J Filters the displayed recorded images according to the selected category Filters Page 100 K Shows today s recorded image list for the selected camera L Displ...

Page 96: ...screen B When recording images is displayed together with the recording duration and details about the recording The recording was started manually 24 7 recording is in use The recording was started when motion was detected C Shows the camera s name D Displays the camera setting screen E Shows the bit rate Displaying the bit rate level icon Page 112 F Shows the live camera image G Displays hides r...

Page 97: ...isplayed To display these icons tap anywhere on the camera image Zooming in and out Pinch in and out on the camera image while viewing live images from a camera While zoomed in you can swipe your finger on the camera image to display a different area of the image Night vision If there is not adequate light to illuminate the subject such as at night the camera switches to night vision mode Recordin...

Page 98: ...ive camera images Snapshots are saved in your mobile device s default photo album app 1 View live images from the desired camera 2 Tap Note R Snapshot sizes are scaled to fit the width of your mobile device s display R iPhone iPad Snapshots are saved as JPEG files in your mobile device s Photos app R Android devices Snapshots are saved as JPEG files in your mobile device s picture directory The fi...

Page 99: ...when there are multiple cameras registered F Filters the displayed recorded images according to the selected category Filters Page 100 G Goes to rapid playback Rapid playback Page 101 H Displays a thumbnail image for the recording I Shows information about the type of recording Person Recordings that contain detections for the motion of people Motion Recordings that were recorded when a motion sen...

Page 100: ...n is displayed Viewing the recording list screen Page 98 2 Select the desired camera 3 Tap or the displayed date to select a recording date R A list of all recordings recorded on the selected date is displayed R Filter categories Filters Page 100 can be used to display to the desired recordings R Tap to display recordings in a timeline Tap to display recordings in a list 4 Select a recording R The...

Page 101: ...rent recording G Protects the recording R Tap to remove the protection for the recording H Downloads the recording to the mobile device R Do not perform any function on your mobile device while downloading is in progress R Only 1 recording can be downloaded at a time R Recordings can only be downloaded when the mobile device is connected to the same wireless network as the camera I Indicates when ...

Page 102: ...omeHawk app home screen tap Recording List R The recording list screen is displayed Viewing the recording list screen Page 98 2 Select the desired camera 3 Tap or the displayed date to select a recording date 4 Tap Select 5 Select the desired recordings R Tap displayed next to the date to select or deselect all images shown in the list R Filter categories Filters Page 100 can be used to display to...

Page 103: ...nail of images to indicate that the image is protected R Tap displayed next to the date to select or deselect all images shown in the list R Filter categories Filters Page 100 can be used to display to the desired recordings 6 When finished tap Protect Detection area You can select which areas of the camera image are monitored for motion detection This allows you to ignore motion in certain areas ...

Page 104: ...y slightly sensitive to changes i e a large change is required to trigger the sensor 5 When finished tap OK Camera SD cards SD card capacity and total recording time The following recording times apply when images from one camera are recorded All times are approximate 4 GB card 4 hours 8 GB card 9 hours 16 GB card 18 hours 32 GB card 36 hours 64 GB card 72 hours 128 GB card 145 hours 256 GB card 2...

Page 105: ... org downloads formatter_4 How recordings are saved on the SD card R Recordings are saved on the camera s SD card in folders based on the recording date in the following path PRIVATE PANA_GRP HH WINDOW MM DD YYYY R The file naming convention is camera number recording type recording start time First character 1 fixed Second character Recording type A sensor recordings M manual recordings C continu...

Page 106: ...to pre determined settings Protection Use this in the following situations R You want the camera to Turn record images when motion is detected Send notifications to you when motion is detected R You don t want the camera to Record images 24 7 24 7 Recording Use this in the following situations R You want the camera to Record images 24 7 Send notifications to you when motion is detected Note R When...

Page 107: ...n create new modes to operate your devices when an event occurs such as motion is detected 1 Access the mode screen Accessing the mode screen Page 107 2 Tap 3 Change the settings as required R Each setting is explained in this section 4 When finished tap Create Mode name When creating a new mode you can set the name used for the mode This helps you to identify the mode from other modes used on you...

Page 108: ...ons Editing modes 1 Access the mode screen Accessing the mode screen Page 107 2 Tap Edit and then tap next to the desired mode 3 Edit the desired settings 4 When finished tap Done Deleting created modes 1 Access the mode screen Accessing the mode screen Page 107 2 Tap Edit and then tap next to the desired mode 3 Tap 4 Tap OK Note R Preset modes cannot be deleted 108 Using a shelf floor and window ...

Page 109: ...ume You can adjust the volume of your mobile device s microphone which determines the volume of your voice that is sent to the camera when talking to the camera 1 From the HomeHawk app home screen tap Settings 2 Tap Camera Settings and select the desired camera 3 Tap Sound 4 Under Talk Volume adjust the volume as desired Adjusting the motion detection volume You can adjust the volume of the camera...

Page 110: ...an select whether audio is recorded when recording camera images 1 From the HomeHawk app home screen tap Settings 2 Tap Camera Settings and select the desired camera 3 Tap Recording Settings 4 Slide the Recording with Sound switch to the desired position R When this switch is turned off audio is not recorded when recording camera images Adjusting the time stamp You can change the time format and p...

Page 111: ... Settings 2 Tap Camera Settings and select the desired camera 3 Tap Recording Settings 4 Tap Format microSD Card OK Using night vision shelf cameras and floor cameras only If there is not adequate light to illuminate the subject such as at night the camera switches to night vision mode depending on the settings The following settings can be selected for the night vision 1 From the HomeHawk app hom...

Page 112: ... are refreshed less often and moving subjects may appear choppy however images displayed on your mobile device will be less delayed and sound may be more consistent when talking shelf cameras and floor cameras only to the camera over a slow or congested network connection Changing the brightness You can adjust the overall brightness of the camera image 1 From the HomeHawk app home screen tap Setti...

Page 113: ...Changing the name of cameras You can edit camera names The camera name setting is used to identify cameras This is useful when you have multiple cameras 1 From the HomeHawk app home screen tap Settings 2 Tap Camera Settings and select the desired camera 3 Tap Name 4 Enter the desired name 5 When finished tap OK Note R If your camera is linked with an Amazon Echo Show device or a Google Home device...

Page 114: ...ion of its firmware 4 Follow the on screen instructions Resetting camera settings 1 From the HomeHawk app home screen tap Settings 2 Tap Camera Settings and select the desired camera 3 Tap System Reset Camera Settings 4 Select the desired setting Reset All Settings Resets all camera settings including network settings Reset Camera Settings Resets all camera settings except network settings Reset N...

Page 115: ...he mobile device to match the time with and then tap OK Displaying device information You can display device information such as firmware versions and MAC addresses and select whether or not to upload logs 1 From the HomeHawk app home screen tap Settings 2 Tap Camera Settings and select the desired camera 3 Tap System System Info Camera Log Upload Determines whether or not logs are uploaded Notifi...

Page 116: ...ings and select the desired camera 3 Tap Login Settings 4 Next to Automatic Login slide the switch to the desired position To disable automatic login Slide the switch to the off position To enable automatic login Slide the switch to the on position enter the password and then tap OK R To display the characters that you have entered tap Changing the login password You can change the login password ...

Page 117: ...ra Settings and select the desired camera 3 Tap Network Port Forwarding 4 Turn on the Enable radio button 5 Tap the field next to Port and then enter the desired port number R Only port numbers 55000 65000 can be assigned R Configure your wireless router s port forwarding feature to forward these ports to the static IP address that you have assigned to your devices 6 When finished tap OK R Your de...

Page 118: ...ttings and select the desired camera 3 Tap Home Wireless Network SSID 4 Select the wireless router that you want to delete and then tap Delete Updating the wireless network SSID information 1 From the HomeHawk app home screen tap Settings 2 Tap Camera Settings and select the desired camera 3 Tap Home Wireless Network SSID 4 Tap Update to update the information 118 Using a shelf floor and window ca...

Page 119: ...ter and the access point are turned on and the access point s LED indicator is lit in yellow amber or green Make sure your access point is connected to your wireless router with an Ethernet cable Make sure your mobile device is connected to the same wireless router as your access point Make sure your mobile device can connect to the Internet Note R If you have completed this procedure and want to ...

Page 120: ...n prompted press the SETUP button on the access point 9 When prompted set the password that will be used to log in to the access point and then tap Next 10 When prompted enter a name for the access point 1 and for your mobile device and then tap OK R The access point name setting is used by your mobile device to identify the access point This is useful when you have multiple access points R The mo...

Page 121: ... amber tap the yellow amber blinking icon and then connect the Ethernet cable between the access point and router Next follow the on screen instructions wait for a while and then check the color of the LED lights again R If the access point s LED indicator blinks in green tap the blinking green icon check if DHCP Dynamic Host Configuration Protocol is operating for the router refer to the operatin...

Page 122: ...device from the access point Deregistering mobile devices Page 41 before handing it over to a third party such as when submitting your mobile device for service lending it to someone else selling it etc or if you no longer intend to use the mobile device with the access point 122 Using a front door camera and outdoor camera ...

Page 123: ...evice Additionally built in speakers and microphones allow you to talk to anyone who is near the camera Note R Front door cameras and outdoor cameras may stop working in extremely high or low temperatures Normal operations will resume once the temperature is within the supported levels See The camera will not charge the charging LED indicator blinks quickly in red Page 191 Main features Viewing th...

Page 124: ...image E or this icon F the camera image can be enlarged and the live camera image screen Viewing the live camera image screen Page 125 can be accessed G Takes snapshots Taking snapshots Page 127 H Starts stops recording Recording camera images manual recording Page 127 I Enables talking with the camera Talking to the camera Page 128 J Turns sound on off Turning the camera audio on and off Page 126...

Page 125: ...en tap the desired camera from the HomeHawk app home screen Front door camera and outdoor camera home screen Page 24 and then tap the displayed camera image B C F G J I E A D K H A Returns you to the home screen Front door camera and outdoor camera home screen Page 24 R iPhone iPad Displayed on the right side of the screen R Android devices Displayed on the left side of the screen B Displays the c...

Page 126: ...ant to connect to the camera again The time out period cannot be changed Turning the camera audio on and off Tap the icon to select the desired setting while viewing live images from a camera Camera audio will be heard Camera audio will not be heard Viewing images horizontally By turning your mobile device on its side you can display camera images horizontally When viewing images horizontally icon...

Page 127: ...isplayed The sub image can be displayed in the 4 corners of an image Recording camera images manual recording You can record camera images while viewing live camera images Camera recordings are saved on the access point s SD card 1 View live images from the desired camera 2 Tap to start recording R Recordings include both audio and video To disable audio recording see Recording with sound Page 137...

Page 128: ...he camera s speaker until you release your finger R Talk in turns with the other party While you are talking to the camera you will not be able to hear audio from the camera s microphone Note R For information about adjusting the camera s speaker volume see Adjusting the talk volume Page 136 Viewing the recording list screen From the HomeHawk app home screen tap Recording List to display the recor...

Page 129: ...ects devices when there are multiple devices registered F Shows the camera s name Select All Cameras to see recorded images from all the cameras registered to the specified access point G Displays a thumbnail image for the recording H Shows information about the type of recording Manual Recordings that were recorded manually Motion Recordings that were recorded when a motion sensor was triggered I...

Page 130: ...be played back from the camera image recording list screen Viewing the camera image recording list screen Page 123 Playback controls The following controls are displayed in the playback screen Starts or resumes playback Pauses playback Allows you to quickly move to the desired area of the recording by sliding the progress bar Erases the current recording Protects or removes the protection for the ...

Page 131: ...ting individual images 1 From the HomeHawk app home screen tap Recording List 2 Select the desired access point and camera R Select All Cameras to see recorded images from all the cameras registered to the specified access point 3 Tap or the displayed date to select a recording date 4 Select the desired recording 5 Tap R Tap to remove the protection R is displayed in the thumbnail of images to ind...

Page 132: ...long 3 Are cameras combined together for pre recording Example 2 cameras can be linked together so that if 1 camera detects motion the other camera starts pre recording Images are temporarily stored and if motion is detected later images are then saved on the access point s SD card 4 Are notifications sent to mobile devices when motion is detected Note R Modes cannot be used with HD cameras Exampl...

Page 133: ... screen Page 133 2 Tap Basic Mode Preset modes There are 3 preset modes that can be used for front door cameras and outdoor cameras Basic Mode Silent Mode and Protection Mode Basic Mode Use this if you don t want to receive notifications record images or have the camera make sounds when motion is detected Silent Mode Use this if you want to receive notifications record images but not have the came...

Page 134: ...yed next to Duration and then tap Done Sync You can coordinate cameras so that when 1 camera detects motion the other camera starts pre recording Images are temporarily stored and if motion is detected later images are then saved on the access point s SD card To enable disable camera coordination Slide the Sync switch to the desired position Note R Sync is only available when 2 or more front door ...

Page 135: ...n change the volume of beeps and announcements played form cameras See Speaker volume settings Page 136 for more information Editing modes 1 Access the mode screen Accessing the mode screen Page 133 2 Tap Edit and then tap next to the desired mode 3 Edit the desired settings 4 When finished tap Done Deleting modes 1 Access the mode screen Accessing the mode screen Page 133 2 Tap Edit and then tap ...

Page 136: ...ing the talk volume You can adjust the volume of your mobile device s microphone which determines the volume of your voice that is sent to the camera when talking to the camera 1 From the HomeHawk app home screen tap Settings 2 Tap Camera Settings and select the desired camera 3 Tap Sound Talk Volume 4 Adjust the volume as desired Adjusting the motion detection volume You can adjust the volume of ...

Page 137: ... the time stamp off select OFF 24 Hour Format Determines whether the time stamp is displayed in 24 hour format or 12 hour format Enable this setting to use 24 hour format time Using night vision If there is not adequate light to illuminate the subject such as at night the camera switches to night vision mode depending on the settings The following settings can be selected for the night vision Colo...

Page 138: ...ts may appear choppy however images displayed on your mobile device will be less delayed and sound may be more consistent when talking to the camera over a slow or congested network connection Changing the brightness You can adjust the overall brightness of the camera image 1 From the HomeHawk app home screen tap Settings 2 Tap Camera Settings and select the desired camera 3 Tap Video Brightness 4...

Page 139: ...se the same sensitivity level for the IR sensor and video motion sensor High The sensors are very sensitive to changes i e even a small change will trigger the sensors Normal The sensors are moderately sensitive to changes Low The sensors are somewhat sensitive to changes If you want to use different sensitivity levels for the IR sensor and video motion sensor Tap Advanced IR Sensor Determines sen...

Page 140: ...show their detection status Green areas Areas where motion was detected Clear areas Areas where motion was not detected Black areas Areas where detection is disabled See Detection area Page 139 for more information Front door camera and outdoor camera settings Changing the name of cameras You can edit camera names The camera name setting is used to identify cameras This is useful when you have mul...

Page 141: ...ion of its firmware 4 Follow the on screen instructions Resetting camera settings 1 From the HomeHawk app home screen tap Settings 2 Tap Camera Settings and select the desired camera 3 Tap System Reset Camera Settings 4 Follow the on screen instructions Note R Camera registration information stored on the access point is not reset Access point features Access point features overview Using multiple...

Page 142: ...ED indicator lights or is disabled Resetting an access point 1 From the HomeHawk app home screen tap Settings 2 Tap Access Point Settings and select the desired access point 3 Tap System Reset Access Point 4 Select the desired setting Reset All Settings Resets all access point settings except camera registration settings Reset Access Point Settings Resets access point settings except for camera re...

Page 143: ...ages on Amazon Echo Show or via Google Home Chromecast or if images are not displayed smoothly try using a lower bit rate setting 1 From the HomeHawk app home screen tap Settings 2 Tap Access Point Settings and select the desired access point 3 Tap System Bit Rate 4 Select the desired setting and then tap OK Note R This setting is only available when Amazon Echo Show Amazon Alexa features overview...

Page 144: ... instructions Notification settings You can select which types of status notifications are displayed and which are not Important R In order to receive notifications your mobile device must be connected to the Internet If your mobile device is not connected to a wireless network a mobile network connection is required 1 From the HomeHawk app home screen tap Settings 2 Tap Access Point Settings and ...

Page 145: ...d to the same wireless router as the access point Network features Changing IP settings Typically these settings should not be changed 1 From the HomeHawk app home screen tap Settings 2 Tap Access Point Settings and select the desired access point 3 Tap Network IP Settings 4 Select the desired IP address mode R In most cases Auto DHCP is preferred In this case no other settings are available on th...

Page 146: ...sired value and then tap OK Home wireless network SSID features The app remembers the SSIDs of wireless routers that your mobile device uses at home to connect to your devices it can remember 10 SSIDs and saves them in the home wireless network SSID list If the list is full and you try to connect to your devices using a new SSID while at home the app may connect to your devices over the Internet e...

Page 147: ...rmatting Before inserting an SD card into the access point format the SD card using your computer and the SD formatting tool available from the web page listed below www sdcard org downloads formatter_4 tolink http www sdcard org downloads formatter_4 Note R All data stored on the SD card will be erased when it is formatted How recordings are saved on the SD card R Recordings are saved on the acce...

Page 148: ...wk iPad users should search in the iPhone only category Android device users Search for Panasonic HomeHawk Compatible mobile devices Please check the latest information at the following supported page https panasonic net cns pcc support homehawk tolink https panasonic net cns pcc support homehawk iPhone 5s and later iPad Air and later iOS 10 0 and later Android devices Android 5 0 and later As of ...

Page 149: ...awk app R The end user license agreement is displayed the first time you start the app 3 Follow the on screen instructions 4 Tap Indoor HD Camera 5 Tap Set up the HD Camera 6 When prompted press the SETUP button on the back of the camera and then tap Next R The LED indicator blinks in green 7 iOS 11 0 or later users Tap Join and then continue from step 9 iOS 10 x users Change your mobile device s ...

Page 150: ...nnect to your wireless router R If you enter the wrong password an error is displayed Repeat the initial setup procedure from the beginning 8 When prompted press the SETUP button on the back of the camera R The camera registers your mobile device 9 When prompted set the password that will be used to connect to the camera 10 When prompted enter a name for your mobile device and then tap OK R This s...

Page 151: ... you enter will be saved allowing the app to log in to the camera automatically You can turn the automatic login feature on and off later if desired See Automatic Login Page 169 General information R Running the app while away from home when your mobile device is connected to a mobile network 3G 4G etc may cause your mobile device s battery to deplete faster than normal R If the app disconnects fr...

Page 152: ...nect to the camera certain features may be temporarily unavailable depending on how other mobile devices are using the camera Other restrictions on HD camera features If a mobile device is viewing camera images R Other mobile devices cannot change certain settings for that camera If a mobile device is playing camera recordings R Other mobile devices cannot play recordings from that camera If a mob...

Page 153: ...home screen is displayed when you start the app HD camera home screen A B C D A Displays the settings menu B Shows the camera s name C Selects the camera to be displayed at the top of the list D Shows the camera image Viewing live HD camera images 1 From the HomeHawk app home screen select the desired camera 2 If prompted enter the camera s password R A live image from the selected camera is displ...

Page 154: ...ings for the selected camera Smart Recording Allows you to create and edit smart recording scenarios See Smart recording features overview Page 161 Camera Speaker Volume Allows you to adjust the selected camera s speaker volume Set Thumbnail Allows you to set the preview image for the selected camera that is displayed in the camera list See Thumbnail image Page 168 Sensor Log Displays a log of pre...

Page 155: ... speaker to talk to someone where the camera is installed This feature behaves differently depending on the Talk Mode setting Talk mode Page 167 Half Duplex Mode When Talk Mode is set to Half Duplex Mode the following icons are displayed The Talk feature is turned off Your voice will not be heard at the camera The Talk feature is turned on Your voice will be heard at the camera if your voice is lo...

Page 156: ...mart recording scenarios to record images See Smart recording features overview Page 161 R The maximum recording time is 15 minutes R If the camera s SD card is full erase unneeded recordings see Erasing HD camera recordings Page 158 R For information about SD cards and how recordings are saved see HD camera SD cards Page 158 Viewing the HD camera recording list You can use the recording list to p...

Page 157: ...sing HD camera recordings Page 158 Delete Selected Contents Allows you to erase individual recordings See Erasing HD camera recordings Page 158 Playing back HD camera recordings 1 View live images from the desired camera 2 Tap Videos R A list of recording dates is displayed 3 Select a recording date 4 Tap the desired recording R The recording is played back Playback controls The following controls...

Page 158: ... 9 hours 16 GB card 18 hours 32 GB card 36 hours 64 GB card 72 hours 128 GB card 145 hours Note R The times listed here are calculated theoretically Actual recording time may vary R The times listed here apply during the following conditions Camera Resolution is set to HD 1280x720 Image resolution Page 166 Frame Rate is set to 25 fps Frame rate Page 166 R The file system and other information is s...

Page 159: ...tions on your mobile device using your mobile device s notifications features Status notifications Page 159 Lighting the camera s LED indicator HD camera LED indicator Page 160 Sounding an alert tone using your mobile device when a sensor feature is triggered Status notifications The camera uses status notifications to give you feedback about how it is functioning Details vary depending on the app...

Page 160: ... was triggered HD camera temperature sensor was triggered Smart recording scenario error or HD camera is malfunctioning HD camera LED indicator You can use the camera s LED indicator to confirm the camera s status Meaning of symbols used in this section Indicator off Indicator lit Indicator blinking slowly Indicator blinking Indicator blinking quickly HD camera LED indicator Off No power or LED in...

Page 161: ...igure smart recording settings by creating scenarios Each scenario answers the following two questions 1 What is the trigger that will make the camera start recording A schedule A sensor 2 How long should the camera record images Maximum 15 minutes Sensors that can be used to trigger smart recording scenarios Built in motion sensor in HD camera Built in sound sensor in HD camera Built in temperatu...

Page 162: ...h item Recording Duration Determines the length of the recording The maximum setting is 15 minutes 7 Under Trigger Period set each item All Day Enables the scenario for all day i e images will be recorded whenever the sensor is triggered Start Time Determines the start time of the scenario If the sensor is triggered before this time images will not be recorded End Time Determines the end time of t...

Page 163: ...K HD camera sensor features HD camera sensor features overview The camera provides three sensor features Built in motion sensor Detects visual differences in the camera image over time Built in sound sensor Detects ambient sound Built in temperature sensor Detects ambient temperature When these sensors are triggered the camera can send a notification or record images When you receive a notificatio...

Page 164: ...temperature is displayed and specified in Fahrenheit or Celsius 6 Tap the upper threshold of the acceptable temperature range select the desired temperature and then tap OK 7 Repeat the previous step for the lower threshold of the acceptable temperature range Note R In order to receive temperature alert notifications make sure the Temperature Alert notification setting is enabled See Notification ...

Page 165: ...lect the desired setting High The image sensor is very sensitive to changes i e even a small change will trigger the sensor Normal The image sensor is moderately sensitive to changes Low The image sensor is somewhat sensitive to changes Very Low The image sensor is only slightly sensitive to changes i e a large change is required to trigger the sensor OFF The image sensor is disabled 5 Tap OK Dete...

Page 166: ...gs 4 Tap Camera Resolution 5 Select the desired setting and then tap OK Frame rate You can adjust the speed at which images from the camera are refreshed 1 View live images from the desired camera 2 Open the options menu see Displaying the options menu Page 151 3 Tap Settings Video Settings 4 Tap Frame Rate 5 Select the desired setting and then tap OK Note R Higher frame rates mean images are refr...

Page 167: ...le in certain regions You can select whether audio is recorded when recording camera images 1 View live images from the desired camera 2 Open the options menu see Displaying the options menu Page 151 3 Tap Settings Video Settings 4 Slide the Recording with Sound switch to the desired position R When this switch is turned off audio is not recorded when recording camera images Night vision mode If t...

Page 168: ...tion of the time stamp that is displayed when viewing camera images or recording You can also turn the time stamp off 1 View live images from the desired camera 2 Open the options menu see Displaying the options menu Page 151 3 Tap Settings Video Settings Other Settings 4 Tap Time Stamp 5 Select the desired setting and then tap OK Position Determines the position of the time stamp To turn the time...

Page 169: ...er Settings 4 Slide the WDR and HLS switches to the desired position R WDR brightens the darker areas of the image and provides increased contrast and picture detail R HLS reduces the brightness in areas of the image that are too bright HD camera settings General settings You can customize general camera settings to suit your needs 1 View live images from the desired camera 2 Open the options menu...

Page 170: ...amera s privacy shutter is opened or closed Device Error This setting determines whether a notification is displayed when a device error is detected Wireless Settings See Network features Page 171 Wireless Access Point See Deleting wireless access points Page 172 Reset HD Camera See Resetting the HD camera s settings Page 173 Login password You can change the password that is used to connect to th...

Page 171: ...bile device and then tap OK Network features Confirming network information 1 View live images from the desired camera 2 Open the options menu see Displaying the options menu Page 151 3 Tap Settings Wireless Settings 4 Tap Current Status Changing IP settings Typically these settings should not be changed 1 View live images from the desired camera 2 Open the options menu see Displaying the options ...

Page 172: ...red camera 2 Open the options menu see Displaying the options menu Page 151 3 Tap Settings Wireless Settings 4 Tap MTU Settings 5 Select the desired value and then tap OK Deleting wireless access points The app remembers the SSIDs of wireless routers that you use at home to connect to the camera it can remember 10 SSIDs and saves them in the wireless access point list If the list is full and you t...

Page 173: ... the camera again by following the initial setup procedure see Setting up the HD camera Page 149 If you selected Reset All Settings or Reset Wireless Settings Wait for the camera s LED indicator to light in green then set up the camera again by following the initial setup procedure see Setting up the HD camera Page 149 Using the camera s reset button You can use the camera s reset button to reset ...

Page 174: ...ap Deregistration Indoor HD Camera 3 Select the device that you want to deregister R A dialog is displayed asking whether you want to deregister the device 4 Tap OK Note R If the app cannot connect to the selected camera you will be prompted to try again later Try Later or continue with deregistration Forget Camera If you select Forget Camera the camera will be removed from your app s list of avai...

Page 175: ...s procedure to deregister the mobile device you are using to perform the procedure and if there are no other cameras or access points that the app can connect to the initial setup screen is displayed 175 Using an HD camera ...

Page 176: ...ork devices Use these steps to make sure that each of your network devices and your Internet connection are working properly 1 Make sure all cables connected between your wireless router and any other network devices are functioning and connected properly 2 Make sure that devices connected to your wireless router can connect to the Internet Refer to the operating instructions included with your wi...

Page 177: ...e at home Check your mobile device s wireless network settings and confirm that it is connected to your wireless router Next use the HomeHawk app to connect to the access point and confirm that or are not displayed in the live camera image screen Viewing the live camera image screen Page 125 camera image recording list screen Viewing the camera image recording list screen Page 123 or playback scre...

Page 178: ...ndroid devices Recording Error No SD Card is displayed R There is no SD card inserted in the access point shelf camera or floor camera Insert a memory card in the device Recording Error Memory full is displayed R There is no space in the SD card Shelf cameras floor cameras and window cameras Insert a new SD memory card into the camera or enable overwrite recording Recording settings Page 110 Acces...

Page 179: ...ID information Delete the SSID information in Home Wireless Network SSID shelf cameras floor cameras window cameras Home wireless network SSID features Page 117 HD cameras Deleting wireless access points Page 172 Deregister the shelf camera floor camera or window camera from your mobile device Deregistering devices Page 41 and then register it again Registering devices Page 33 Deregister the HD ca...

Page 180: ...a is using for wireless communication reset the HD camera s wireless settings Using the camera s reset button Page 173 and then set up the camera again I forgot the login password for the shelf camera floor camera or window camera Connect to the shelf camera floor camera or window camera while at home and change the password The password is not required when your mobile device is connected to the ...

Page 181: ...is not a malfunction R Too many notifications were sent in a short amount of time If many notifications are sent in a short time notifications may be received late This is a characteristic your mobile device s notifications service Shelf camera features General issues Refer to the following after checking the general troubleshooting information described in General information Page 176 The camera ...

Page 182: ...cing feature is enabled R Your mobile device may have failed to communicate with your camera The mode may not switch automatically in the following situations your mobile device and or your camera do not have good network conditions your mobile device s battery does not have adequate charge remaining to use the Automatic Mode Switching feature Start the HomeHawk app on your mobile device The camer...

Page 183: ...less router which the camera is connected with Reconnect your mobile device to the router whose WPS button was pressed restart the HomeHawk app and then follow the on screen instructions If you want to connect your camera to the wireless router which the mobile device is connected with Press and hold the RESET button until you hear a beep about 10 seconds using an object with a thin tip Resetting ...

Page 184: ...to another network Connect your mobile device to the same wireless network that was used to set up the camera and try to add the mobile device again R A network clash has occurred because you have 2 wireless routers at home that are using the same channel or channels of a close frequency Unplug all the wireless routers and plug them in again If the situation still does not improve refer to your wi...

Page 185: ... There is a long delay when talking to the camera while away from home R Your mobile device s network connection is slow or congested Wait for network traffic to decrease Lower the Frame Rate setting Changing the frame rate Page 112 Images are poor at night when the camera is installed in front of a window R Night vision mode is causing images to have poor quality Turn off night vision mode Using ...

Page 186: ...ted is displayed R The camera is used in an environment with a temperature that exceeds 40 C 104 F Features such as viewing images and recording images will not be available if the temperature exceeds 45 C 113 F Use the camera in an environment with temperatures below 40 C 104 F The light will not turn on or Ambient temperature is too high the lighting will be turned off is displayed R The tempera...

Page 187: ...e WPS button was pressed restart the HomeHawk app and then follow the on screen instructions If you want to connect your camera to the wireless router which the mobile device is connected with Press and hold the RESET button until you hear a beep about 10 seconds using an object with a thin tip Resetting camera settings Page 114 and restart the HomeHawk app Then press the WPS button on the router ...

Page 188: ...t was used to set up the camera and try to add the mobile device again R A network clash has occurred because you have 2 wireless routers at home that are using the same channel or channels of a close frequency Unplug all the wireless routers and plug them in again If the situation still does not improve refer to your wireless router s manual for information on how to change the router channel of ...

Page 189: ... Lower the Frame Rate setting Changing the frame rate Page 112 I have to wait a long time before camera images are displayed while away from home R There is too much traffic on your home network or on the mobile device s network Wait for network traffic to decrease Camera images are not displayed and Loading is displayed for a long period when I try to view camera images while away from home R The...

Page 190: ... Register the MAC address of the camera to the address filter setting of the wireless router Refer to your wireless router s manual The camera s LED indicator is lit in blue R The WPS button was pressed on another router which is different from the router your mobile device is connected with Perform one of the following If you want to connect your mobile device to the wireless router which the cam...

Page 191: ...quency Unplug all the wireless routers and plug them in again If the situation still does not improve refer to your wireless router s manual for information on how to change the router channel of your wireless network R The Isolation function on the wireless router is enabled Sometimes when the Isolation function is enabled the camera will not be able to communicate with your mobile device via you...

Page 192: ...s slow or congested Wait for network traffic to decrease Lower the Frame Rate setting Changing the frame rate Page 138 Images are poor at night when the camera is installed in front of a window R Night vision mode is causing images to have poor quality Turn off night vision mode Using night vision Page 137 LEDs light at night R Night vision mode is enabled and automatically turns on LEDs at night ...

Page 193: ...amera image Areas where birds or flying insects move in front of the camera Areas where rain snow hail or tree leaves fall in front of the camera You can prevent these false detections by adjusting the position of the camera or lowering the sensitivity of sensors Motion sensitivity Page 139 Ambient temperature is too high or too low camera operation will be interrupted is displayed R The camera is...

Page 194: ...ot displayed or not displayed smoothly on Amazon Echo Show R The bit rate setting is too high Lower the bit rate setting shelf cameras floor cameras Bit rate settings for Amazon Echo Show and Google Home Page 114 front door cameras outdoor cameras Bit rate settings for Amazon Echo Show and Google Home Page 143 Google Home features Refer to the following after checking the general troubleshooting i...

Page 195: ...anty excludes both parts and labor for non rechargeable batteries antennas and cosmetic parts cabinet This warranty only applies to products purchased and serviced in the United States This warranty is extended only to the original purchaser of a new product which was not sold as is Home Network System Products microSD card Included model only 90 days N A When shipping the unit carefully pack incl...

Page 196: ... Center or other Authorized Servicer or damage that is attributable to acts of God THERE ARE NO EXPRESS WARRANTIES EXCEPT AS LISTED UNDER LIMITED WARRANTY COVERAGE THE WARRANTOR IS NOT LIABLE FOR INCIDENTAL OR CONSEQUENTIAL DAMAGES RESULTING FROM THE USE OF THIS PRODUCT OR ARISING OUT OF ANY BREACH OF THIS WARRANTY ALL EXPRESS AND IMPLIED WARRANTIES INCLUDING THE WARRANTY OF MERCHANTABILITY ARE LI...

Page 197: ...tooth word mark and logos are registered trademarks owned by Bluetooth SIG Inc and any use of such marks by Panasonic Corporation is under license R Firefox is a trademark of the Mozilla Foundation in the US and other countries R microSDHC and microSDXC Logos are trademarks of SD 3C LLC R Microsoft Windows and Internet Explorer are either registered trademarks or trademarks of Microsoft Corporatio...

Page 198: ...198 Notes ...

Page 199: ...199 Notes ...

Page 200: ...PNQP1406QA eng CC1803YK9100 ...

Reviews: