


379
JAN 2006
Ver. 5.2
DP-3510/3520/3530/4510/4520/4530/6010/6020/6030
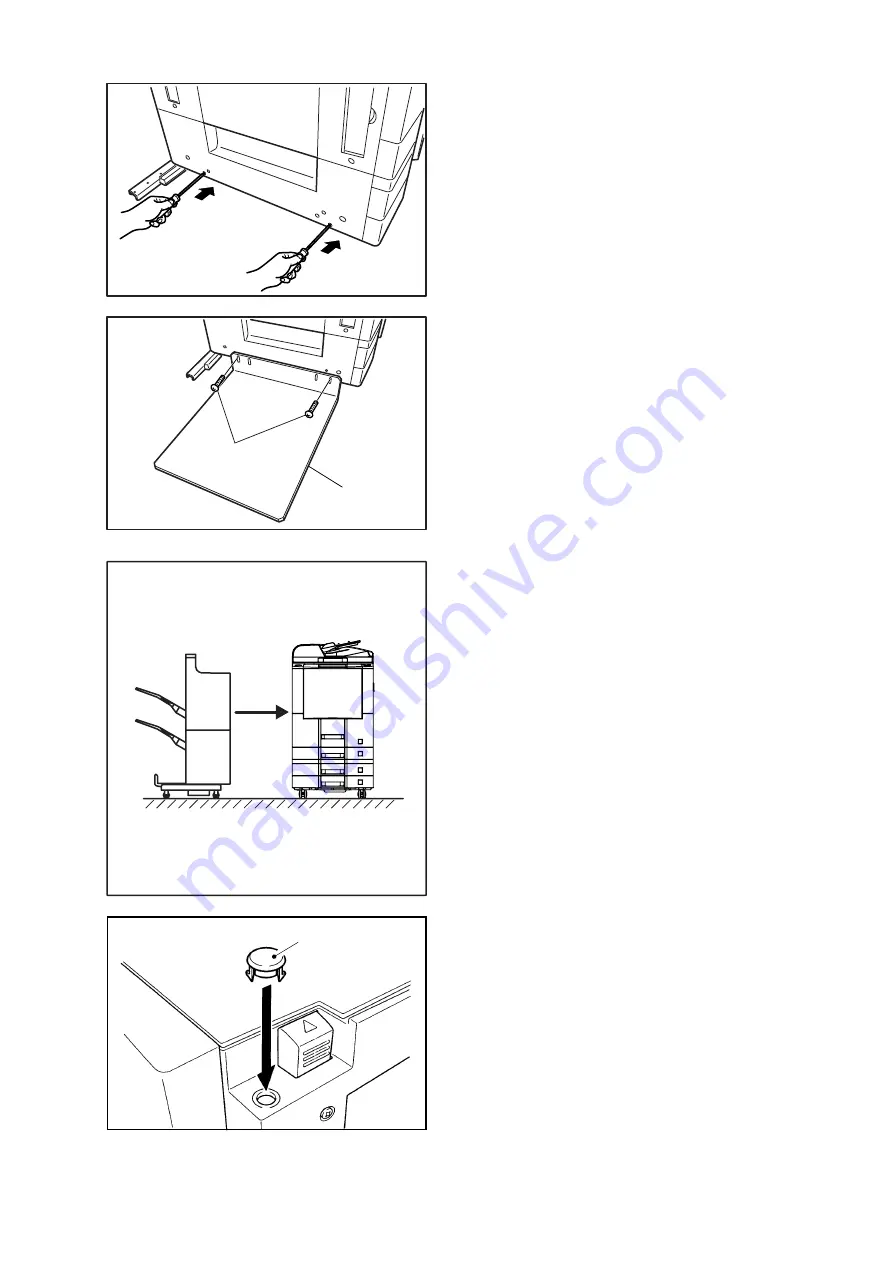
(24) Break off the bottom 2 Protective Tabs.
(25) Install the Base Plate.
(26) Secure the Base Plate with 2 Screws (M4 x 25).
7. Connecting to the Host Machine
(1) Bring the Finisher closer to its Host Machine so
that the Pickup Assembly of the Finisher and the
Delivery Assembly of the Host Machine match in
height; then, connect the two with care.
If the connection is correct, the Guide Pin of the
Latch Plate will fit, and there will be no gap
between the two. If there is a gap either at the
front or the rear, adjust the height position of the
Finisher.
Caution:
Be sure to install both Finisher and the Host
Machine on a flat floor surface. A difference in
height can lead to faulty movement of paper.
(2) As illustrated, install the Face Plate Button in the
round hole of the Right Guide Assembly of the
Finisher. However, do NOT install it if you are
also installing the Punch Unit.
(25)
(26)
Face Plate Button
Summary of Contents for DP-3530
Page 4: ...4 Beispiel DP 6530 4530 6030 Hinweis ...
Page 424: ...424 JAN 2006 Ver 5 2 DP 3510 3520 3530 4510 4520 4530 6010 6020 6030 ...
Page 425: ...425 JAN 2006 Ver 5 2 DP 3510 3520 3530 4510 4520 4530 6010 6020 6030 ...
Page 474: ...474 JAN 2006 Ver 5 2 DP 3510 3520 3530 4510 4520 4530 6010 6020 6030 memo ...
Page 842: ...memo ...
Page 858: ...DZZSM00298 ...


