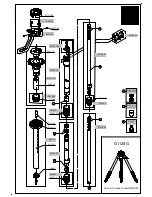
ELE-14
3-3. Adjustment when CAMERA Ass’y is exchanged
1. Start up the Camera Adjustment software by double-clicking
“Camera Adjustment Software.exe”
. The
Camera Adjustment
screen is displayed.
2. The
“Execute”
button is clicked on the
Camera Adjustment
screen.
Video/Frequency Adj.
screen is
displayed.
3. Click
“Exit”
button on the
Video/Frequency Adj.
screen.
4. The
message
“Adjustment Starts. Shoot White Chart.”
is displayed on the
Camera Adjustment
screen.
5. Please perform the adjustment according to the content of item
“2-4. Auto adjustment”
and
“2-5. ND FILTER
compensation”
.
3-4. Adjustment when Head Optical Ass’y and CCD FLEX board are
exchanged
The adjustment procedure is same as the camera ass’y exchange.
4. Notes of adjustment
When the adjustment fails during the auto adjustment, the
“Execute”
button becomes effective. Clicking
“Execute”
button on the
Camera Adjustment
screen,
Video/Frequency Adj.
screen is displayed.
In this case, because the adjustment shown in item 2-3 is completed, the
“Exit”
button is clicked on the
Video/Frequency Adj.
screen. Clicking
“Execute”
button again on the
Camera Adjustment
screen to start the
auto adjustment.
“Execute”
button is becomes effective.
Click
“Execute”
button.
Indicates as NG
Click
“Exit”
button,
Clicking
“Execute”
button on the
Camera Adjustment
screen to start the auto adjustment.
Summary of Contents for AG-HPX500
Page 3: ... 3 ...
Page 4: ... 4 ...
Page 6: ... 6 Read this first ...
Page 7: ... 7 ...
Page 8: ...MHNK250 0123456S7P ...
Page 117: ...MPL 17 LCD PARTS ASSEMBLY 101 101 101 1 6 7 8 9 E12 101 2 3 4 5 ...
Page 153: ...Panasonic Broadcast AG HPX500 Menu Information ...
Page 185: ...MPL 17 LCD PARTS ASSEMBLY 101 101 101 1 6 7 8 9 E12 101 2 3 4 5 ...