


15
4.
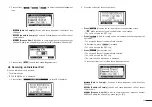
Repeat step 3 to enter all 10 digits.
5.
After 10 digits have been entered, press softkey [
] to set the ID.
6. Enter ATIS ID again to confirm.
7.
Repeat step 3 to 5 as above.
•
Once setup is complete the radio can now perform normal operation.
NOTE:
In the menu item “Radio Info”, you can query the set ATIS ID.
■
■
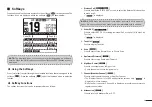
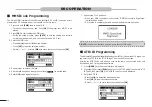
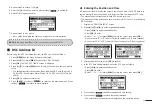
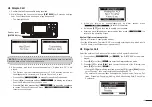
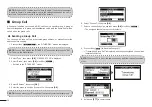
DSC Address ID
Before using the DSC call related function, the DSC can be set as follows:
1.
Press
[MENU]
key, the menu interface is displayed.
2. Press [▲]/[▼] or rotate
[DIAL]
knob to select “DSC Settings”.
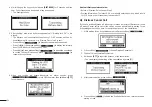
3.
Press
[OK]
, the “DSC SETTINGS” screen is displayed.
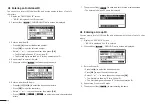
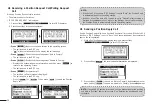
4. Press [▲]/[▼] or rotate
[DIAL]
knob to select the submenu item you want to
set up.
•
The setting items includes Position Input, Individual ID, Gourp ID, Auto ACK,
CH Auto SW, Data Output, Alarm Status, CH 70 SQL Level, Self-Test, Mul-
ti-Task.
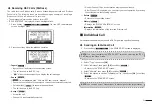
5.
Press
[OK]
to enter next level menu.
6.
Press
[BACK]
or softkey [
] to return to the previous menu. Press
softkey [
] to return to main interface.
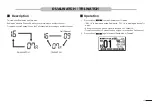
■
◆
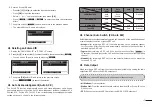
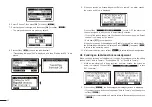
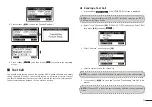
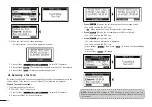
Entering the Position and Time
A Distress call should include the vessel’s position and time. If no GPS data is re-
ceived, manually input the position and Universal Time Coordinated (UTC) time.
•
The manual entry is disabled while valid GPS data is received.
•
The manually entered position and time is valid only for 23.5 hours, or until turning
OFF the radio.
1.
Display the “POSITION INPUT” screen.
2. Press [▲]/[▼]/[◄]/[►] to enter longitude and latitude.
• Press [◄]/[►] to select desired number.
•
Press
[OK]
to enter.
• Select ”←” or “→”, or rotate
[DIAL]
to move the cursor, then press
[OK]
.
•
Move cursor to “N” or “S” to select N (North Latitude) or S (South Latitude).
•
Move cursor to “W” or “E” to select W (West Longitude) or E (East Longitude).
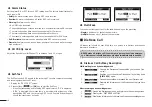
3.
After position is entered, press
[OK]
to confirm.
4.
In the UTC time editing interface, enter the UTC time as follows.
• Press [◄]/[►] to select desired number.
•
Press
[OK]
to enter.
• Select ”←” or “→”, or rotate
[DIAL]
to move the cursor, then press
[OK]
.
5.
Press softkey [
] to confirm position and time setting.
6.
Press softkey [
] to return to standby interface.
•
The entered position and time are displayed on the operating screen.
Summary of Contents for MX1100G
Page 48: ...Ref 12102020...
Page 49: ......