


12
SCAN OPERATION
■
■
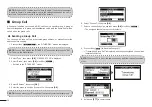
Scan Types
This radio has normal scan and priority scan, this can be set in the menu item under
“Radio Settings”.
When the weather alert function is turned ON, the previously selected (last used)
weather channel is also scanned.
Set the TAG channels (scanned channels) before scanning.
Clear the TAG channels which you would like to scanning.
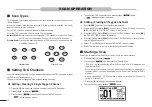
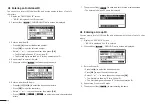
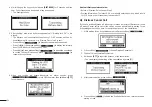
Normal Scan:
Normal scan searches through all TAG channels in sequence. Chan-
nel 16 is not checked unless Channel 16 is set as a TAG channel.
Priority Scan:
Priority scan searches through all TAG channels in sequence while
monitoring Channel 16.
Priority Scan
Normal Scan
).
).
).
).
).
).
).
).
).
).
).
).
).
■
■
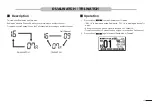
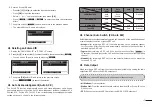
Setting TAG Channels
For more efficient scanning, you can add desired channels as TAG channels or clear
the TAG for unwanted channels.
Channels that are not tagged will be skipped during scanning.
■
◆
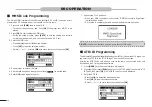
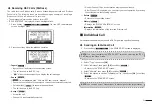
Setting / Clearing a Single Tagged Channel
1. Press [▲]/[▼] to select the channel you want to set as TAG channel.
2. Press [◄]/[►] to display [
].
3.
Press softkey [
] to set current channel as TAG channel.
•
“
” is displayed on screen.
4.
To cancel the TAG channel setting, press softkey [
] again.
•
“
” disappears from the screen.
■
◆
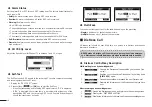
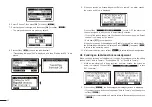
Setting / Clearing All Tagged Channels
1.
Press
[MENU]
key, the menu interface is displayed.
2. Press [▲]/[▼] or rotate
[DIAL]
knob to select “Radio Settings”, then press
[OK]
, the “RADIO SETTINGS” screen is displayed.
3. Press [▲]/[▼] or rotate
[DIAL]
knob to select “FAV Settings”, then press
[OK]
,
the “FAV SETTINGS” screen is displayed.
4. Press [▲]/[▼] or rotate
[DIAL]
knob to select “Set All Channels” to set all chan-
nels as Tagged Channels.
5.
Select “Clear All Channels” to cancel all the TAG channel setting.
6.
Select “Set Default” to restore to factory default channel setting.
■
■
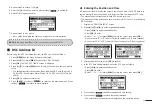
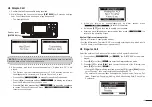
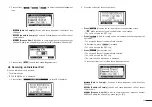
Starting a Scan
Scan Type, Weather Alert, Scan Timer can be set in the menu interface.
1. Press [◄]/[►] to display [
].
2.
Press softkey [
] to start Normal or Priority Scan.
•
“SCAN 16” is displayed during a Priority Scan, and “SCAN” is displayed dur-
ing a Normal Scan.
•
When a signal is received, the scan pauses until the signal disappears, or
resumes after 5 seconds, depending on the Scan Timer setting in “Radio
Settings”.
•
A beep sounds and “16” blinks when a signal is received on Channel 16
during a Priority Scan.
• Press [▲]/[▼] to change the scanning direction.
3.
To stop the scan, press softkey [
] again.
Summary of Contents for MX1100G
Page 48: ...Ref 12102020...
Page 49: ......


