background image

26

ENG

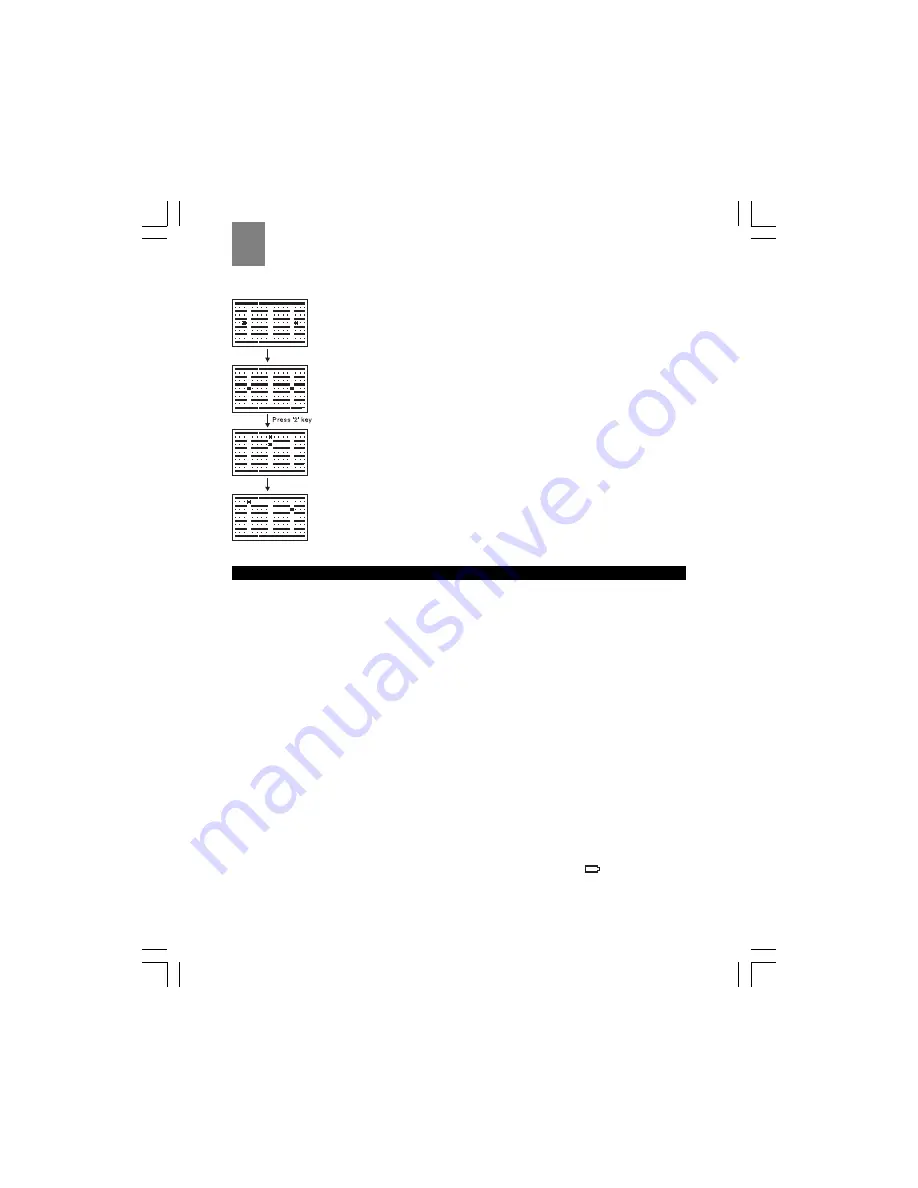
Car game description

When the game starts, your car is moving to the left; the computer-driven car is
moving to the right.

When you reach the gap, press the appropriate key to move to another row and
avoid crashing into the computer car.

Press the keys to move between the rows as you try to clear all the dots. The
computer car will try to crash into you as you proceed. Press 6 if you need to
break.

Continue playing until you clear all the dots.

 TROUBLESHOOTING  GUIDE

This section includes a list of frequently asked questions for problems you may encounter with your
ThermoDECT telephone. If your telephone is not operating as you think it should, check here before
arranging for servicing.

Problems turning on the telephone

“I cannot hear a dial tone or get the LCD display to work.”

Check to make sure the telephone is properly set up:

• Is the base unit plugged into the telephone line and AC power source? See page 6 for instructions.

• Is the AC power source turned on at the socket?

• Are the batteries properly installed in the handset? See page 6 for instructions.

If the problem persists, please contact our help line following the instructions on our website (www.
oregonscientific.com). Never attempt to repair or adjust the telephone yourself. This can cause damage
to the unit, electrical shock, and may invalidate your warranty.

Problems making and answering calls

“I cannot make or answer calls.”

• Try moving the handset closer to the base unit.

• If this doesn’t work, try a different position for the base unit following the instructions on page 6.

Typically, the higher you place the base unit, the better the reception.

• The battery charge level may be low. The battery life shortens when you use the Speakerphone

(handsfree) mode. Check the LCD display for the low battery warning signal 

. If the battery is

low, place the handset in the charging cradle of base unit until the battery signal appears full.

• Check the power connection by switching off the power at the main socket, waiting a few

seconds, then switching it back on.

Summary of Contents for ThermoDECT TD 339

Page 1: ...U s e r M a n u a l C o r d l e s s T e l e p h o n e T D 3 3 8 ThermoDECT English Cover...

Page 2: ...lephone call 8 Using the handset speakerphone 8 Muting the microphone 8 Paging the handset from the base unit 8 Displaying caller ID information 8 Deleting call ID information 9 Using the telephone bo...

Page 3: ...e call 20 Using the call waiting feature 20 Transferring calls between handsets 20 Monitoring the indoor temperature 21 Changing from Celsius to Fahrenheit 21 Setting and using the handset clock 21 Se...

Page 4: ...ife 10 hour rechargeable batteries for those conversations that go on and on Read on to learn how to set up and use your new ThermoDECT telephone system KEY FEATURES The handset 1 Clear Phonebook Mute...

Page 5: ...bserve the following safety precautions when setting up and using your ThermoDECT telephone Do not use your ThermoDECT phone in or near water Using your telephone with wet hands while standing in wate...

Page 6: ...the base unit as shown in the diagram to the right 2 Plug the other end of the telephone cord into the telephone wall socket 3 Plug the small end of the AC power cord into the power socket located at...

Page 7: ...he handset display area This is normal and means that the handset needs to synchronize with the base unit before you can use it Hold the handset near the base unit for a few seconds until the handset...

Page 8: ...o adjust the speaker volume press first and then or Muting the microphone You can temporarily mute the microphone on your handset to prevent a caller from hearing a side conversation To activate or de...

Page 9: ...E BOOK Your ThermoDECT telephone can store up to 50 names and telephone numbers Names are limited to 8 characters and numbers are limited to 20 digits Programming the telephone book To store an entry...

Page 10: ...elephone book Changing an entry in the telephone book To change an entry in the telephone book 1 Press the button 2 Press to select Phonebook 3 Press to select Edit Entry 4 Press 5 Press or to select...

Page 11: ...the handset ring volume level To change the volume level while the handset is ringing press the or arrows To change the volume level while the handset is in standby mode 1 Press the button 2 Press to...

Page 12: ...f the batteries become low while you are talking on the telephone 9 Press to confirm your selection Tip To return to standby mode press and hold the button Turning the out of range warning signal off...

Page 13: ...ions 5 Press to select off or on 6 Press to confirm your selection Setting the handset display language ThedefaultlanguageforthehandsetdisplayisEnglish Tochangethelanguage 1 Press the button 2 Press t...

Page 14: ...he security PIN Personal Identification Number set to 0000 You can change this to any 1 8 digit PIN you choose The security PIN is used for resetting the system and identifying the telephone in a PABX...

Page 15: ...m check to see if the systems are complatible by registering a handset to both base units Managing multiple handset and base unit registrations A base unit can carry a maximum of 5 handsets on its net...

Page 16: ...egistered to it 2 Each handset keeps a record of which base unit s it has been registered to A handset can be cross registered to up to 4 base units 3 You may need to reset the registrations as you re...

Page 17: ...options 3 Press 4 Press to select Remove HS from the options 5 Press 6 Enter the security PIN for the handset The default PIN code is 0000 For more information about security PIN codes refer to page 1...

Page 18: ...page 9 as a guide Press the button to delete the current entry The maximum length for the name is 8 characters 7 Press to confirm your selection Note The handset number will display after the assigned...

Page 19: ...options 3 Press 4 Press to select Ring Priority from the options 5 Press 6 Press to set the ring priority to off on or Def Priority 7 Press 8 Optional if you selected Def Priority in Step 6 Press or...

Page 20: ...ximately 2 seconds until you see the word Conference flash on the display and hear a confirmation beep Result All three parties are connected into the call and can talk together Tip You can end a 3 wa...

Page 21: ...t date and time If you have multiple handsets you only need to set the time and date on one handset The alarm can be set for each handset separately Selecting 12 or 24 hour display To change the hands...

Page 22: ...he alarm off in Step 8 you are returned to the Setup menu and can exit by pressing the button If you turned the alarm on proceed to Steps 10 11 10 Press the keypad digits 0 9 to enter the hour and min...

Page 23: ...enever any key is pressed No other calls are allowed including emergency numbers unless you program the baby call feature to call an emergency number There are two steps to using the baby call feature...

Page 24: ...u placed in monitor mode Result A call is placed between your handset and the handset you placed in monitor mode This allows you to listen to the activities occurring near the second handset When you...

Page 25: ...turns right and is moving toward the egg Playing the car game The goal of the car game is to clear all the dots without getting hit by the other car To start the game 1 Press the button 2 Press to se...

Page 26: ...e See page 6 for instructions Is the AC power source turned on at the socket Are the batteries properly installed in the handset See page 6 for instructions If the problem persists please contact our...

Page 27: ...the base unit to achieve a greater transmission range Refer to page 6 for instructions I hear a tone while I am using my handset and the battery symbol on the display looks empty The battery needs to...

Page 28: ...xt to it You may have already registered 5 handsets to the base unit If so you will need to remove one or add another base unit before you can register the new handset If you are replacing a faulty ha...

Page 29: ...Your ThermoDECT telephone is dependent on AC power source for operation and may not work during power and telephone outages Certain types of rechargeable batteries such as Ni MH rechargeable batteries...

Page 30: ...30 ENG NOTES...

Page 31: ...31 ENG NOTES...

Reviews: