Section 4
– Functional Description
Page 30
09/11/2008 REV 0.99
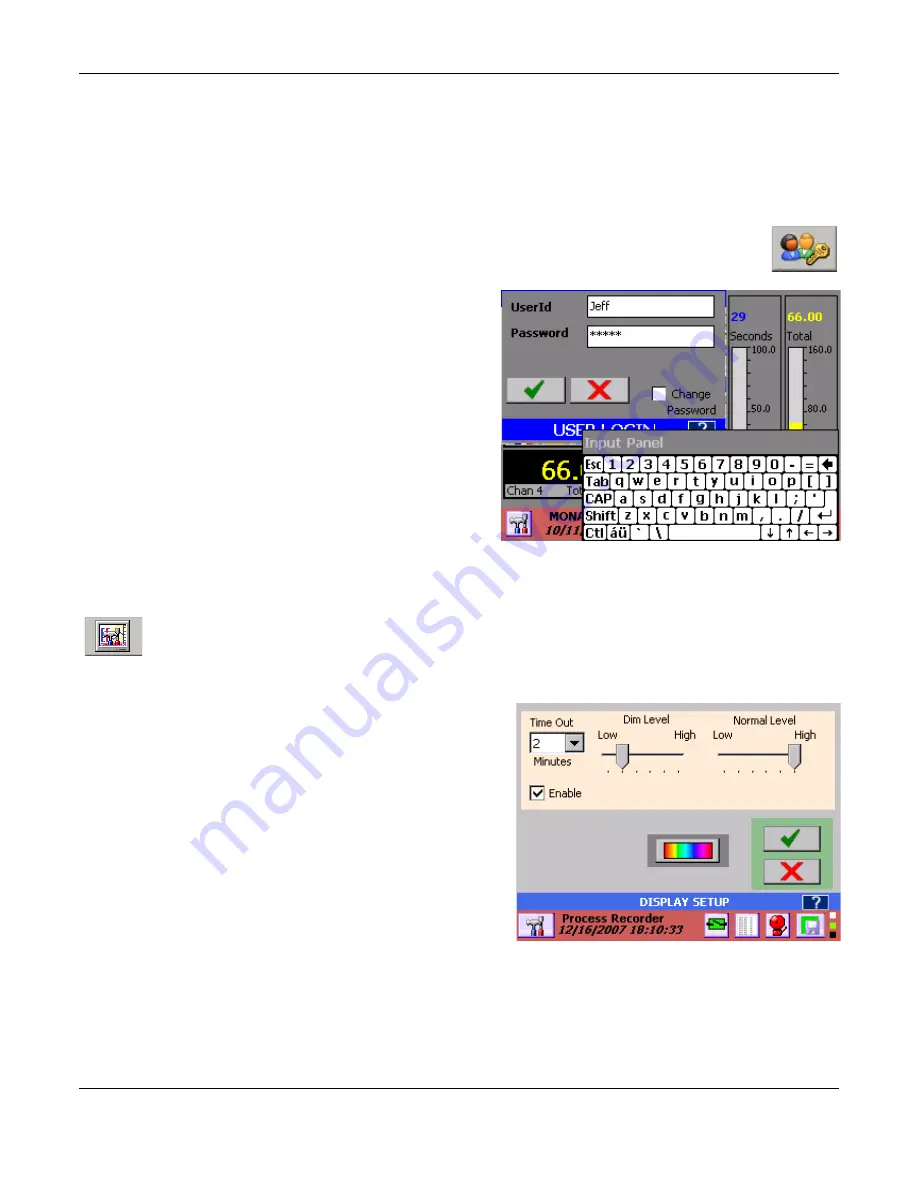
Figure 4-7 Log In
4.7
User Login
If password protection is
enabled
, the user will have to log in to be able to use many of the functions of the recorder.
There are various levels of protection and access to functions is based on user privileges. These levels are:
User:
Can operate the recorder but cannot change any settings or configuration.
Manager:
Can operate and configure the unit, but cannot change basic settings.
Administrator:
Can operate the unit, and change all configurations and settings.
If password protection is NOT enabled then all users have administrative privileges.
Log in
is done
via the
System Utility Menu
using the log in icon shown right. This will bring up the login dialog box
shown below right.
Note: If a user is not logged in and attempts to access a
protected function, this log in dialog box will pop up at each
instance. Logging in allows a user to navigate the unit
without having to deal with this at each attempt to do
anything. Once logged in a user remains logged in until they
log out or their log in time
expires
, however they will be
required to enter their password.
Enter the
User ID
and
Password
using the keyboard and
tap
OK
(Check mark)
.
Check the “Change Password” box if
you wish to change your password.
To
Log Out
tap the Log In icon and you will be asked if you
want to log out. Tap the
Yes
button.
Logging in or out is recorded in the
Activity Log
.
4.8
Display Utilities
The Display Utility menu allows the user to control the display brightness and background color. Enter
this dialog by tapping the icon shown left, in the
System Utility Menu
.
4.8.1
Display Brightness
The display brightness can be set at varying levels, either
continuously or can be set to dim after a preset time. Refer
to 3-11. There are two sliders
– Dim Level and Normal
Level.
The
Dim Level
is the level the display will dim to after the
Time Out, which is selected in the dropdown box to the left
of the Dim Level slider bar. It is shown as 2 minutes in
Figure 4-8. In order for the Dim Level Time Out to be active
you need to check the
Enable box
. To set the Dim Level
place the stylus on the slider bar and drag the pointer or
tap the slider bar. The display brightness will alter in real
time. Select the required level.
The
Normal Level
setting will be the default brightness of
the display. To change the brightness, place the stylus on
the slider bar and drag the pointer or tap the slider bar. The
display brightness will alter in real time. Select the required level.
After the preset period of inactivity, the display will dim to the Dim Level setting. Any screen touch activity will
restore the normal level of brightness.
Figure 4-8 Display Setup


