Op
er
at
ion
4
4.2
Control From the Front Panel
30
1
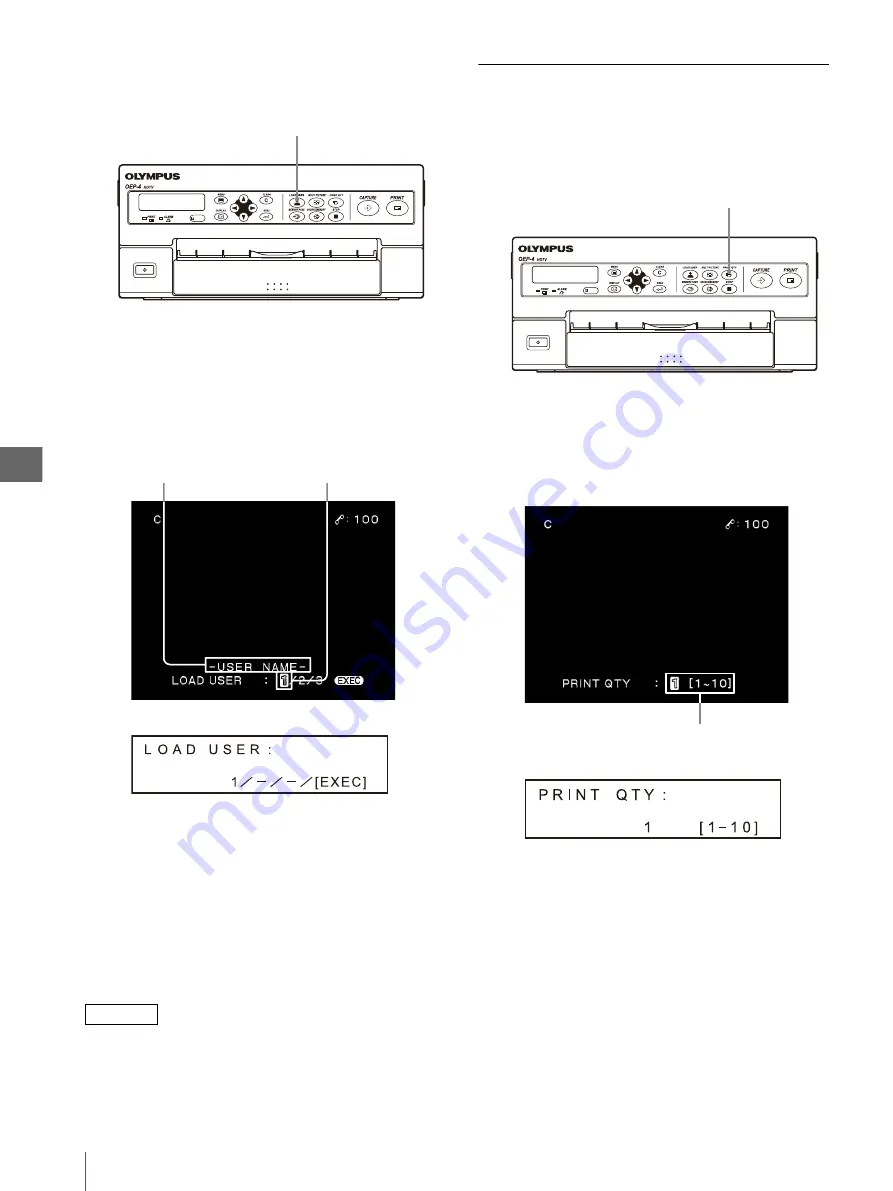
Press the LOAD USER button on the front panel
(see Figure 4.2).
Figure 4.2
The monitor and LCD panel display the current
setup for a few seconds. On the monitor, the user
number currently selected is displayed in green (see
Figure 4.3).
Figure 4.3
2
While the monitor or LCD panel is as shown in
Figure 4.3, press the LOAD USER button, “
b
” or
“
B
” until the desired user number is displayed.
Each press of the LOAD USER button or “
B
”
changes the user number by one as “1” “2” “3”
“1” ….
Each press of “
b
” changes the user number by one
as “1” “3” “2” “1” ….
NOTE
The user setup can also be selected in the menu. The
setup made using the above procedure is also applied to
the setup using the menu. For details on menus, see
“Setting “LOAD USER”” on page 48.
Setting the Print Quantity
The number of printing the same picture can be set up.
1
Press the PRINT QTY button on the front panel
(see Figure 4.4).
Figure 4.4
The monitor and LCD panel display the current
setup for a few seconds (see Figure 4.5).
Figure 4.5
2
While the monitor or LCD panel is as shown in
Figure 4.5, press the PRINT QTY button, “
b
” or
“
B
” until the desired print quantity is displayed.
Each press of the PRINT QTY button or “
B
”
increments the print quantity by one as “1” “2” “3”
... “9” “10” “1” …. The print quantity after “10”
is “1.”
Each press of “
b
” decrements the print quantity by
one as “1” “10” “9” ... “2” “1” “10” …. The print
quantity after “1” is “10.”
LOAD USER button
Monitor
User Number
User Name
LCD panel
PRINT QTY button
Monitor
Print quantity display
LCD panel
Summary of Contents for oep-4
Page 2: ...2 ...
Page 76: ...Index 76 Appendix ...
Page 77: ...Index 77 Appendix ...
Page 78: ...Index 78 Appendix ...


