background image

|

User’s Guide:  English

173

Customizing Features and Operations

Identifying Current Settings

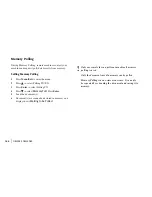
The Configuration Report is a list of current settings.

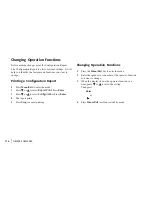
Printing a Configuration Report

1

Press Menu/Exit to enter the menu.

2

Press 

 or 

 to select 

Report Print.

 Press Enter.

3

Press 

 or 

 to select 

Configuration.

 Press Enter.

4

The report prints.

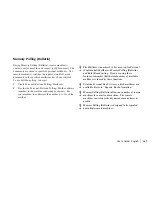
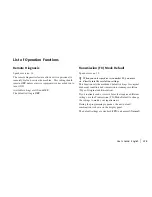
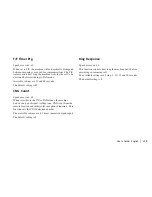
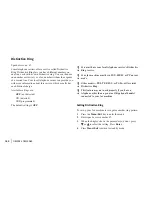
Many of your fax machine’s features and settings can be
changed to suit your needs.  This section lists the functions
you can change to customize machine operations.

!

When you press the Help button, a Help List and
Function List print.  These lists are very helpful when
you are moving through the multi-level structure of the
menu.

Summary of Contents for OKIFAX 5780

Page 1: ...5780_5980 tif User s Guide P N 59336802...

Page 2: ...g and Publications Department Contact Information Please address any comments on this publication to Web Site Please visit Oki Data s multilingual web site at http www okidata com e Mail Address pubs...

Page 3: ...ond Panel 37 Signal Tones 38 Installation 39 Safety 40 Installation Hints 40 Operation and Maintenance 41 Toner Cartridge and Image Drum Handling 41 Emergency First Aid 42 Getting Started 42 Where to...

Page 4: ...ceive Mode TEL 65 Telephone Fax Mode T F 65 Telephone Answering Device Mode TAD 66 Memory Reception Mode MEM 66 Forwarding Mode FWD 67 PC Fax Mode PC 67 Dial and Incoming Call Parameter Settings 68 Se...

Page 5: ...ution 94 Sending a Fax 95 Using a One Touch Speed Dial Key 96 Using 2 or 3 digit Speed Dial 96 Using the Search Function 97 Using the Numeric Keypad 97 Using An External Telephone 97 Rejecting Unsolic...

Page 6: ...roup Name 122 Group Directory Report 122 Using Speed Dial Search 123 Broadcasting 124 What is a Broadcast Fax 124 Sending a Broadcast Fax 125 Deleting a Location from a Broadcast Fax 126 Advanced Oper...

Page 7: ...56 Program the Destination Numbers 157 Create the Destination Group s 157 Create the Relay Broadcast Mailbox includes Relay Password 158 Relay Entry Report 159 Status of Relay Broadcast Report 160 Pri...

Page 8: ...187 Printing the Activity Report 187 Active Memory Files Report 188 Printing the Active Memory Files Report 188 Broadcast Confirmation Report 189 Printing the Broadcast Confirmation Report 189 Teleph...

Page 9: ...ng Page 214 Clearing a Document Jam 215 Clearing a Printing Paper Jam 216 Display Panel Messages 219 Normal Display in Standby Mode 219 Error Messages 219 Counters 222 Accessing the Print Scan Counter...

Page 10: ...you can t dial out 231 Problem 17 You want to answer an external telephone but your machine always answers first 231 Problem 18 Your received faxes sometimes look distorted 232 Problem 19 You are con...

Page 11: ...e features and capabilities directly connected to saving money and time Details for these features and capabilities are provided in other sections of this document You may want to use some of our Help...

Page 12: ...The Help List is a guide for using key features of the machine It provides step by step instructions for using the control panel to access or program various machine settings and features The Function...

Page 13: ...tion 5 Copying 6 Delayed Faxing 7 Function Settings 8 Report Printing 9 Message Confirmation Report Function List The Function List is a report of the product s menu programming structure Use it as a...

Page 14: ...ou to send documents at a specified time and date You do not have to manually start the transmission For more information refer to Advanced Operations Delayed Fax Transmissions Relay Faxing This featu...

Page 15: ...more information see Customizing Features and Operations Changing Operation Functions Department Code Be sure to record all passwords Department Codes Keep the record in a safe place If you forget a...

Page 16: ...s and time required when using these numbers For more information refer to Programming Speed Dial Numbers Dual Access Your machine can multi task You can load and prepare a document for sending while...

Page 17: ...Number Communications Speed and Echo Protection State 6 You may enter all of the requested information or press Menu Exit to return to sending your fax 7 Either wait or press Start Wait and the trans...

Page 18: ...ord any addresses and passwords you program Keep the record in a safe place If you forget a password you will need to contact a Service Dealer for assistance Some of the features that use addresses an...

Page 19: ...tout of the menu structure It IS NOT a report of current menu settings See Help and Helpful Hints 2 Configuration Report The Configuration Report is a list of the current operational settings of your...

Page 20: ...b Site You may reach the Oki Data Web Site at www okidata com Thank you for purchasing this fax machine This desktop plain paper facsimile machine utilizes advanced light emitting diode LED technology...

Page 21: ...n information etc Automatic Document Feeder ADF Capacity of up to 50 sheets of recommended letter A4 paper Speed Dial Speed Dial numbers are pre programmed telephone numbers There are two types of spe...

Page 22: ...ncludes delayed transmission broadcasting multi location transmission confidential message transmission reception relay broadcasting polling etc Automatic redial and page retransmission Ensures docume...

Page 23: ...of toner or paper No paper reception Allows continued reception of documents when toner or paper run out by storing data not yet printed in the built in memory Polling Allows the transmission receptio...

Page 24: ...lay Panel Displays status of machine and operation in progress 2 One Touch Keypad Use for one touch dialing of preprogrammed telephone numbers and for entering alphabetic numeric and special character...

Page 25: ...each side to gain entry to the toner image drum area 6 Power Switch Press 1 to turn on and 0 to turn off 7 Control Panel Programming Keys These are the main keys used for programming machine settings...

Page 26: ...ion for supporting long documents 14 Paper Tray Holds 250 sheets of paper universal type legal letter A4 15 Paper Indicator Shows level of paper remaining in paper tray 16 Copy Output Lever Up positio...

Page 27: ...ons Options vary according to the the model of your machine See Options and Accessories 20 IEEE 1284 Parallel Port The parallel port provides multifunction capability if your machine is so equipped Op...

Page 28: ...ers it to the printing paper Install a new image drum unit when Replace Drum appears on the display panel Only install image drum units specified by OKI for use in this machine See Maintenance 25 Tone...

Page 29: ...User s Guide English 29 Control Panel Keys and Indicators Fig1_08 eps...

Page 30: ...option in the same operational layer when programming the machine Move to the lower row from the upper row when data such as telephone numbers is listed in two rows 5 Shift Right Key Use this key to M...

Page 31: ...riginals that are too dark 11 Clear Key Use this key to cancel ID telephone number and programming entries 12 Menu Exit Use this key to activate the Menu mode when the machine is in standby state exit...

Page 32: ...elephone handset After pressing the key you can hear the dial tone and dialing code through the machine s speaker 18 Speed Dial Search Key After loading a document for faxing press this key and then e...

Page 33: ...numbers 1 through xx where xx 40 Model 5780 or 80 Model 5980 For higher Speed Dial numbers program the number s and print the Telephone Directory For more information see Reports Telephone Directory 2...

Page 34: ...e faxed and press the key of the location where the fax is to be sent Two telephone numbers can be programmed for each One Touch key a primary number that is always dialed first and an alternate numbe...

Page 35: ...laut characters Norwegian characters Del Key One Touch key 30 Use this key to delete characters at the position of the cursor in the display panel when entering ID telephone numbers or programming fun...

Page 36: ...ber then complete the process by entering the second part of the number following the procedures required for inputting another Speed Dial number If the Internet Fax feature set is installed Use this...

Page 37: ...ch at the bottom of the keypad and lift up on the main panel swinging it up and to the right After pressing the desired key s close the main panel The One Touch Sheet s provide space for Speed Dial nu...

Page 38: ...s the Stop key Then print a Message Confirmation Report to check the source of the problem To print the report press the Enter key twice with no documents loaded One Long Beep This is the End of Sessi...

Page 39: ...cting Optional External Devices Handset Telephone Answering Machine Answering Machine and a Telephone Connecting Power Loading Paper To install your fax machine follow the steps in this section Safety...

Page 40: ...lectrically and is equipped with a three wire grounded power cord For your safety do not attempt to defeat your power cord s grounding plug The electrical outlet and phone jack should be installed nea...

Page 41: ...e is not intended to be used in parallel with any other telephone devices Toner Cartridge and Image Drum Handling Leave unused toner cartridges and image drums in their packages until needed When repl...

Page 42: ...medical attention If toner gets in the eyes Flush eyes with large quantities of cool water for 15 minutes keeping eyelids open with fingers Seek medical attention Getting Started Where to Install You...

Page 43: ...re included If any items are missing contact Oki Data immediately Keep your packing materials and carton in case you need to ship or transport the unit 1 Fax Machine 2 Toner cartridge 3 Image drum ins...

Page 44: ...0 44 Setting Up Your Fax Machine 1 Lift up on the document tray and swing it up and out of the way Fig4_02 eps 2 Press the release buttons 1 located on both sides of the copy stacker Lift up the stack...

Page 45: ...tridge then lift it out Caution Do not touch the green drum surface Fig4_04 eps 4 Grasp the protective sheet and pull it out Fig019 eps 5 Put the image drum cartridge back into place 6 Press down at e...

Page 46: ...This machine will only operate using toner cartridges specified by OKI for this facsimile machine The use of any other toner will result in the display of an operation error and in machine malfunctio...

Page 47: ...User s Guide English 47 5 Push the lock lever in the direction of the arrow until it stops Fig4_11 eps 6 Close the copy stacker and document tray Make sure the cover is firmly closed Fig_01 eps...

Page 48: ...exit stacker on the back of the machine using the latching mechanism provided 5759_7 eps Connecting to the Telephone Line 1 Insert one end of the telephone cord into the LINE jack in the back of the m...

Page 49: ...ephone cord into the jack located on the back of the cradle 3 Insert the end of the cord into the TEL jack on the back of the fax machine 5759_47 tif The two TEL jacks are provided to allow you to con...

Page 50: ...lephone 1 Connect your answering machine to your fax machine 2 Plug your external telephone s cord into the telephone jack on your answering machine You must have the TAD mode feature turned on for an...

Page 51: ...aper To use a different paper size change the 1 st Paper Size User Function 25 to match your new paper size See Setting Basic Features Other Basic Parameters Paper Size Setting Loading Paper Your fax...

Page 52: ...de to the marker for the size you re using 3 Lift up the paper length adjustment guide b and set it to the length of your paper If using legal size paper rotate the extension c at the back of the tray...

Page 53: ...functions Press Menu Exit c to access the menu The machine functions are organized in a menu structure Functions are shown in the display as you navigate through the menu using the navigation keys If...

Page 54: ...s For example Polling TX RX includes 2 options Polling TX and Polling RX Each of these options includes a number of possible settings cake eps Primary Menu Functions Group TX Delayed TX Delayed Batch...

Page 55: ...features See Help and Helpful Hints 5950_10 eps 1 Setting Features There are two ways to navigate through the functions StepAccess The step access method moves through the function menu step by step I...

Page 56: ...menu mode and return to standby state Press SHIFT UP to move to the previous function or option Press SHIFT DOWN to move to the next function from the upper row to the lower row when data is entered i...

Page 57: ...t be entered in two digit format for example 00 or 99 A list of speed access numbers follows this section Example Here is an example of using speed access To access the Redial Tries function you only...

Page 58: ...ramming Machine Settings Dial Options Incoming Options Report Options LAN Options The speed access numbers and their assigned functions are listed in the following sections Speed Access Numbers by Typ...

Page 59: ...e Diagnosis 15 TX Mode Default 16 No Toner Memory Receive 17 Memory Full Save 18 Instant Dial 19 Department Code 20 ECM Function 21 Closed Network 22 Toner Save 23 Sender ID 24 Width Reduction 25 1 st...

Page 60: ...ne Duration 50 PBX Line 51 Flash Earth Normal 52 Dial Prefix Settings for 46 47 48 49 and 51 should only be changed by Authorized Service Technicians Incoming Options 60 Incoming Ring 61 Remote Receiv...

Page 61: ...N Print T O 83 POP Interval 84 DELET POP MSG 85 Time Between GMT 86 Text Print 87 Header Print 88 Coding Mode 89 EX FINE MODE 90 Sender ID E Mail 91 DOMAIN Name 92 Return Receipt 93 Receipt Format 94...

Page 62: ...Menu Exit to return to standby mode Setting the Date and Time Follow these instructions to set the date and time 1 Press Menu Exit to enter the menu 2 Using the numeric keys 0 9 enter speed access num...

Page 63: ...ID This is a descriptive title that identifies the sender usually the location of your fax machine or the name of your company or office It is printed at the top of every fax you send You can enter u...

Page 64: ...Menu Exit to return to standby mode Set the answering mode based on how you want your machine to answer calls and what telephone equipment is connected to it Choose the mode that best fits your needs...

Page 65: ...ephone connected to your machine If you pick up the hand set and hear fax machine tones press the Start key to receive the fax If you do not answer the phone and someone tries to send you a fax messag...

Page 66: ...ypad to enter the remote receive number you have programmed This number activates fax reception Add something like this to your answering machine message To send a fax now press XX the programmed numb...

Page 67: ...s function displays only when a forwarding number has been programmed PC Fax Mode PC This mode is available only if an optional MFP Kit is installed Incoming faxes are stored on you computer s hard di...

Page 68: ...or incoming call parameter you want to change 3 Use or to select the desired setting Press Enter 4 Press Menu Exit to return to standby mode Dial Parameter Settings Redial Tries Speed access no 40 Thi...

Page 69: ...and detect a dial tone before dialing Set to ON a dial tone must be detected Available settings are ON and OFF OFF is the default setting Busy Tone Detect Speed access no 44 This function allows your...

Page 70: ...try Available settings are 75 85 and 100 ms 100 ms is the default setting PBX LINE Speed access no 50 To change this setting see Setting Basic Features Connecting to a PBX This function must be ON if...

Page 71: ...to a PBX Available settings are NORMAL N flash F and earth E NORMAL N is the default setting DIAL PREFIX Speed access no 52 To change this setting see Setting Basic Features Connecting to a PBX If yo...

Page 72: ...ceive mode or Ring Response is set to 1 ring 5 sec 10 sec 15 sec or 20 sec If the function is set to to DRC the machine emits a ringing sound for every incoming call no matter what type of call it is...

Page 73: ...Available settings are ON and OFF OFF is the default setting PC FAX Switch Speed Access no 64 When set to ON the machine automatically switches to FAX when fax reception by a connected personal compu...

Page 74: ...cradle after use Available settings are Low Middle and High Middle is the default setting User Language Speed Access no 13 Your machine has two languages installed English and Spanish or French depen...

Page 75: ...o 26 Sets the size of the paper loaded in the second optional paper tray Default setting is Letter This setting is only available when the second tray is installed Relay Print This function is ONLY av...

Page 76: ...it set it to ON set a four digit password program the number of the backup recipient This is One Touch 40 The backup recipient is the fax machine to which copies of your correspondence are sent Refer...

Page 77: ...ke the following changes to enable the machine to recognize the prefix digits in the telephone numbers used to obtain access to the outside line After dialing the prefix digits the machine waits until...

Page 78: ...ide line from the PBX Press Enter 6 Press Menu Exit to return to standby mode Dial Prefix can also be accessed from the main menu by entering its speed access code 52 Remember that all outside telepho...

Page 79: ...e chain dial feature For more information on chain dialing refer to Programming Speed Dial Numbers Chain Dialing This section describes programming fax numbers only See the T 37 Option Guide for infor...

Page 80: ...xing operations you can store telephone numbers in the machine s memory and send documents to a fax number by pressing a single key The total number of stored telephone numbers varies by model 40 Mode...

Page 81: ...he second hidden panel Each one touch key may be programmed with Two 40 digit numbers a primary number an alternative number used if the primary number is busy or goes unanswered a 15 character locati...

Page 82: ...o 230 Model 5980 They are called three digit because you access them by entering their three digit space designation The One Touch Sheet s provide space for Speed Dial numbers 1 through xx where xx 40...

Page 83: ...ing the information programming the information Collect Information Gather the following information for each Speed Dial number you want to store Name Primary Telephone Number LOC Alternate Telephone...

Page 84: ...lable settings are 33 6 K 28 8 K 14 4 K 9 6 K and 4 8 K The default setting is 33 6 K If the machine you are communicating with is an older fax machine and you are having problems communicating with i...

Page 85: ...it Shift keys Enter and Capital CAPS Numeric Keypad 0 9 Use these keys to enter numbers Unique Key Use this key to enter a variety of unique characters Symbols Internet characters _ l The l functions...

Page 86: ...s _ l The l functions as a tilde symbol Umlaut characters Norwegian characters Pause Key One Touch key 40 Use this key to enter automatic 3 second pauses in dialing For example use this key to tell th...

Page 87: ...User s Guide English 87 See next page 4...

Page 88: ...l 5780 80 Model 5980 For higher Speed Dial numbers program the number s and print the Telephone Directory For more information see Reports Telephone Directory 1 Press Menu Exit to enter the menu 2 Pre...

Page 89: ...rom Step 4 until you have finished programming 11 Press Menu Exit to return the machine to standby mode 12 When finished with the programming of One Touch keys lift off the plastic cover Use a pencil...

Page 90: ...to erase the existing speed dial information Using Clear To program new information refer to Programming Speed Dial Numbers To use DEL refer to Programming Speed Dial Numbers When the existing number...

Page 91: ...wn and press the Copy If your documents are heavily bent creased or torn make a copy on a photocopier and send the copy instead Document Guidelines General Try to use good quality documents for your f...

Page 92: ...0 06 millimeters Maximum 0 006 inches 0 15 millimeters Multiple Page Specifications Also see Basic Faxing Document Guidelines General For very heavy paper load and send pages individually Width Minim...

Page 93: ...per jams and problems during operation Stack your documents neatly Align document edges before loading Don t load different size documents at the same time You can load and prepare to transmit a docum...

Page 94: ...For documents with normal contrast default setting use NORMAL contrast For documents that are too light use LIGHT contrast For documents that are too dark use DARK contrast The default setting is NORM...

Page 95: ...There are two ways to send one fax to multiple locations using one fax session group fax or broadcast fax See Sending a Fax to Multiple Locations Procedure 1 Load your documents 2 Select the entry me...

Page 96: ...ss the One Touch key you have programmed Fig1_08a eps Using 2 or 3 digit Speed Dial 1 Press the Speed Dial Search key 2 Enter the Speed Dial number 2 or 3 digit using the numeric keypad 3 Press the En...

Page 97: ...31 eps Using the Numeric Keypad 1 Dial as you would on a normal telephone 2 If you make a mistake press the SPACE key to back up one space Then enter the correct number 3 Press the Start key 5759_82 t...

Page 98: ...work settings are Limited reception RX Limited transmission and reception TX RX No limitations OFF This is the default setting If Closed Network is set to TX RX or RX your machine will ONLY accept fax...

Page 99: ...rs If data is in memory when power is restored the machine continues operations from the point when power was lost If the data in memory is lost when power is restored the Power Outage Report prints P...

Page 100: ...ber you entered will identify the location during transmission CALLING The machine dialled a number remote location made contact and that number is ringing SENDING The machine is transmitting a fax RE...

Page 101: ...ine is busy or there is no answer the machine waits and then automatically redials the number Also if the machine is transmitting from memory and a communication error occurs it automatically redials...

Page 102: ...machine is set to the manual receive TEL mode follow the instructions below to receive faxes You need to have an optional handset installed or an external handset connected 1 When your telephone or fa...

Page 103: ...machine is running low on toner it displays TONER LOW REPLACE TONER CART If user function 16 NO TONER MEM RX is set to OFF default setting and the print quality is still legible you can continue to u...

Page 104: ...etting Basic Features Setting the Answering Mode Memory Reception Mode You may want to set your machine for memory reception if you receive faxes containing confidential information When Are Faxes Rec...

Page 105: ...rmines how many messages may be stored You always know how much memory is available to you The amount of available memory is shown on the display panel This amount varies depending on what has already...

Page 106: ...e at which the message was scanned into memory for transmission The name or telephone number of the machine you were communicating with The communication mode used for each transmission or reception T...

Page 107: ...Receive Mode disabling Memory Reception Mode all messages stored in memory are printed out Canceling Messages Stored in Memory Erasing Messages Received in Memory Without Printing Them 1 Press Menu Ex...

Page 108: ...p time with a fully charged battery is 72 hours If data is in memory when power is restored the machine continues operations from the point when power was lost If the data in memory is lost when power...

Page 109: ...ding another fax from memory This feature increases your productivity and reduces the time you spend waiting for other operations to finish Dual Access applies while making a copy while sending a fax...

Page 110: ...u have loaded is automatically sent 3 Enter the fax number before loading a document Why is this important Documents are placed FACE DOWN on the feeder of your machine If the only record of the fax nu...

Page 111: ...inting if your machine is set to receive faxes into memory 3 Enter the fax number before loading a document Why is this important Documents are placed FACE DOWN on the feeder of your machine If the on...

Page 112: ...gh the automatic document feeder print at 600 dpi Paper used for copying has two possible paper sources paper tray manual paper feeder To Make Copies 1 Load the document s in the document tray Fig2_35...

Page 113: ...in the paper tray 1 Load the document in the document tray 2 Fold down the manual paper feeder tray Fig2_36 eps 3 Insert a sheet of paper face up on the tray and push into the slot until the machine g...

Page 114: ...ace Up or stacked with print side down Face Down The position of the lever determines how the copies are stacked The lever is located on the side of the machine above the power switch 5759_87a eps 1 I...

Page 115: ...her method may be saved programmed into your fax machine as One Touch or 2 or 3 digit Speed Dial numbers These saved programmed numbers must exist before sending a fax See Programming Speed Dial Numbe...

Page 116: ...ne as One Touch or 2 or 3 digit Speed Dial numbers The Group a collection of individual destination numbers can be saved Broadcast Fax A broadcast fax is a fax sent to several locations A broadcast fa...

Page 117: ...A group fax is meant to be repeated The group a collection of destination numbers where the fax is going to IS saved programmed into the machine You can create up to 20 different groups of telephone...

Page 118: ...nce of group numbers already programmed See Reports Group Directories 1 Press Menu Exit to enter the Menu 2 Press to select Location Program Press Enter 3 The cursor will be at Speed Dial Press to sel...

Page 119: ...here are entries When all entries are deleted the group name is automatically deleted You DO NOT delete the assigned numbers from their Speed Dial locations You DO DELETE the entries assigned to the g...

Page 120: ...X 2 DELAYED TX 3 DELAYED BATCH TX 4 Press the Enter key 5 A list of groups will be displayed 6 You may select one group or multiple groups There are three ways to find a group scrolling by name by num...

Page 121: ...to send to An will appear in front of each group that has been selected When you have selected all of the groups press the Enter key By Name Press the Speed Dial Search key Input the first character o...

Page 122: ...of the group use the Group Directory Report or Press Speed Dial Search key twice Then scroll through the list If you know the name of the group press the Speed Dial Search key enter the first letter...

Page 123: ...earches are done by the first character entered for the location name Remember this when programming the name 1 Press the Speed Dial Search key The display will show ENTER 1 ST CHAR 2 Using the One To...

Page 124: ...one time event not meant to be repeated The broadcast a collection of destination numbers where the fax is going to IS NOT saved programmed into the machine The locations you use during a broadcast C...

Page 125: ...a location from the broadcast refer to the following section Deleting a Location from a Broadcast Fax 5 At this point you have three options Press Enter to display the locations for the broadcast Pres...

Page 126: ...location from a broadcast fax after Step 4 of the previous section Sending a Broadcast Fax follow these steps 1 PressEnter 2 Press 3 PressEnter 4 Press or to move the cursor to the location name 5 Pre...

Page 127: ...ons The advanced operations are Delayed Faxing Delayed Fax Transmission Delayed Batch Transmission Priority Transmissions Confidential Faxes Call Forwarding Relay Faxing Polling Transmission sending d...

Page 128: ...ed time The faxes are sent at the same time every day Imagine that your fax machine is located in the main office and you send faxes to your sales force Your machine can be programmed to hold all docu...

Page 129: ...a in memory The fax machine can send documents at different specified times sessions You can program a delayed transmission to occur at any time over the next three days The number of delayed transmis...

Page 130: ...c keypad Press Enter Enter times following the 24 hour format For example 0800 is 8 00AM 2000 is 8 00PM 6 Delayed TX shows Select Location s on the display 7 Enter the desired location using either Sp...

Page 131: ...No of the delayed transmissions currently programmed in the machine 4 Press or to select transmission to cancel Press Enter 5 The Location ID and Tel No of the selected transmission will display After...

Page 132: ...specify When it is the specified time all held documents are sent to the number Locations must be programmed into Speed Dial One Touch numbers 31 40 To perform a delayed batch transmission you must pr...

Page 133: ...nu 2 Press toselectLocation Program PressEnter 3 Press toselectBatch TX Time PressEnter 4 Enter the Speed Dial number of the desired location Use the numeric keypad to enter the number Press Enter 5 W...

Page 134: ...Batch Transmission must be programmed into Speed Dial numbers 31 through 40 5 Location and transmission time set displays Press Start 6 The machine scans the document s into memory and waits until the...

Page 135: ...ication 3 The display shows Location ID or Tel No of the delayed transmissions currently programmed in the machine 4 Press or to select transmission to cancel Press Enter 5 The Location ID and Tel No...

Page 136: ...documents any received incoming documents Sending a Priority TX 1 Load the document s 2 Press Menu Exit to enter the menu 3 Press to select Priority TX Press Enter 4 Input the desired location using...

Page 137: ...Both communicating machines the machine being sent from sender and the machine being sent to receiver support compatible confidential fax standards i e both machines are OKIFAX or compatible products...

Page 138: ...rsonal mailboxes When set up each mailbox is opened as a Confidential Mailbox Bulletin Polling Mailbox or Relay Broadcast Mailbox Messages stored in a mailbox cannot be printed until the correct passw...

Page 139: ...s number 04 wait 3 Enter the personal box number 1 16 Press Enter This is the address 4 Press or to select Confidential Press Enter 5 Input a 4 digit numeric password 0000 9999 Press Enter 6 Repeat st...

Page 140: ...Change 5 Input the existing old 4 digit numeric password Press Enter 6 Input the new 4 digit numeric password Press Enter 7 Press Menu Exit to return to standby mode If the message Invalid Operation...

Page 141: ...Enter the number of the personal mailbox you are working with Press Enter 4 Press or to select Close Press Enter 5 At Close Box press Enter 6 At Password enter the 4 digit numeric password Press Enter...

Page 142: ...s a mailbox without the address and password To send a fax to a mailbox you must know the address of the mailbox For your machine the address is the number 1 to 16 of the mailbox To send a confidentia...

Page 143: ...l fax it is stored in memory It will not print until the proper password is entered If you wish to receive confidential faxes you must provide your confidential mailbox address to the people sending y...

Page 144: ...word of the confidential mailbox you wish to print from The Confidential Reception Report has the mailbox address 1 Press Menu Exit to enter Menu 2 Press to selectPrint from Memory PressEnter 3 Press...

Page 145: ...u Exit to enter Menu 2 Press to selectPrint from Memory PressEnter 3 Press toselectPrint Personal Box Press Enter 4 Enter the personal mailbox number 1 16 that is holding the message Press Enter 5 Ent...

Page 146: ...racters 0 9 Pause Space long To use forwarding you must 1 set the forwarding number 2 set theAuto Answer mode to FWD Set a Forwarding Number 1 Press Menu Exit to enter the menu 2 Press to select Locat...

Page 147: ...s to select FWD Press Enter 6 Press Menu Exit to return to standby mode Clear Forwarding Mode 1 Press Menu Exit to enter the menu 2 Press to select Setup Press Enter 3 Press to select Machine Settings...

Page 148: ...ward on Paper Toner will not work if the machine is set for Forwarding Mode FWD Manual Receive Mode TEL Memory Reception Mode MEM Setting a Paper Toner Error Forwarding Number 1 Press Menu Exit to ent...

Page 149: ...enter the password in order to change the location of the backup recipient turn the feature off or change the password Activate Backup File TX Set the Password Follow this procedure to Activate the Ba...

Page 150: ...ressEnter 3 With SPEED DIAL selected press Enter 4 Using the numeric keypad enter 40 PressEnter 5 Enter the password you set for the backup file feature PressEnter 6 Program the fax number and locatio...

Page 151: ...5980 machine can function as an initiating station and a relay key station hub The relay key station hub can send a confirmation report to the relay initiating station when the relay fax session is c...

Page 152: ...he contact number for the relay broadcast report is the number of the relay initiating station programmed to a special location and in the format used by the relay key station hub Relay Password This...

Page 153: ...The telephone number of the relay initiating station is called the Relay Report Number This number is set in the relay initiating station Be sure to program the number in the format the relay key sta...

Page 154: ...ion This number is programmed into the relay initiating station Be sure to program the number in the format the relay key station uses for dialing For example be sure to include the access digit if re...

Page 155: ...ber of key relay station PressEnter 5 Enter two digit numbers of remote stations Press Enter 6 Enter the desired location using the Speed Dial number or numeric keypad Press Start 7 The machine will s...

Page 156: ...ay fax session is complete This confirmation report is called the Relay Broadcast Report Before you use your machine as a relay key station hub you must program the number s of the destination machine...

Page 157: ...e programmed into your machine as a Speed Dial See Programming Speed Dial Numbers Create the Destination Group s The Speed Dial numbers of the contact numbers of the destination machines must be progr...

Page 158: ...s are available Refer to Reports Box Information To create the Relay Broadcast Mailbox which includes creating the Relay Password 1 Press Menu Exit to enter the Menu 2 Input speed access number 04 wai...

Page 159: ...dcast Mailbox Steps 3 9 or Press Menu Exit to return to standby mode Relay Entry Report Your machine can print a report of the locations programmed in a Relay Broadcast Mailbox This report is called t...

Page 160: ...umber location This number is programmed into the relay initiating station Be sure to program the number in the format the relay key station uses for dialing For example be sure to include the access...

Page 161: ...Print to ON your machine will print any relay fax it receives from a relay initiating station To change the setting of Relay Print Speed Access 28 1 Press Menu Exit to enter the menu 2 Input speed acc...

Page 162: ...nsmission Your machine holds data in memory until transmission occurs An example of polling transmission is a hospital pharmacy facsimile contacting each unit s facsimile Pediatrics Cardiology Critica...

Page 163: ...d Feeder Document Tray Polling is a one time occurrence It can only be repeated by re loading the document Memory Polling Memory Polling is very similar to Feeder Document Tray Polling The difference...

Page 164: ...you to use your machine as a fax back system The Mailboxes numbers 1 to 16 are used for Personal Confidential Mailboxes Memory Polling Bulletin and Relay Broadcasting If you are using these features...

Page 165: ...ct Polling TX 4 Press to select Feeder Poll Press Enter 5 Load the document s 6 Display shows Waiting to be Polled If you use feeder document tray polling remember that the document remains in the mac...

Page 166: ...g TX RX 3 Press Enter to select Polling TX 4 Press to select Memory Poll Press Enter 5 Load the document s 6 Document s are scanned and stored in memory and display shows Waiting to be Polled Only one...

Page 167: ...the machine requesting documents For your machine the address is the number 1 to 16 of the mailbox The Mailboxes numbers 1 to 16 are used for Personal Confidential Mailboxes Memory Polling Bulletin a...

Page 168: ...esired number of bulletin polling mailboxes has been created up to 16 6 Press Menu Exit to return to standby mode The Mailboxes numbers 1 to 16 are used for Personal Confidential Mailboxes Memory Poll...

Page 169: ...mber 6 When finished inputting mailbox numbers load the document s 7 The document s will be scanned and stored in memory Bulletin Msg in Mem displays The Mailboxes numbers 1 to 16 are used for Persona...

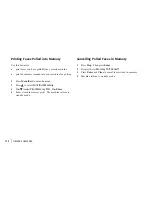
Page 170: ...g the document Press Enter 5 The message prints Then the machine returns to standby Tips 1 If no message is stored in the personal mailbox No Data in Memory displays 2 If you want to delete a message...

Page 171: ...alled polling or polling reception Your machine can poll only one machine at a time 1 Press Menu Exit to enter the menu 2 Press to select Polling TX RX Press Enter 3 Press to select Polling RX Press E...

Page 172: ...ng 1 Press Menu Exit to enter the menu 2 Press to select Print from Memory 3 Press toselectPrint Memory Poll PressEnter 4 Faxes stored in memory print The machine returns to standby mode Cancelling Po...

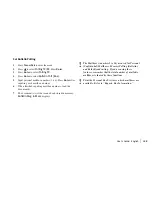
Page 173: ...o select Report Print Press Enter 3 Press or to select Configuration Press Enter 4 The report prints Many of your fax machine s features and settings can be changed to suit your needs This section lis...

Page 174: ...enu Exit to enter the menu 2 Press or to select Report Print Press Enter 3 Press or to select Configuration Press Enter 4 The report prints 5 Press Stop to cancel printing Changing Operation Functions...

Page 175: ...ult Speed access no 15 When you enter speed access number 15 you move directly into the resolution settings This function sets the machine s default settings for original document condition and transm...

Page 176: ...ata not read into memory is deleted automatically Available settings are ON and OFF The default setting is OFF Instant Dial Speed access no 18 Set to ON The document is scanned into memory and dialing...

Page 177: ...F The default setting is OFF ECM Function Speed access no 20 The error correction mode ECM function is provided to improve communications in areas where telephone line conditions are very poor Availab...

Page 178: ...rameter Settings Pulse Make Ratio This setting can only be changed by an Authorized Service Technician Speed access no 47 If the machine is set to Dial Pulse this function controls the make rate of th...

Page 179: ...ng is 35 CNG Count Speed access no 65 When set either in the T F or TAD modes the machine detects the type of signal calling tone CNG sent from the remote location and initiates fax reception if requi...

Page 180: ...cted ON detected SET programmed The default setting is OFF You must have your local telephone carrier s Distinctive Ring service Your fax machine must be in FAX MEM or PC answer mode Other modes TEL T...

Page 181: ...ric password 0000 9999 using numeric keypad Press Enter 4 Press Menu Exit to return to standby mode Be sure to record the password Keep the record in a safe place If you forget the password you will n...

Page 182: ...nown as the Restricted Access ID User Function 19 Department Code must be set to ON before the Department Code may be set Be sure to record all Department Codes Keep the record in a safe place If you...

Page 183: ...s Enter 7 Repeat Steps 3 6 until all the department numbers you want to use have been registered 8 Press Menu Exit to return to standby mode To use a Department Code Enter the 4 digit Department Code...

Page 184: ...75 inches whichever comes first before a logical jam occurs MDY DMY This setting controls how the machine displays and prints the date mm dd yy or dd mm yy Time Date Print This setting controls if and...

Page 185: ...Printing Reports or Reports Report Name Printing Reports Printing a Message Confirmation Report After transmission press the Enter key once with no documents loaded to see a report confirming your tra...

Page 186: ...oup Directory Configuration Report Function List Box Information Personal Box List Relay Broadcast Entry Report Protocol Dump Only Authorized Service Technicians will access the Protocol Dump Log Repo...

Page 187: ...ax machine you were communicating with DISTANT STATION ID The communication mode used The number of pages The result Service codes Department codes D CODE when the Department Code Setting Speed Access...

Page 188: ...ansmission The name or telephone number of the machine you were communicating with The communication mode used for each transmission or reception The number of pages The result Department codes D CODE...

Page 189: ...the broadcast For each location the Location ID the number of pages sent and the result of the communication Department codes D CODE when the Department Code Setting Speed Access Number 6 is set to ON...

Page 190: ...er for each One Touch key and 2 and 3 digit Speed Dial number The alternate number OR for each One Touch key The parameter settings for each One Touch key Printing the Telephone Directory 1 Press Menu...

Page 191: ...s printed ID of the machine generating the report Group Number Group Name Location IDs programmed into the Group Printing the Group Directory 1 Press Menu Exit to enter the menu 2 Press or to select R...

Page 192: ...phone directory Certain numbers currently programmed into your machine Sender ID ID TSI CSI TEL NO Forwarding No Forward on P Err Relay Report No Your machine s current dial parameter settings Printin...

Page 193: ...ion Report provides a list of the current menu settings See Reports Configuration Report Printing the Function List There are two ways to print the Function List Help Report Print Help 1 Press Help Re...

Page 194: ...eports Personal Box List Relay Broadcast Entry Report OKIFAX 5980 only Your machine has 16 available boxes which are shared between several functions Refer to Advanced Operations for more information...

Page 195: ...ng This indicates that the box is programmed for Memory Polling Bulletin Use the Personal Box List as a reference when working with Confidential Faxing Bulletin Polling or Relay Faxing Refer to Advanc...

Page 196: ...e report was printed the box number the description Location ID of each location contact number programmed in the relay broadcast Printing the Relay Entry Report 1 Press Menu Exit to enter the menu 2...

Page 197: ...the fax machine you were communicating with DISTANT STATION ID The communication mode The number of pages The result Service codes Department codes D CODE when the Department Code Setting Speed Acces...

Page 198: ...is OFF MCF Multi Loc Speed Access no 71 Set to ON single and multiple location transmission MCFs automatically print Set to OFF no report prints The default setting is ON Image in MCF Speed Access no...

Page 199: ...eport to confirm your entries Information in this report includes The Location ID of the One Touch keys and 2 and 3 digit Speed Dial codes you have selected Telephone numbers you have manually entered...

Page 200: ...indicate the results of communications BUSY The other machine s line was busy or there was no answer CANCL A message was erased after being held in memory for 10 days COMP A multiple location transmi...

Page 201: ...eceiving a fax It could not receive the entire message in memory S_JAM A document jam occurred in the sending fax machine STOP The Stop key was pressed ending the communication session Communication C...

Page 202: ...lint and dust accumulated in the area around the contact image sensor a Open the control panel and gently wipe the area over the scanner Fig4_14 eps a This section covers the procedures listed below...

Page 203: ...on the type of documents you usually receive or copy A toner cartridge will print about 5 000 pages letter size of standard business communications at a typical print coverage of 4 equivalent of CCITT...

Page 204: ...cker Fig4_02 eps 3 Pull the lock lever on the toner cartridge in the direction of the arrow Fig4_11_a eps CAUTION When you open the top cover you will see a label that reads CAUTION HOT This part is e...

Page 205: ...f the image drum unit For disposal place it in the plastic bag you received with your new toner cartridge Fig2_03 eps 5 Unwrap the new toner cartridge and gently shake it to distribute the toner Then...

Page 206: ..._11 eps 9 Use the cleaning wipe provided with your new toner cartridge Gently wipe back and forth across the full length of the LED array 1 Use a clean section of the wipe with each pass Fig1_07 eps 1...

Page 207: ...for more than 5 minutes Never expose the image drum unit to direct sunlight Always hold the image drum unit by the ends Never touch the surface of the green drum inside the image drum unit CAUTION Wh...

Page 208: ...Replacement Procedure 1 Turn off the power switch 2 Lift up on the document tray and swing it up and out of the way Fig4_02 eps 3 Press the release buttons 1 located on both sides of the copy stacker...

Page 209: ...ur new image drum cartridge and discard it Please abide by local laws when disposing of an image drum cartridge Fig4_04 eps 5 Insert the new drum cartridge Press down firmly on both ends to lock the d...

Page 210: ...rum counter ONLY when you replace the image drum and to clear the CHANGE DRUM message To reset the image drum counter 1 Press Menu Exit to enter the menu 2 Press until the symbol is beside COUNTER 3 P...

Page 211: ...in machine malfunction Obtaining Before you order have the correct part number and description of the item Order on the Internet at www okidata com Click on the where to buy link Consult the dealer w...

Page 212: ...on Kit 40755322 HRS600 8 MB Memory Expansion Kit 70029401 2nd Paper Tray Kit UST 550 70031801 Handset 41345301 G3 Dual Line Option Kit 70040101 T 37 Internet LAN Fax Option Kit 70037001 T 38 Real Time...

Page 213: ...ce and Support Internet Support Problem Solving General Information Here are some general things to check before proceeding with detailed troubleshooting Is the machine plugged in and turned on Are th...

Page 214: ...you replace the image drum Cleaning page process Removes residual impurities from printing surfaces Reduces problems such as repeating marks blotching and shading To print a cleaning page 1 Press the...

Page 215: ...ocument 4 Return the document tray to its original operating position Push down until it locks in place 5 Turn the power switch back on Clearing a Document Jam When a document jam occurs your machine...

Page 216: ...it may be due to the type of paper you are using For best results select a paper which has been developed specifically for photocopying or laser printing Be sure to fan the paper before loading it int...

Page 217: ...idge with its toner cartridge then lift it out Set it aside on a clean dry surface out of direct sunlight WARNING Never expose the image drum cartridge to light for more than 5 minutes Never expose th...

Page 218: ...low the Paper Full marking 9 Slide the paper tray back into the machine until it latches in place 10 Place the image drum unit back into the machine WARNING Always hold the image drum unit by the ends...

Page 219: ...memory available Error Messages 14 14 FAX CLOSE THE COVER The upper cover is not closed Check to be sure that the image drum is seated correctly and the toner cartridge is installed properly Check to...

Page 220: ...ray 14 14 FAX CHANGE DRUM SOON Image drum alarm The image drum is nearing the end of its projected life Make sure a new drum is available and replace the drum when print quality begins to deteriorate...

Page 221: ...ld clear INVALID TONER CART REFER TO USER GUIDE This error will occur if an incorrect toner cartridge is installed This machine will only operate using toner cartridges specified for use in this machi...

Page 222: ...rint Scan Counters 1 Press Menu Exit to enter the menu 2 Press to select Counter Press Enter 3 Press or to select the counter you want Press Enter 4 Press Menu Exit to return to standby mode Resetting...

Page 223: ...u press the control panel keys Problem 3 The display tells you to replace paper even though there is paper in the paper tray Problem 4 Your documents jam Problem 5 Your machine won t dial Problem 6 Th...

Page 224: ...ed to a PBX and you can t dial out Problem 17 You want to answer an external telephone but your machine always answers first Problem 18 Your received faxes sometimes look distorted Problem 19 You are...

Page 225: ...sition Check your wall outlet to make sure that it has power Problem 2 Nothing happens when you press the control panel keys Solution Turn the machine off Wait 10 seconds Then turn it on again Problem...

Page 226: ...let Make sure that your telephone line not your external telephone or handset is connected to the LINE outlet on the back of your machine If you have an external telephone connected lift the handset a...

Page 227: ...rors Try sending the fax again and check to make sure you are dialing the correct telephone number You have to dial a prefix number to get an outside line or if you are dialing internationally you may...

Page 228: ...ing Operations Loading Documents Copy the document on your machine to see how it will transmit The problem may be caused by telephone line interference Try sending the document again later Problem 8 Y...

Page 229: ...end the fax again If you still have a problem try making a copy of a document on your machine to make sure it is working properly Problem 11 You tried dialing using One Touch 2 or 3 digit Speed Dial b...

Page 230: ...them and you are not out of toner Solution Gently wipe the lens surface of your machine s LED array and then see if the machine works properly See Maintenance Replacing the Toner Cartridge If your ma...

Page 231: ...ine in polling transmission mode Problem 16 Your machine is connected to a PBX and you can t dial out Solution You must enter your dial prefix before the telephone number for each number that you dial...

Page 232: ...the sender to fax the document again Problem 19 You are constantly receiving unsolicited advertising on your machine Solution Try using the closed network function See Basic Faxing Rejecting Unsolict...

Page 233: ...PLACE IMAGE DRUM message If displayed replace the image drum Your machine may be set to Answering Mode Memory Reception Mode Change the Answering Mode to Auto Receive Mode FAX See Setting Basic Featur...

Page 234: ...Call 1 800 654 3282 1 800 OKI DATA English only Latin America Use this procedure to ship the machine 1 Remove the image drum unit with toner cartridge 2 Place the image drum unit with toner cartridge...

Page 235: ...0 150 Groups 20 up to x numbers each where x 140 for the 5780 230 for the 5980 Broadcast Transmissions 5780 150 locations 5980 240 locations All specifications are subject to change without notice For...

Page 236: ...ommunication Method Half duplex Coding Scheme MH MR MMR JBIG with ITU T ECM error correction JBIG available on Model 5980 only Memory Standard 5780 2 5 MB 5980 12 5 MB Optional 2 4 or 8 MB 5780 only O...

Page 237: ...e will print about 5 000 pages letter size of standard business communications at a typical print coverage of 4 equivalent of CCITT No 1 test chart The first toner cartridge installed in a new image d...

Page 238: ...0 sheets maximum 16 to 24 lb 60 to 91 g m2 Manual Feeder Single Sheet Letter legal 13 inch legal 14 inch Executive A4 A5 A6 JIS B5 16 to 32 lb 60 to 121 g m2 Envelopes Monarch COM 10 DL C5 COM 9 You m...

Page 239: ...wer Modes Ready Standby Warmup Time From Standby 30 seconds Environmental Temperature Operating 50 to 90 degrees Fahrenheit 10 to 32 degrees Celsius Storage 14 to 110 degrees Fahrenheit 10 to 43 degre...

Page 240: ...e Mode FAX 65 Automatic Mode Detection 22 Forwarding Mode FWD 67 Manual Receive Mode TEL 65 Memory Reception Mode MEM 66 PC Fax Mode PC 67 Setting 64 Telephone Answering Device Mode TAD 66 Telephone F...

Page 241: ...Stop Key 33 Capitalization Caps Key 35 Chain Dial 36 Number 36 Plus Key 36 Characters Caps Key 35 Unique Key 31 Cleaning Cleaning Page 214 Scanner Path 202 Clear Clear Key Location 31 Document Jams 21...

Page 242: ...23 Copy Output Lever 26 Copy Stacker 26 Copy Stacker Extension 26 Copy Stacker Release Buttons 25 Dual Access 109 Face Up or Face Down 114 Copy Output Lever 26 Making Copies 112 Start Copy Key 32 Coun...

Page 243: ...Country MF 70 Display Blank Display 225 Display Messages Normal Display 219 Transmission 100 Display Panel 21 Location 24 30 Display Panel Messages 219 Distinctive Ring 180 Incoming Ring 72 Restricti...

Page 244: ...130 Sending Confidential Faxes 142 Sending to a Group 120 Single Page Specifications 92 to Multiple Locations 115 FCC Sender ID 63 TSI CSI 63 Features 21 Feeder Document Tray Polling 165 First Aid 2...

Page 245: ...EE 1284 Parallel Port 27 Image Gray Scale 237 Image Contrast Resolution Key 31 Image in Message Confirmation Report MCF 198 Legal to Letter Reduction 51 Light Print 230 Received Faxes Distorted 232 Re...

Page 246: ...ed Access Settings 59 Mailboxes Box Information 194 Personal Box List 195 Programming 138 158 164 167 168 169 Relay Entry Report 196 Maintenance 202 Image Drum Location 28 Replacement 207 LED Printhea...

Page 247: ...198 Printing 185 MF 69 Modem Speed 236 Modes Auto Receive Mode FAX 65 Forwarding Mode FWD 67 Manual Receive Mode TEL 65 Memory Reception Mode MEM 66 PC Fax Mode PC optional 67 Remote Receive 72 Telep...

Page 248: ...212 T 37 212 T 38 212 Unimessage 212 Original Documents See Document Stacker Location Out of paper 23 Outside Line Dial Prefix PBX 71 Clearing 78 Entering 78 PBX 70 Connecting to 77 P Packing 234 Mate...

Page 249: ...195 Programming Mailboxes 138 158 164 167 168 169 Personal Computer PC FAX Switch 73 Personal Mailbox Address 138 Changing Password 140 Number of 138 Type 138 Phone Line Machine doesn t answer 230 Pho...

Page 250: ...ate 62 Deleting Characters 35 Dial Parameter Settings 68 e Mail Key 32 Enter Key 30 Incoming Call Parameter Settings 68 Language 62 Menu Exit Key 31 Norwegian Characters Unique Key 31 35 85 86 One Tou...

Page 251: ...Relay Broadcast Report 154 Relay Broadcast Report Contact Number 153 Contact Number Programming 153 Relay Faxing 14 151 Contact Number Relay Broadcast Report 153 Destination Groups 157 Destination Nu...

Page 252: ...ephone Directory 22 190 Unwanted 228 Resetting the Drum Counter 210 Resolution Print 236 Resolution Key 31 Scanning 237 Set while Loading Documents 94 Transmission TX Mode Default 175 Restrict Access...

Page 253: ...adcast Fax 125 Document Guidelines 91 General 91 Loading Documents 93 Multi Location Message Confirma tion Report 198 Multiple Page Documents 92 Poor Quality Received Image 228 Relay Faxing 151 Single...

Page 254: ...ng Options 60 LAN Options 61 Machine Settings 59 Numbers Types 58 Numeric Keypad 32 Report Options 60 Speed Dial 2 Digit 82 3 Digit 82 Alternate Telephone Number 84 and Closed Network 98 Chain Dialing...

Page 255: ...ax Mode T F 65 Telephone and Answering Machine External Installation 50 Temperature Specifications 239 Time Setting 62 Setting for Delayed Fax 231 Timing Ring Response 179 T F Timer Prg 179 Tone MF Du...

Page 256: ...Unique Characters 31 Unique Key 31 35 Unpacking Missing Items 43 Unsolicited Faxes 98 232 Closed Network 98 Unwanted Faxes 232 Uppercase Caps Key 35 User Language Changing 74 V Ventilation Installing...

Reviews: