BASIC OPERATION
- 90 -
1
2
3
4
5
6
Using scans saved in USB storage
device
When you select [USB] to save your scans, they are stored in
the USB storage device connected to the equipment.
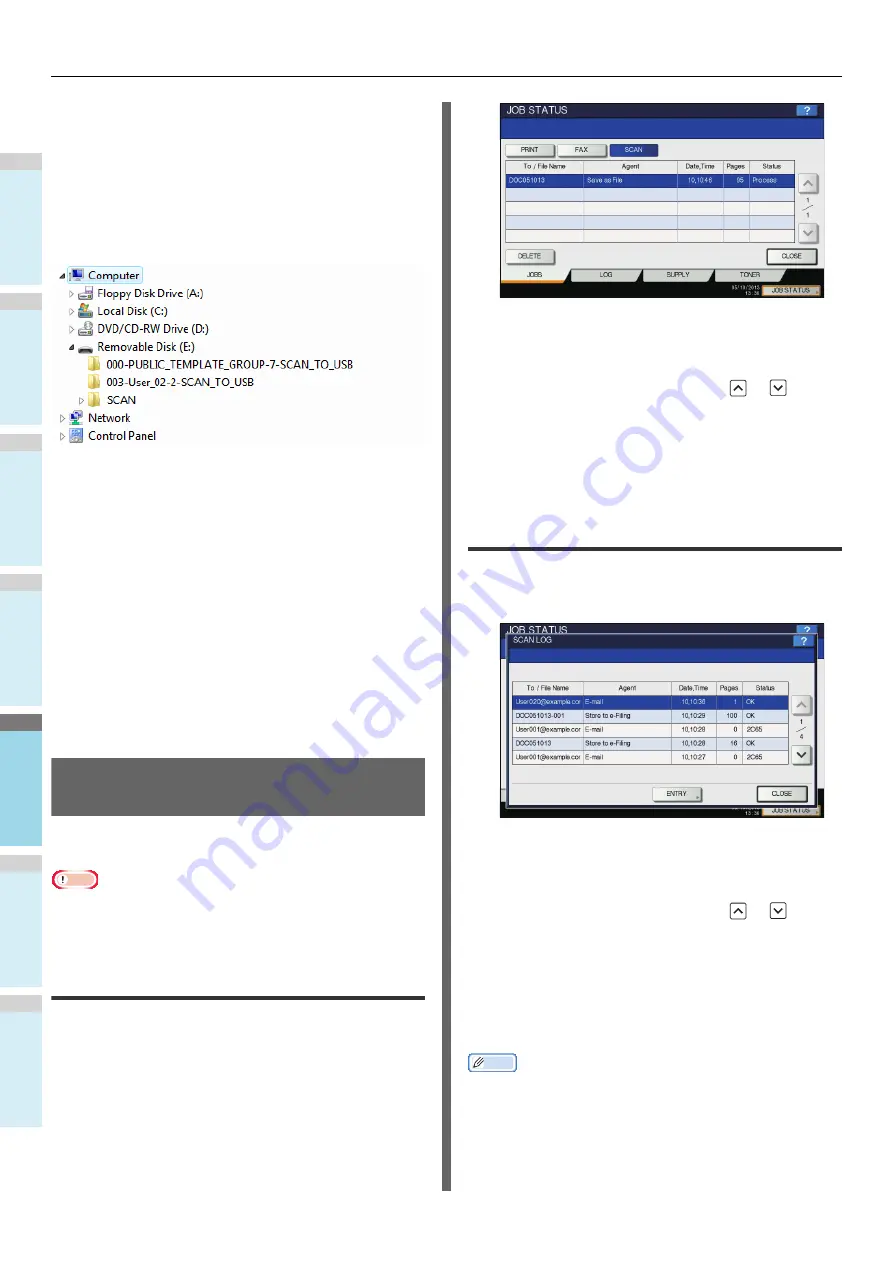
When you save your scans in the USB storage device, a sub-
folder is automatically created. The name of the sub-folder
depends on how you operate the Scan to USB function.
•
“SCAN”
— This sub-folder contains files created by the
Scan to USB function.
•
“000-PUBLIC_TEMPLATE_GROUP-[Template Name]”
— This sub-folder contains files created using a scan
template in the Public Template group.
•
“[Group No.]-[Group Name]-[Template Name]”
— This
sub-folder contains files created using a scan template in
the User Template group.
Using scans saved in network folders
(REMOTE 1/2)
When you select [REMOTE 1] or [REMOTE 2] to store data,
they are stored in the Scan folder automatically created in the
specified network folder. When these data contain a template,
they are stored in a folder that has been specified in the
template setting.
Viewing the Scan Job Status and
Log
The status and log of scan jobs can be viewed on the touch
panel.
Note
• If the equipment is managed by the User Management
feature, you need to enter the user information, such as the
user name and password.
Viewing the scan job status
Pressing [JOB STATUS] > [JOBS] > [SCAN] on the touch
panel displays a list of the scan jobs in progress. The jobs can
be deleted if needed.
In the list, you can view each job’s destination/file name, agent
(scan function), date and time, number of pages, and current
status. The maximum number of displayed jobs differs
depending on your model or operating environment.
To display the previous or next page, press
or
. The
number of jobs displayed on a page varies depending on the
equipment used.
To delete jobs, select one on the list and press [DELETE]. You
can select more than one job to be deleted.
To exit from the JOB STATUS screen, press [CLOSE].
Viewing the scan job log
A record of scan jobs can be displayed on the [LOG] tab of the
JOB STATUS screen. To display the record on the touch panel,
press [JOB STATUS] > [LOG] > [SCAN].
On the [LOG] tab, you can view each job’s destination/file
name, agent (scan function), date and time, number of pages,
and status (job result).
Up to 1000 jobs can be listed.
To display the previous or next page, press
or
. The
number of jobs displayed on a page varies depending on the
equipment used.
If you want to register an e-mail address on the list to the
address book, press [ENTRY].
Advanced Guide
To exit from the SCAN LOG screen, press [CLOSE].
Memo
• For details of the job record displayed on the [LOG] tab,
refer to the
TopAccess Guide
.
• For details on error codes displayed in the “Status” column,
refer to the
Troubleshooting Guide
.
• The scan job log can be exported to a USB storage device.
Summary of Contents for ES7470dn
Page 27: ...1 2 3 4 5 6 2 HOW TO MAKE COPIES P 28 BASIC COPY MODES P 43 Copying...
Page 59: ...1 2 3 4 5 6 3 SENDING RECEIVING A FAX P 60 CHECKING AND CANCELING THE COMMUNICATIONS P 73 Fax...
Page 77: ...1 2 3 4 5 6 4 0 Scanning BASIC OPERATION P 78...
Page 91: ...1 2 3 4 5 6 5 List of Utilities P 92 Utilities that can be used with this machine...
Page 93: ...1 2 3 4 5 6 6 Index...
Page 96: ...March 2015 45510702EE Rev4...


