- 54 -
Connecting to a Computer
1
1.
Setup
12
Close [Print & Fax].
13
Remove “Software DVD-ROM” from the
computer.
Finish by test printing from a computer.
1
Start up [TextEdit].
2
Open an appropriate file.
3
Start printing.
The installation is complete.
For Mac OS X 10.3.9 to 10.4.11
Memo
●
The procedure below uses Mac OS X 10.4.11 as an
example. Depending on your OS, the description may be
different.
1
Ensure that your printer and the
computer are turned on and connected.
Reference
●
2
Insert “Software DVD-ROM”.
3
Double-click the [OKI] icon on the
desktop.
4
Double-click [Driver] folder > [Printer]
folder > [Installer for Mac OSX].
5
Enter the administrator’s password, and
then click [OK].
Follow the instructions displayed on the screen to
complete the installation.
6
From the [Go] menu, select [Utilities],
and then double-click [Printer Setup
Utility].
Note
●
If [Printer Setup Utility] is already running, close it
and open it again.
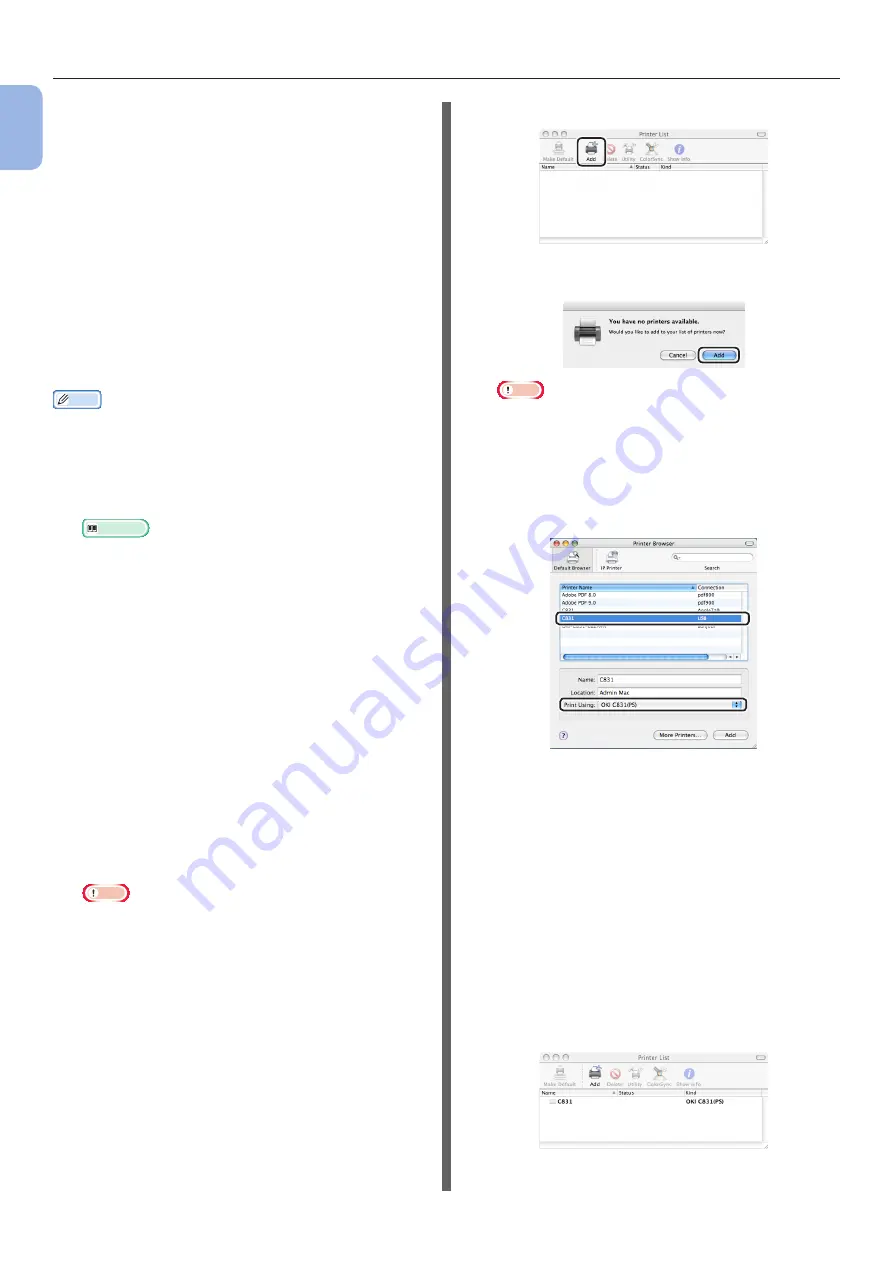
7
Click [Add].
If the [You have no printers available] dialog
box appears, click [Add].
Note
●
If the name of the printer is already displayed, select
it and click [Delete], and then click [Add].
8
Select the name of the printer where
[Connection] is [USB], and then check
that [OKI C831(PS)] is displayed in
[Print Using].
For Mac OS X 10.3.9, set as follows.
a
Select [USB] from the pop-up menu.
b
Select the printer from the list.
c
Select [Oki] from [Printer Model]
and then select [OKI C831(PS)]
from the driver list.
9
Click [Add].
10
Check that the name of your printer is
displayed in [Printer List], and then
close the window.
Summary of Contents for C834DN
Page 1: ......
Page 147: ...44902802EE Rev2...


