Performing a Test
16
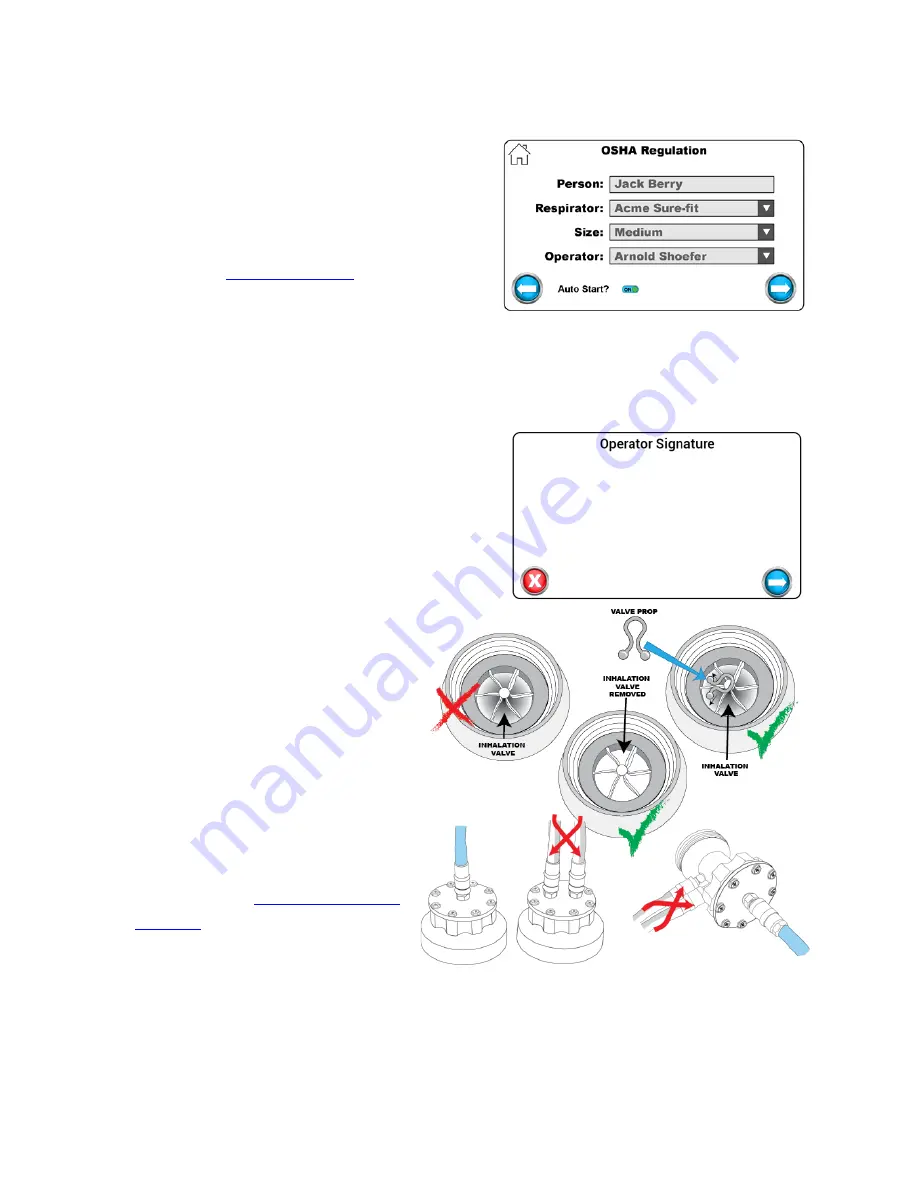
Test Screen
The test screen prompts the operator or test
subject to select or fill in the details of the test.
This includes Respirator, Size, and Operator.
The Respirator selection will only show the
respirators that have been selected during the setup
wizard or in the
Setup Respirators
module on the
settings screen.
Auto Start
The Auto Start feature is turned on by default. With this on, the test subject takes a comfortable
breath preparing to hold it once the circle in the lower right corner fills with green. The
QuantiFit2 senses the breath hold and the test automatically begins
Operator Signature
After the details of the test have been confirmed,
the operator can progress to input their signature
on screen, if desired. This feature can be turned off
in Settings>System Settings>Signature Capture.
Preparing the Respirator
If the respirator has an inhalation valve at
the place where a fit test adapter will be
connected to the respirator, it must be
removed or propped open.
When the test subject is ready, connect the
tube assembly to the adapter(s).
o
The blue tube goes to the single port.
o
The gray and clear tubes go to the two
ports that are located side by side. It
does not matter which tube is
connected to which of these two
connectors. See
for more information.
Beginning a Fit Test
After selecting or adding a person to the database, the test can begin. Explain the test to the test
subject: During each step, the test subject will be given instructions to be in a specific position for
the test, and a possible action to perform before the test step begins.
Summary of Contents for QuantiFit 2
Page 53: ...Appendix D CNP Diagram 52...
Page 108: ...Appendix D CNP Diagram 52...


