15
Inverter-Schwimmbadwärmepumpe
D
12
WARNING: Installation must be carried out by a qualified engineer.
This section is provided for information purposes only and must be checked and adapted if
necessary according to the actual installation conditions.
3.6 Hydraulic connection
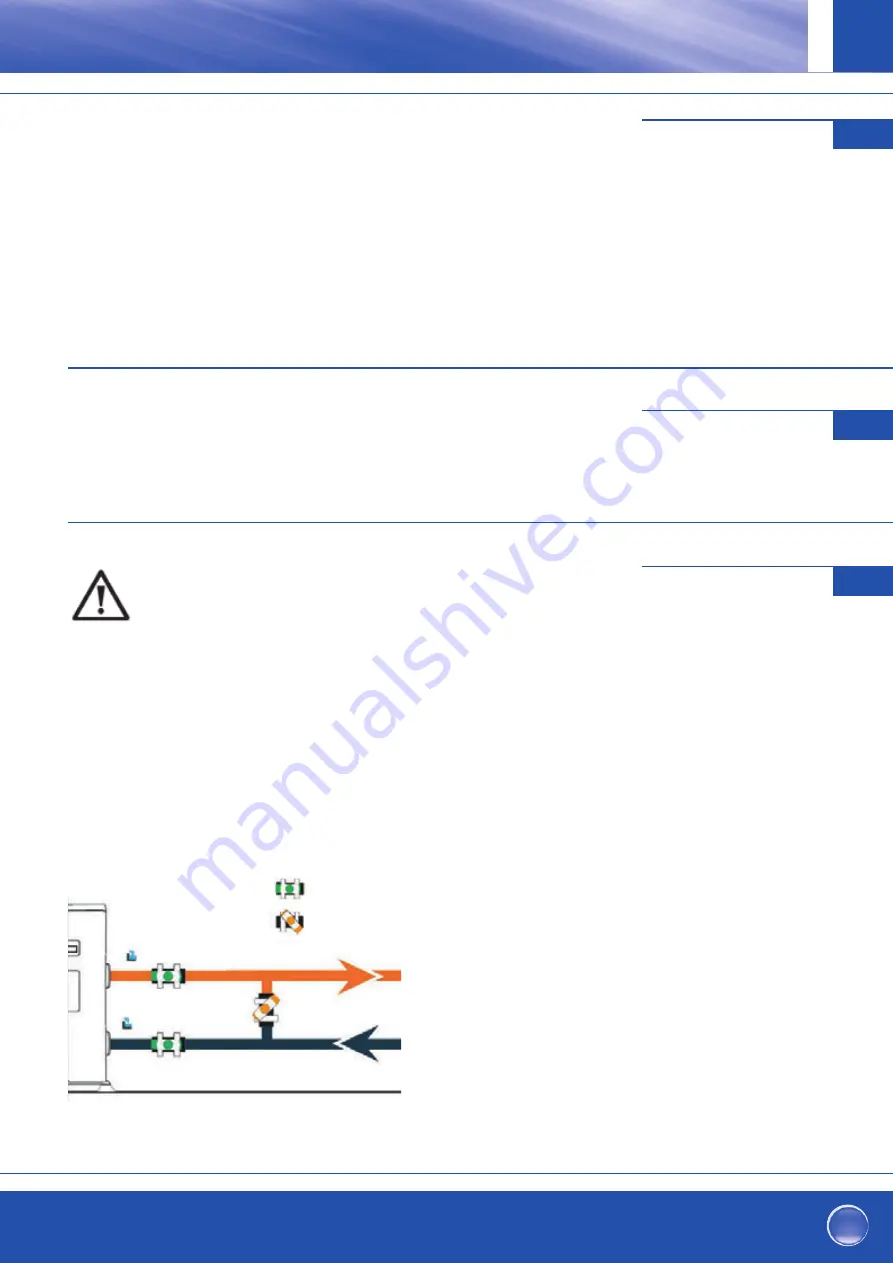
By-Pass assembly
The heat pump must be connected to the pool by means of a
By-Pass assembly.
A By-Pass is an assembly consisting of 3 valves that
regulate the flow circulating in the heat pump.
During maintenance operations, the By-Pass permits the heat
pump to be isolated from the system without interrupting your
installation.
Making a hydraulic connection with the By-Pass kit
WARNING: Do not run water through the hydraulic circuit for 2 hours after applying the adhesive.
Step 1: Take the necessary steps to cut your pipes.
Step 2: Make a straight perpendicular cut through the PVC pipes with a saw.
Step 3: Assemble your hydraulic circuit without connecting it in order to check that it perfectly fits your
installation, then dismantle the pipes to be connected. Step 4: Chamfer the ends of the cut pipes with sandpaper.
Step 5: Apply stripper to the ends of the pipes to be connected. Step 6: Apply the adhesive in the same place.
Step 7: Assemble the pipes.
Step 7: Clean off any adhesive remaining on the PVC.
Step 8: Leave to dry for at least 2 hours before putting the hydraulic circuit into water.
ZUM Schwimmbad
vom Schwimmbad
Ausgang
Eingang
11
3.3 Installation layout
3.4 Connecting the condensation draining kit
While operating, the heat pump is subject to condensation. This will result in a more or less large run-off of
water, depending on the degree of humidity. To channel this flow, we recommend that you install the
condensation drainage kit.
How do you install the condensation drainage kit|?
Install the heat pump, raising it at least 10 cm with solid water-resistant pads, then connect the drainage pipe to
the opening located under the pump.
3.5 Installing the unit on noise-damping supports
In order to minimize the noise pollution associated with heat pump vibrations, it can be positioned on vibration
absorbing pads.
To do this, you simply have to position a pad between each of the unit’s feet and its support, and then fix
the heat pump to the support with suitable screws.
Ventil halb geöff net
Ventil komplett geöff net
11
3.3 Installation layout
3.4 Connecting the condensation draining kit
While operating, the heat pump is subject to condensation. This will result in a more or less large run-off of
water, depending on the degree of humidity. To channel this flow, we recommend that you install the
condensation drainage kit.
How do you install the condensation drainage kit|?
Install the heat pump, raising it at least 10 cm with solid water-resistant pads, then connect the drainage pipe to
the opening located under the pump.
3.5 Installing the unit on noise-damping supports
In order to minimize the noise pollution associated with heat pump vibrations, it can be positioned on vibration
absorbing pads.
To do this, you simply have to position a pad between each of the unit’s feet and its support, and then fix
the heat pump to the support with suitable screws.
Während des Betriebes neigt die Wärmepumpe zu Kondenswasserbildung. Das führt je
nach Luftfeuchtigkeit dazu, dass größere oder kleinere Mengen Kondensat austreten. Zur
Ableitung des Kondensats empfehlen wir den Einbau eines Kondensatablauf-Sets.
Wie verbaut man das Kondensatablauf-Set?
Installieren Sie die Wärmepumpe mit Hilfe von stabilen und feuchtigkeitsbeständigen
Klötzen bei einem Bodenabstand von mindestens 10 cm. Dann schließen Sie die mitgelie-
ferte Kondensatleitung inkl. der Schlauchtülle, unterhalb der Wärmepumpe an die runde
Öff nung in der Bodenplatte / Auff angwanne an.
Siehe hierzu auch Seite 12, 3.3 Position Kondensatablauf.
Um die Lärmbelästigung durch Vibrationsgeräusche der Wärmepumpe zu verringern, kann
sie auf Schalldämpfern platziert werden.
Dafür legt man einfach einen Klotz jeweils zwischen Fuß und Unterbau der Wärmepumpe
und befestigt die Wärmepumpe dann mit geeigneten Schrauben auf dem Unterbau.
Anschluss des
Kondensatablauf-Sets
3.4
Installation von
Schwingungsdämpfern
3.5
Hydraulikanschluss
3.6
WICHTIGER HINWEIS:
Die Installation muss von qualifi zierten Fachpersonal ausgeführt werden.
Dieser Abschnitt ist nur zu Informationszwecken angeführt und muss un-
ter Berücksichtigung der Installationsbedingungen vor Ort geprüft und
gegebenenfalls angepasst werden.
Bypass-Set
Die Wärmepumpe muss über eine Bypass-Baugruppe an das Schwimmbad
angeschlossen werden.
Ein Bypass ist eine Baugruppe, die aus 3 Ventilen besteht, mit denen die Umwälzung
des Wassers innerhalb der Wärmepumpe reguliert wird.
Während Wartungsarbeiten kann die Wärmepumpe mithilfe der Bypass-Ventile vom
restlichen System isoliert werden, ohne dass das System unterbrochen werden muss.


