31
1-800-68-634
Octane Fitness Confidential
3.4
Rails Replacement
1. Unplug the unit and remove the side shrouds, following the directions in Section I.
2 Remove both left and right pedal arms. Use two 17mm wrenches to loosen the nut and remove the bolt; refer back
to Figure 3.2. Support the pedal arm so it does not drop when the bolt is removed. Remove the pedal arm and set
it aside; repeat for second pedal arm.
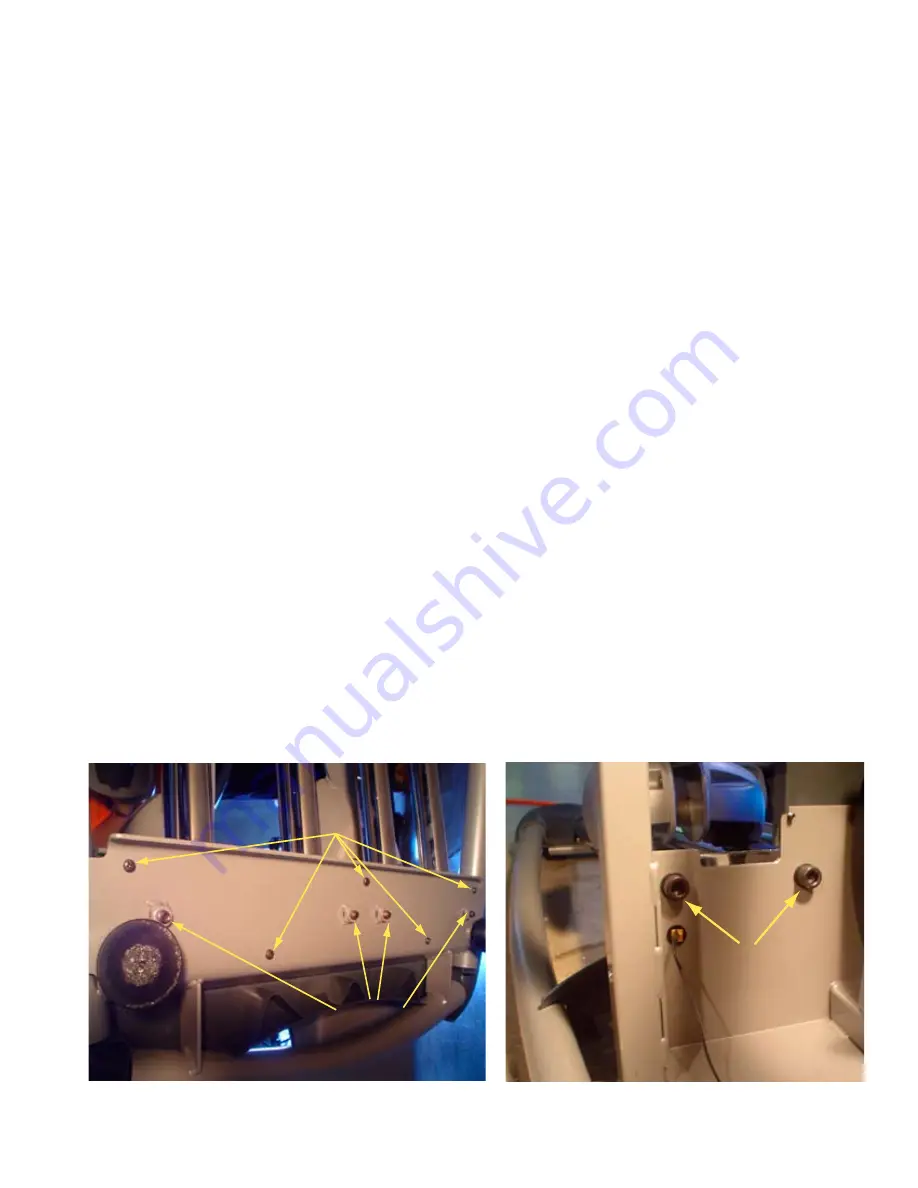
3. Tilt the machine to access the underside, then use a Phillips screwdriver to remove the five screws securing the rail
cover (Figure 3.4).
4. Use a 10mm hex wrench to remove the four (4) bolts at the top of the rail assembly (Figure 3.5).
5. Use a 6mm hex wrench to remove the four (4) bolts located on the underside of the rear support, two on each pair
of rails (Figure 3.4).
6. Remove the old rails and position the new rails.
7. Insert and tighten the screws at the top of the rails using the 10mm hex wrench.
8. Insert and tighten the lower rail bolts using the 6mm hex wrench.
9. Reposition the rear rail cover and secure with five (5) Phillips screws.
10. Slide one pedal arm into position and insert the bolt; secure the bolt with the nut; tighten. Repeat for the second
pedal arm. Move the pedal arms forward and backward a few times; they should feel tight with no side-to-side
motion.
11. Wipe down the chrome rails with a dry rag. You may apply a thin coat of white lithium grease to all four rails only.
Do not apply grease to the wheels. Do not use WD-40
®
or a silicone spray. With a clean rag or paper towel, work
the grease down the rails, covering the rails with a small amount of lubricant. Remove excess grease with a dry
rag; you should be able to feel the grease but not see it.
12. Use the moving arms to move the machine through its motion forward and backward several times to test.
13. Replace the shrouds and secure.
Figure 3.4
Rail bolts
on underside
of machine
Screws
securing
rail cover
Figure 3.5
Screws
at top of rails
(2 each side)


