Various settings
11
CS175 (Phase3)
11-127
3
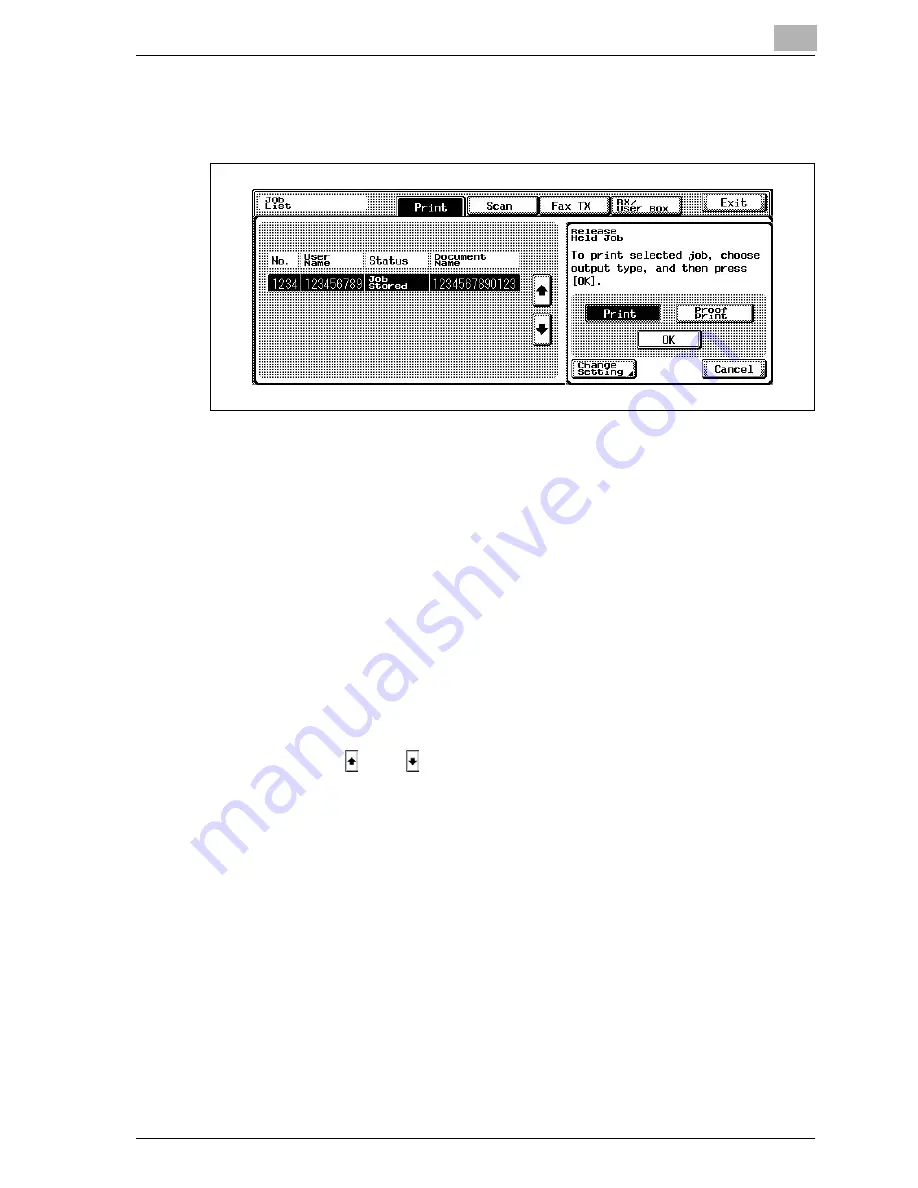
Touch [Release Held Job].
The Release Held Job screen appears.
4
To check the print results, select the job whose sample copy is to be
printed from the job list, select [Proof Print], and then touch [OK].
–
Check the print results on the printed pages.
5
From the job list, select the job that you want to print.
–
To change the settings of the printing conditions, continue with
step 6.
–
If you are not changing the settings of the printing conditions, skip
to step 9.
6
Touch [Change Setting].
The Change Setting screen appears.
–
If the job to be removed from the Held Job list is not displayed,
touch [
] or [
] until the desired job is displayed.
–
To change the settings of or cancel multiple jobs together, select
one job, and then touch the next jobs.
–
If an incorrect job was selected, touch the button for the selected
job again to deselect it.
7
Change the printing conditions on the Change Setting screen, and then
touch [OK].
The Release Held Job screen appears again.
8
Select [Print], and then Touch [OK].
The stored job is changed to an active job, then printed.
–
To cancel printing of the job, touch [Cancel].
Summary of Contents for CS175 Phase 3
Page 1: ...Oc CS175 Phase 3 User Manual Print Operations...
Page 14: ...Contents 12 CS175 Phase3...
Page 15: ...1 Introduction...
Page 16: ......
Page 27: ...2 Overview...
Page 28: ......
Page 39: ...3 Installing the printer driver...
Page 40: ......
Page 44: ...3 Installing the printer driver 3 6 CS175 Phase3...
Page 45: ...4 Setting up network printing...
Page 46: ......
Page 90: ...4 Setting up network printing 4 46 CS175 Phase3...
Page 91: ...5 Various printing methods...
Page 92: ......
Page 123: ...Various printing methods 5 CS175 Phase3 5 33 PCL driver PostScript driver...
Page 128: ...5 Various printing methods 5 38 CS175 Phase3...
Page 129: ...6 Setting up the PCL driver...
Page 130: ......
Page 169: ...Setting up the PCL driver 6 CS175 Phase3 6 41 6 6 Specifying the quality tab settings...
Page 195: ...7 Setting up the PostScript driver Windows...
Page 196: ......
Page 232: ...7 Setting up the PostScript driver Windows 7 38 CS175 Phase3...
Page 233: ...8 Setting up the PPD driver Windows...
Page 234: ......
Page 244: ...8 Setting up the PPD driver Windows 8 12 CS175 Phase3...
Page 245: ...9 Setting up the PPD driver Mac OS 9 2...
Page 246: ......
Page 263: ...10 Setting up the PPD driver Mac OS X...
Page 264: ......
Page 290: ...10 Setting up the PPD driver Mac OS X 10 28 CS175 Phase3...
Page 291: ...11 Various settings...
Page 292: ......
Page 335: ...Various settings 11 CS175 Phase3 11 45 The login page appears after logging out...
Page 372: ...11 Various settings 11 82 CS175 Phase3 System tab ROM version Displays the ROM version...
Page 415: ...Various settings 11 CS175 Phase3 11 125 For details refer to Security on page 10 16...
Page 434: ...11 Various settings 11 144 CS175 Phase3 11 Touch Yes...
Page 435: ...12 Troubleshooting...
Page 436: ......
Page 442: ...12 Troubleshooting 12 8 CS175 Phase3...
Page 443: ...13 Appendix...
Page 444: ......
Page 447: ...Appendix 13 CS175 Phase3 13 5 13 2 Configuration page Oc CS175...
Page 448: ...13 Appendix 13 6 CS175 Phase3 13 3 Font list PCL font list Oc CS175...
Page 449: ...Appendix 13 CS175 Phase3 13 7 PS font list Oc CS175...
Page 450: ...13 Appendix 13 8 CS175 Phase3 Demo page...
Page 460: ...13 Appendix 13 18 CS175 Phase3...


