Installing the Printer Driver
2-8
Confirming the Installation
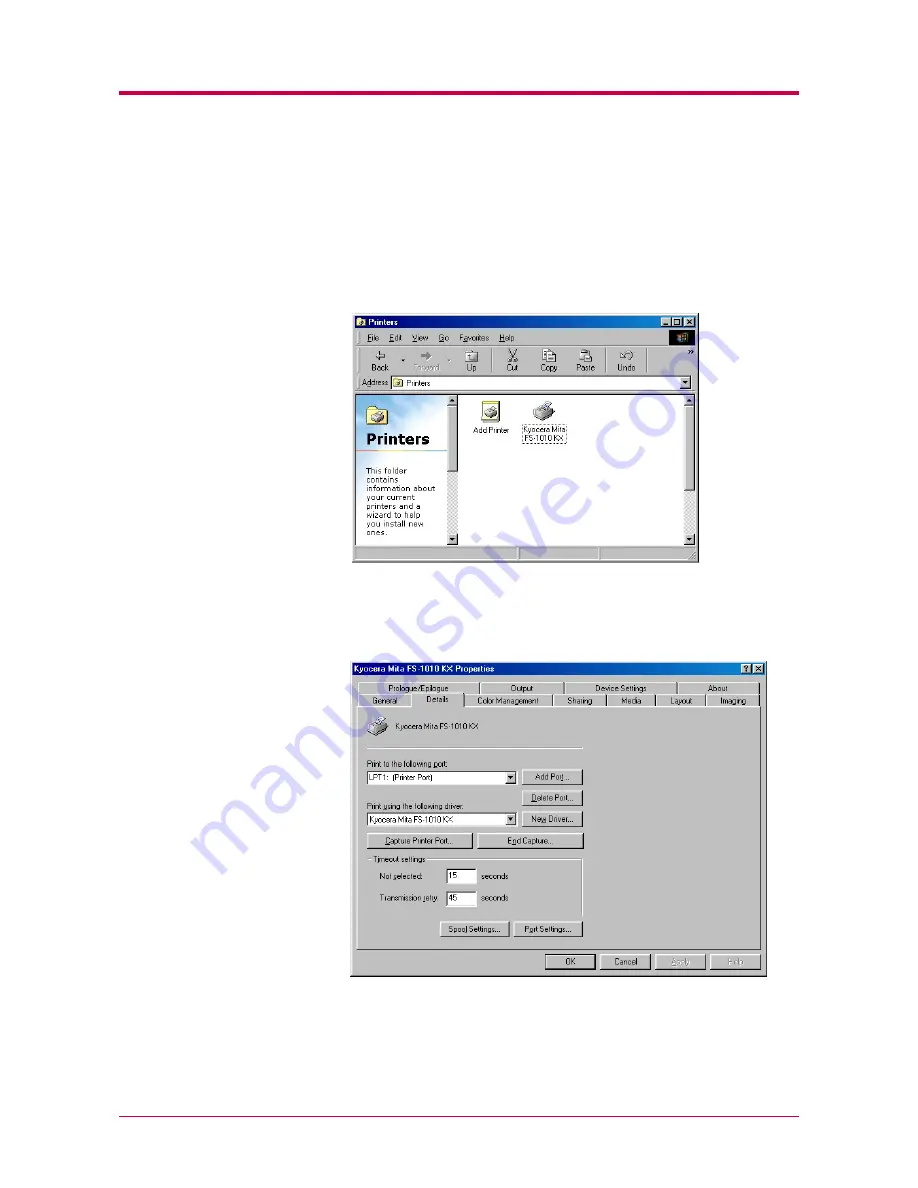
After you restart the printer, follow the instructions below to make sure if
the printer driver has been installed correctly.
1
Click the Windows
Start
button, point
Setting
, and click
Printers
to
make sure the
Kyocera Mita FS-1010 KX
icon has been added to the
Printers
window.
2
Right click the
Kyocera Mita FS-1010 KX
icon and select
Properties
.
The following dialog will open. Click the
Details
tab to make sure
the port you have selected in
step 11
step 11
step 11
step 11
on page
2-6
2-6
2-6
2-6
is shown in the
Print to the following port
list.
Click the
OK
button to close the window. Proceed to section
2.2
2.2
2.2
2.2
Setting Up the Default Properties
Setting Up the Default Properties
Setting Up the Default Properties
Setting Up the Default Properties
on page
2-16
2-16
2-16
2-16
to make default
settings.
Summary of Contents for 1010N - B/W Laser Printer
Page 1: ...1 1 1 Oc PP10 Operation Guide Education Services Oc Operation Guide English version...
Page 145: ...List of Fonts A 5 Font number Font samples 70 71 72 73 74 75 76 77 78 79 80...
Page 146: ...List of Fonts A 6 Font KPDL Fonts 1...
Page 147: ...List of Fonts A 7 Font KPDL Fonts 2...
Page 172: ...D 1 Appendix D Printer Specifications D...
Page 175: ...E 1 Appendix E Glossary E...
Page 179: ...Index 1 Index...
Page 182: ...1001TI...


