


Chapter 7 Installing the main unit
89
BCM50 Installation and Maintenance Guide
Installing the BCM50 unit on a desktop or shelf
To mount a BCM50 unit on a desktop or shelf, attach the supplied rubber feet to the bottom of the
unit. If the BCM50 system includes additional units, you can set the additional units beside, or
stack them on top of, the first unit. If you are mounting the additional units beside the first unit,
attach the supplied rubber feet to the bottom of each unit. If you are stacking the additional units
on top of the first unit, mount each unit into the tabs on top of another unit.
To install the BCM50 unit on a desktop or shelf
To install the BCM50 unit on a desktop or shelf:
1
Insert the power supply retention clip into the BCM50 unit.
2
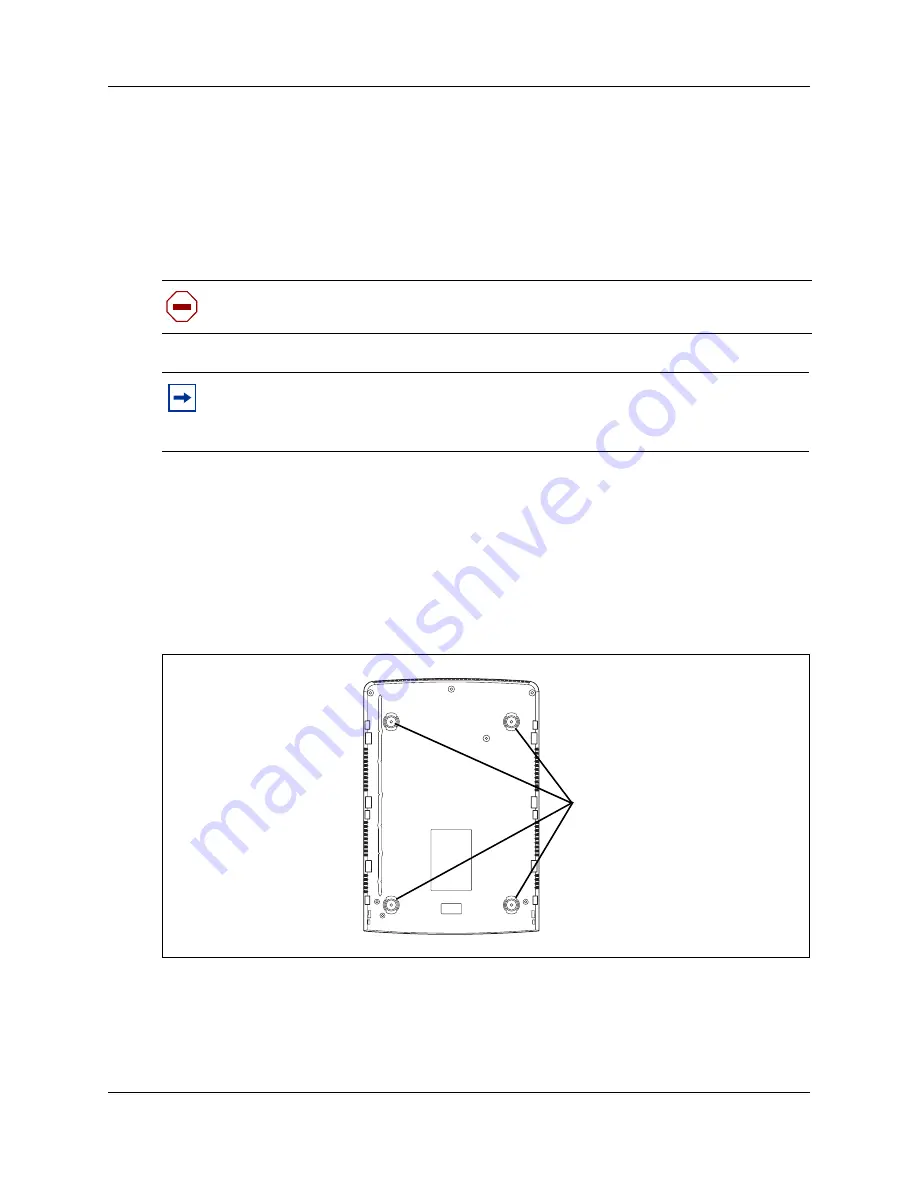
Attach the four
self-adhesive rubber feet to the bottom of the BCM50 unit by peeling off the
paper backing and placing the feet on the unit as indicated in
Figure 38
.
Figure 38 Location for feet on the bottom of the BCM50 unit
3
Position the BCM50 unit on a table or shelf. Make sure you leave enough space around the
unit for ventilation and access to the cables.
4
If the BCM50 system has additional units, you can install the other units on top of, or beside,
the existing BCM50 unit.
Caution:
Refer to
“Checking the installation prerequisites” on page 75
for acceptable
environmental conditions before selecting a location for the BCM50 system.
Note:
To keep the BCM50 unit operating at the optimal internal temperature, keep the
top, sides, and rear clear of obstructions and away from the exhaust of other equipment.
Do not place any objects, except other BCM50 units, on top of the main unit.
Attach feet here
Summary of Contents for BCM50
Page 1: ...Part No N0027152 01 08 April 2005 BCM50 Installation and Maintenance Guide ...
Page 8: ...8 Task List N0027152 01 N0027152 01 ...
Page 16: ...16 Contents N0027152 01 N0027152 01 ...
Page 34: ...34 Chapter 1 Getting started with BCM50 N0027152 01 N0027152 01 ...
Page 58: ...58 Chapter 2 Introducing the BCM50 hardware N0027152 01 N0027152 01 ...
Page 70: ...70 Chapter 4 Determining DHCP server configuration and IP address N0027152 01 N0027152 01 ...
Page 74: ...74 Chapter 5 Installing the BCM50 system N0027152 01 N0027152 01 ...
Page 96: ...96 Chapter 8 Installing an expansion unit N0027152 01 N0027152 01 ...
Page 116: ...116 Chapter 10 Installing telephones and peripherals N0027152 01 N0027152 01 ...
Page 122: ...122 Chapter 11 Installing the analog terminal adapter N0027152 01 N0027152 01 ...
Page 126: ...126 Chapter 12 Configuring the BCM50 system N0027152 01 N0027152 01 ...
Page 148: ...148 Chapter 15 Using the Startup Profile to configure parameters N0027152 01 N0027152 01 ...
Page 158: ...158 Chapter 17 Connecting the BCM50 system to the LAN and WAN N0027152 01 N0027152 01 ...
Page 168: ...168 Chapter 19 Replacing the BCM50 system components N0027152 01 N0027152 01 ...
Page 172: ...172 Chapter 20 Replacing a power supply N0027152 01 N0027152 01 ...
Page 178: ...178 Chapter 21 Replacing a main unit N0027152 01 N0027152 01 ...
Page 182: ...182 Chapter 22 Replacing a media bay module N0027152 01 N0027152 01 ...
Page 214: ...214 Appendix E DTM wiring chart N0027152 01 N0027152 01 ...
Page 220: ...220 Appendix G GATM wiring chart N0027152 01 N0027152 01 ...
Page 224: ...224 Appendix H 4x16 wiring charts N0027152 01 N0027152 01 ...
Page 240: ...240 Appendix K System region attributes N0027152 01 N0027152 01 ...
Page 246: ...246 Index N0027152 01 N0027152 01 ...


