


RV Series Automated Dispensing Systems
79
www.nordsonefd.com [email protected]
+1-401-431-7000 Sales and service of Nordson EFD dispensing systems are available worldwide.
#
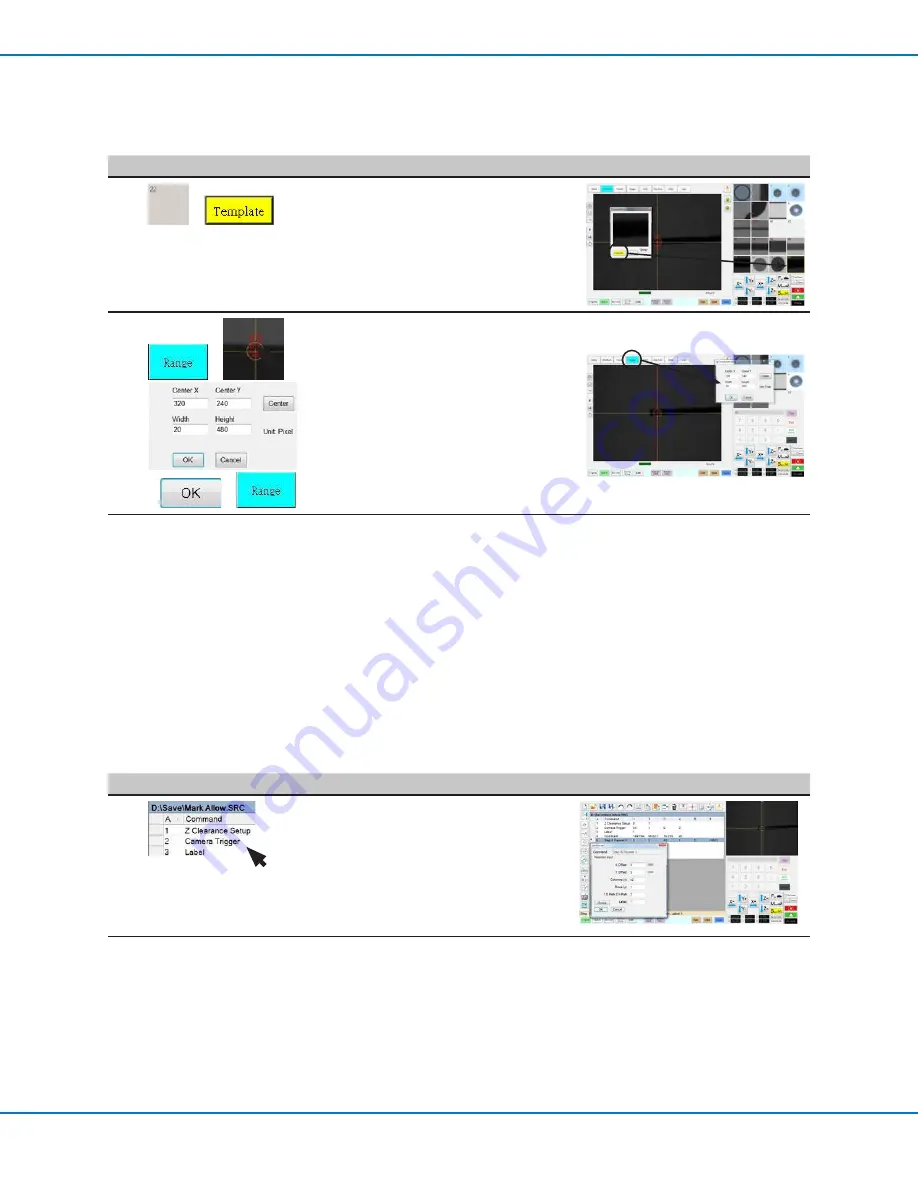
Click
Step
Reference Image
5
>
• Click a socket in the Mark Library to
save the mark, then click TEMPLATE
when the Template Match window
appears.
• Make a note of the Mark No.
6
>
>
>
>
• Click RANGE to set where the system
searches for the mark.
• Double-click the crosshairs in the center
of the mark and enter Width and Height
values.
NOTE:
The Width value must be the
same as the Width specified previously
(20 in this example).
• Click OK.
• Click RANGE again to save.
7
• Continue to the next procedure, “To Use
Mark Follow and / or Mark Follow Adjust
in a Program”.
To Use Mark Follow and / or Mark Follow Adjust in a Program
In this example, the Step & Repeat X command is used to cause the system to dispense along the curved line.
PREREQUISITES
You have completed “To Create a Mark Image for a Curved Line” on page 78.
#
Click
Step
Reference Image
1
• Insert the beginning commands for the
program. Refer to “Example program
using Find Mark, Mark Follow, and
Mark Follow Adjust commands” on
page 83 for the complete example
program.
NOTE:
The Camera Trigger command
can be used if needed.
Continued on next page
How to Use Mark Follow to Dispense Along a Curved Line (continued)
To Create a Mark Image for a Curved Line (continued)


