PROPlus / PRO Series Automated Dispensing Systems
77
www.nordsonefd.com [email protected]
+1-401-431-7000 Sales and service of Nordson EFD dispensing systems are available worldwide.
#
Click
Step
Reference Image
3
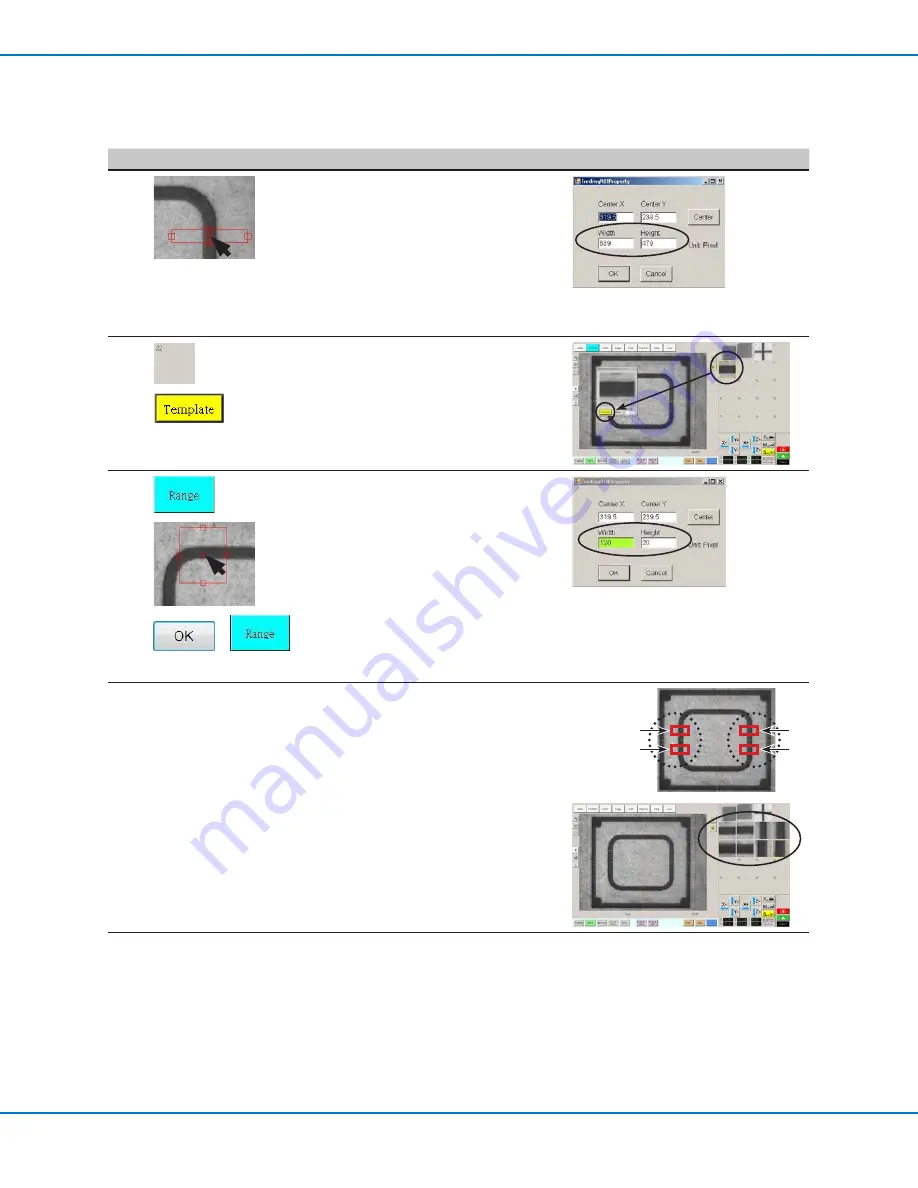
• Double-click the crosshairs in the center
of the red rectangle and then enter
values for Width and Height.
NOTE:
For vertical marks, the Height
value can be smaller, but the Width
value should be large enough for the
system to find the mark.
• Make a note of these values for later
use.
4
>
• Click a socket in the Mark Library to
save the mark, then click TEMPLATE
when the Template Match window
appears.
5
>
>
>
• Click RANGE to set how the system
searches for the mark.
• Double-click again in the center of the
mark and then enter the same Width
and Height values that were entered in
step 3.
NOTE:
For better accuracy, ensure that
the Width and Height values are the
same for both Set Mark and Range.
• Click OK.
• Click RANGE again to save.
6
• With the camera centered over the
workpiece, repeat steps 1–5 for the
other three marks located in the vertical
planes (numbers 6, 7, and 8 in the
reference image).
Vertical
marks
(circled)
(5, 6, 7, 8)
8
7
5
6
All eight marks are now saved into the
Mark Library. These eight marks can be
used as Trig Marks in the Step & Repeat
dispense program.
7
• Continue to “To Use Eight Trig Marks
in a Step & Repeat Program” on
page 78.
Method 1: Using Eight Trig Marks (Highest Accuracy) (continued)
To Create Four Vertical Trig Marks and Set the Range (continued)


