11/33
SI 72
4.8.5 Envelope sealing
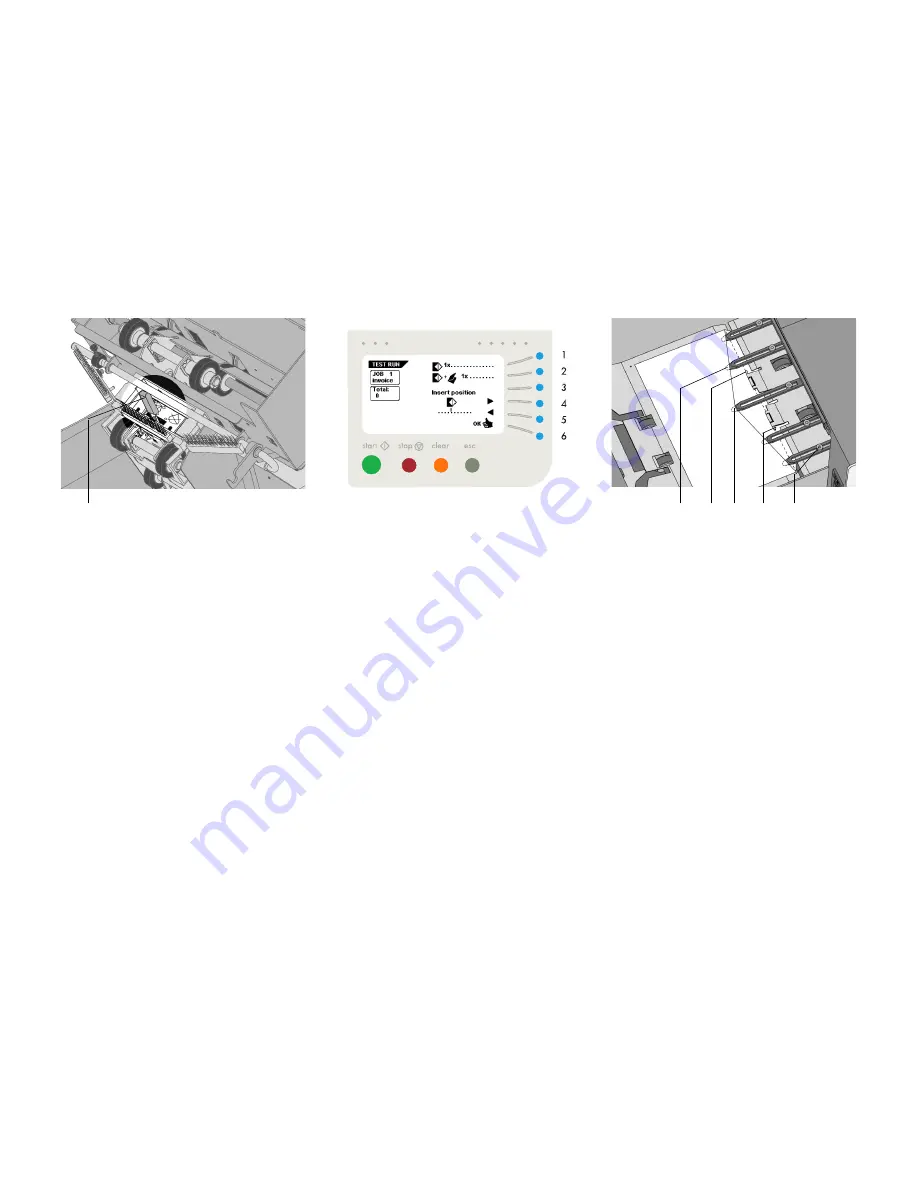
To turn sealing on or off, lift the locking lever of the loc (D
of fig.3, page 4) and pull the loc into the vertical position.
Shift the blue handle A (fig. 20) towards to set sealing off
.
Shift the handle towards to set sealing on. Push the loc
down until it locks.
Fig. 20
4.9 Test run menu
Press key 3 in the “main menu (1)” to enter the “test run”
menu (fig. 21). The “test run” menu shows the following
functions:
• feed one envelope onto the insert table (key 1),
• make one insert (key 2),
• set the insert position (= envelop stop position) to the
right (key 4),
• set the insert position to the left (key 5),
• save the insert position setting with “OK” (key 6) which
will get you to the “main menu (1)”.
First the insert position must be set. Then the insert fingers
must be adjusted. To check all settings a test run can be
made.
4.10 Insert position
Press key 1 in the “test run” menu to bring one envelope
onto the insert table. Lift the locking lever of the loc and pull
the loc into the vertical position.
The flap folding line must be positioned under the green
indicator A (fig. 22). If necessary adjust the flap folding
line position by pressing key 4 or 5 in the “test run” menu.
Each key stroke stops the next envelope 0,5 mm (0.02
Fig. 21
inch) to the right (earlier) or to the left (later). Check the
settings by pressing key 1 again.
4.11 Envelope insert fingers
To adjust the insert fingers B (fig. 22) (5 in total) loosen the
knurled knob C (fig. 22) on top of each finger.
Then adjust each finger so that the tip enters about
5 mm (0.2 inch) into the envelope. Re-tighten the knurled
knob. The fingers on either side of the loc can be moved
sideways to the desired position. Place the outer fingers
about 10 mm (0.4 inch) from the edges of the envelope.
The middle finger cannot be moved sideways.
Check the position of the insert fingers when changing to
a different type of envelope.
When adjusting the fingers sideways, be sure that finger
D (fig. 22) is not positioned over sensor E
(fig. 22). When an incorrect finger position is adjusted the
display shows an “error screen” see page 23).
Fig. 22
A
A
C
B
E
D
Key


