

15
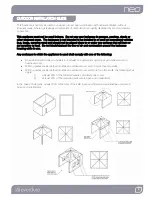
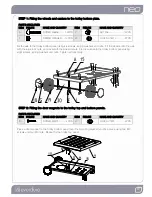
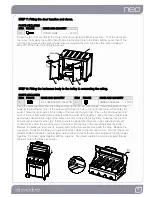
Screw the two door handles to the fronts of the doors using two M4 screws each. To fit the doors into
the trolley, firstly place the bottom (fixed) hinge into the door hole in the trolley bottom panel, then fit the
top hinge by squeezing the spring hinge down and angling the door into place (the spring hinge will
extend to fit the hole in the trolley top panel).
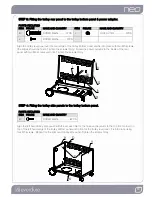
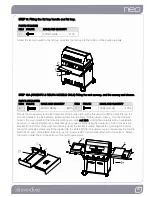
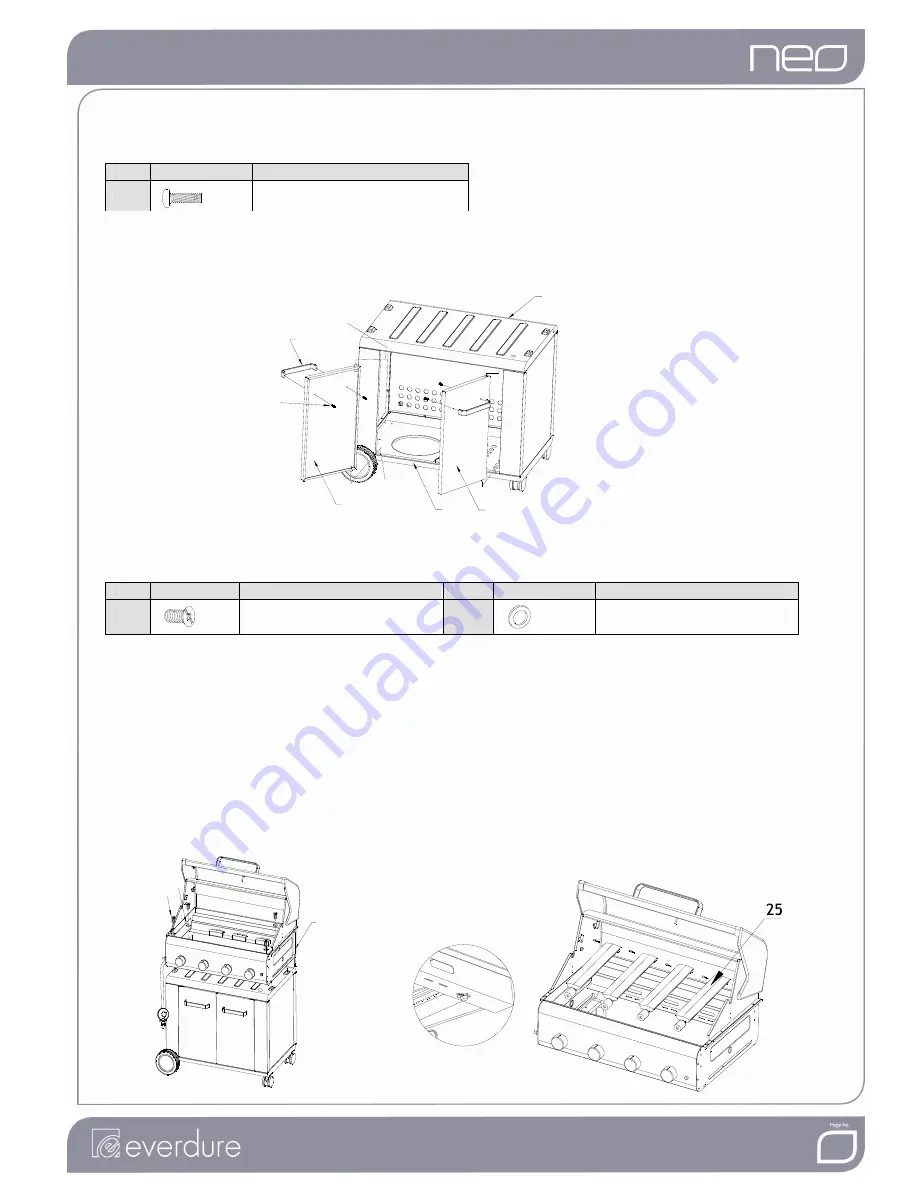
Place the barbecue body onto the trolley and line up the four mounting holes. Thread the switch wiring
cable (at the front right corner of the barbecue) through the hole in the front right corner of the trolley top
panel. Thread the light cable into the trolley at the rear right hand corner. Place a thin fiber washer onto
each of the four flat head screws, and screw the two parts down together. Keep the face of the screws
as flush as possible to the edge of the barbecue body, to help the fat tray slide. Take the four cast iron
burners and remove the wire clips. Fit the burners by placing its throat over a gas valve (behind each
control knob). Lower the tab at the rear of the burner into the hole in the rear of the barbecue body.
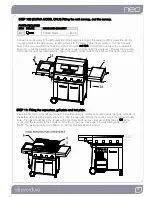
Remove the barbecue rear panel (4 screws) and clip the burners into place with the clips. Replace the
rear panel. Go inside the trolley, and gather the three cables to the rear right corner. Connect the power
adaptor cable to the switch cable & light cable and then connect the two remaining switch & light cables
together. Tie loose cables together with the cable tie. The power cable & plug can be passed through
the large hole in the trolley rear panel.
STEP 7: Fitting the door handles and doors.
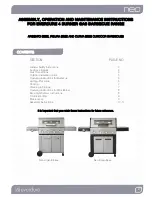
PARTS REQUIRED
ITEM FIGURE
NAME AND QUANTITY
C
SCREW M4X8..…..............4PCS
STEP 8: Fitting the barbecue body to the trolley & connecting the wiring.
PARTS REQUIRED
ITEM FIGURE
NAME AND QUANTITY
ITEM
FIGURE
NAME AND QUANTITY
E
FLAT HEAD SCREW M5..4PCS J
FIBRE WASHER M5.........4PCS
8
E
J
15
C
9
13
14
17
SECOND
FIRST