2-22
System Configuration and Setup
Preparing the BIOS Update Diskette
Before using the BIOS update diskette you must make the diskette BIOS flash ready. Refer to
the
readme.txt
file on the diskette before using the diskette.
Follow these instructions to prepare the BIOS Update Diskette.
1.
Scan the hard drive for any computer viruses.
2.
Enable the diskette for write access.
3.
Insert the diskette into the diskette drive.
4.
Type
a:install
at the DOS prompt and follow the on-screen instructions.
Install.bat copies the DOS system files from the hard drive onto the BIOS Update Diskette
to make it BIOS flash ready.
The system prompts when the process is complete.
5.
Scan the BIOS Update Diskette for computer viruses.
The diskette is ready for use.
Performing the BIOS Update
Follow these steps to perform the BIOS update.
1.
Make sure the computer is operating under AC power and power is off. Insert the BIOS
Update diskette into the diskette drive.
2.
Power on the computer with the diskette in the drive. The computer boots and automatically
loads the utility. A message similar to the following appears.
The NEC BIOS Update Utility should not be used to modify the BIOS in a Versa system
which is docked. If the Versa is docked, please exit the BIOS Update Utility, power down,
and undock the Versa before running the utility. Plug in the AC cable before restarting the
flash utility.
3.
Press
Enter
to continue.
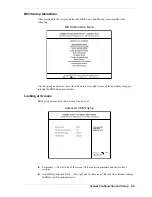
The utility checks the currently installed BIOS version and the diskette’s BIOS version. The
Main menu appears.
4.
Use the arrow keys to highlight the “Display BIOS Version” option on the Main Menu. Use
this option to check the currently installed BIOS version and the version of the new
replacement BIOS.
Press any key to return to the Main menu.
5.
Highlight the “Install New BIOS” option and press
Enter
.
6.
Press
Y
and then press
Enter
. After about four minutes, a message appears telling you to
remove the diskette from the drive and to power down.
Remove the diskette and power down by pressing and holding in the power button for four
seconds to ensure proper shutdown.
The next time you power on the computer, the system will have the latest NEC Versa VXi
computer BIOS revision level.
7.
Enter Setup to restore the default parameter settings.
8.
Be sure to modify any custom settings that you may have previously configured.
Summary of Contents for VERSA VXi
Page 61: ...3 Disassembly and Reassembly Required Tools and Equipment Disassembly Reassembly...
Page 84: ...4 System Board Layout Audio Board DC DC Board I O Board Main Board...
Page 87: ...5 Illustrated Parts Breakdown Illustrated Parts Breakdown Parts List...
Page 94: ...7 Troubleshooting Quick Troubleshooting Helpful Questions...
Page 102: ...9 Specifications System Components Memory Map Interrupt Controllers...


