
NVM-2e Menu Trees
Database Management Menu (Sheet 3)
46
◆
NVM-2e/i-Series Quick Setup Guide
Chapter 6: NVM-2e Menu Trees
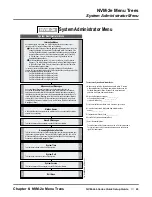
Database Managem ent Menu (Sheet 3)
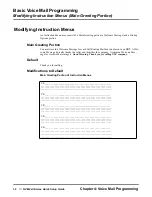
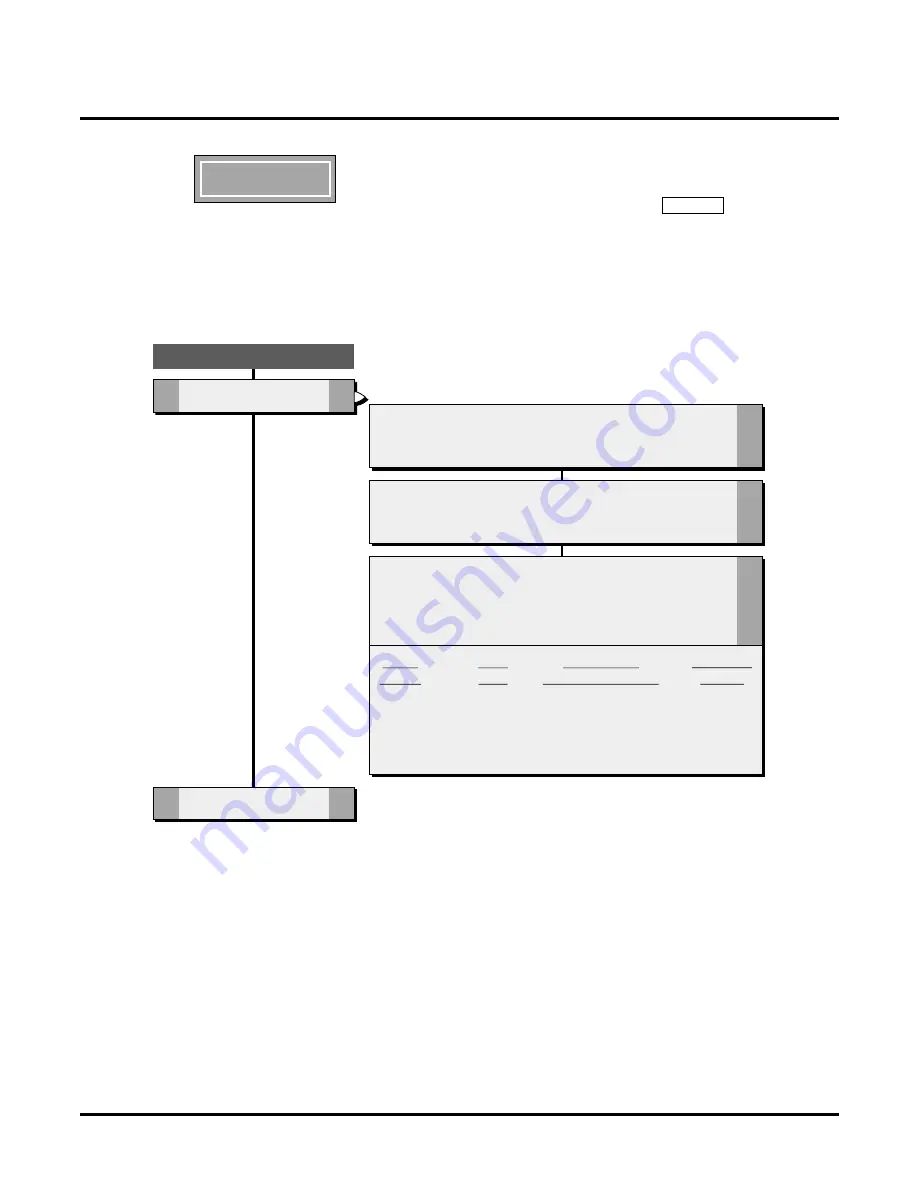
Database Management Menu
NVM-2e
Sheet 3 of 3
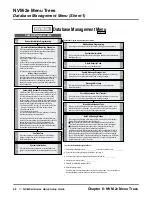
To access the Database Management Menu:
1.
2.
3.
4.
.
.
Dial Voice Mail extension number_______________ or Voice Mail outside number_______________.
If you hear the Instruction Menu, dial #. Otherwise, go to step 3.
If a mailbox is requested, dial System Administrator mailbox number_______________.
If requested, dial Security Code_______________.
5 Press DM for Database Management Menu.
6 Select the desired feature.
To select a feature, dial the letters shown to the left of the feature name. For your convenience, their
corresponding numbers are shown to the right of the feature name.
Database Management Menu
P/N
NVM2EDBM2,
APRIL
2001
7 4
SI
System Initialization
#
#
Exit Menu
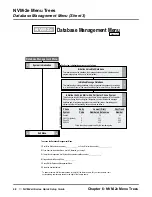
The System Initialization options are as follows:
1
Initialize Voice Mail Database
This initializes the entire database (the message database will be initialized and all
programming options will be set to default values).
2
Initialize Message Database
This initializes the message database so that all personal messages and recordings
(e.g., Instruction Menu) will be erased and the default prompt, if any, will be replaced.
3
Initialize the Voice Mail with a Particular Phone System
This allows you to select the phone system that will be integrated with the Voice Mail.
When you change the phone system integration, you also initialize the message
database and all programming options return to default values. Available phone
systems with their corresponding entry codes are as follows:
Phone
System
Portrait
28i / 124i (default)
Onyx VS
DS-2000
Entry
Code
1
2
3
4
Lowest (First)
Numbered Extension
10
301
300
300
First Trunk
Number
01
001
348
401
Follow the voice prompts to modify the numbering plan.


