62
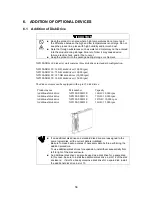
<Addition procedure>
(1) Power
check
Make sure that the power switch of the disk enclosure to be added is set to OFF and
the plug of the power cords is removed from AC outlet.
The powers of the disk array and host units may be set to ON. However, it is
recommended to advance the procedure with the powers set to OFF.
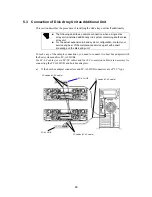
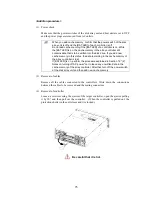
(2) Connection of an additional disk enclosure with the existing disk enclosure
Use the FC cable (HSSDC) provided with the additional disk enclosure or the FC
cable (HSSDC) of the separately priced DE cable (NF9120-SJ04E). Push the
connector at either end of the FC cable into the FC-OUT connector on adapter 0
(ADP0) of the existing disk enclosure until a click is heard. The FC cable has the
same connectors at both ends. Either connector may be connected to the adapter of
the existing disk enclosure.
Push the connector at the other end of the FC cable into the FC-IN connector on
adapter 0 (ADP0) of the additional disk enclosure until a click is heard.
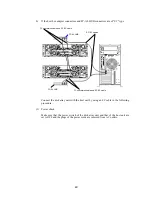
Similarly, connect the FC-OUT connector on adapter 1 (ADP1) of the existing disk
enclosure to the FC-IN connector on adapter 1 (ADP1) of the additional disk
enclosure.
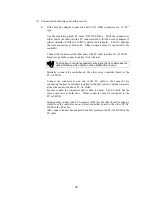
Subsequently, use the DE diagnosis cable provided with the additional disk
enclosure or the DE diagnosis cable of the separately priced DE cable
(NF9120-SJ04E). Push the connector at either end of the DE diagnosis cable into
the DE-DIAG connector [PORT1] on adapter 0 (ADP0) of the existing disk
enclosure until a click is heard. The DE diagnosis cable has the same connectors at
both ends. Either connector may be connected to the adapter of the existing disk
enclosure.
Push the connector at the other end of the DE diagnosis cable into the DE-DIAG
connector [PORT0] on adapter 0 (ADP0) of the additional disk enclosure until a
click is heard.
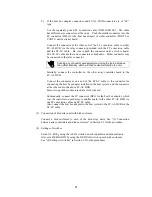
Similarly, connect the DE-DIAG connector [PORT1] on adapter 1 (ADP0) of the
existing disk enclosure to the DE-DIAG connector [PORT0] on adapter 1 (ADP1) of
the additional disk enclosure.
Summary of Contents for NF2300-SR412E
Page 7: ...v ...
Page 8: ...vi ...
Page 9: ...vii ...
Page 10: ...viii ...
Page 63: ...45 ...
Page 65: ...47 Sample configuration 2 NF2300 SR4xxE NF2300 SP02E ...

