English-18
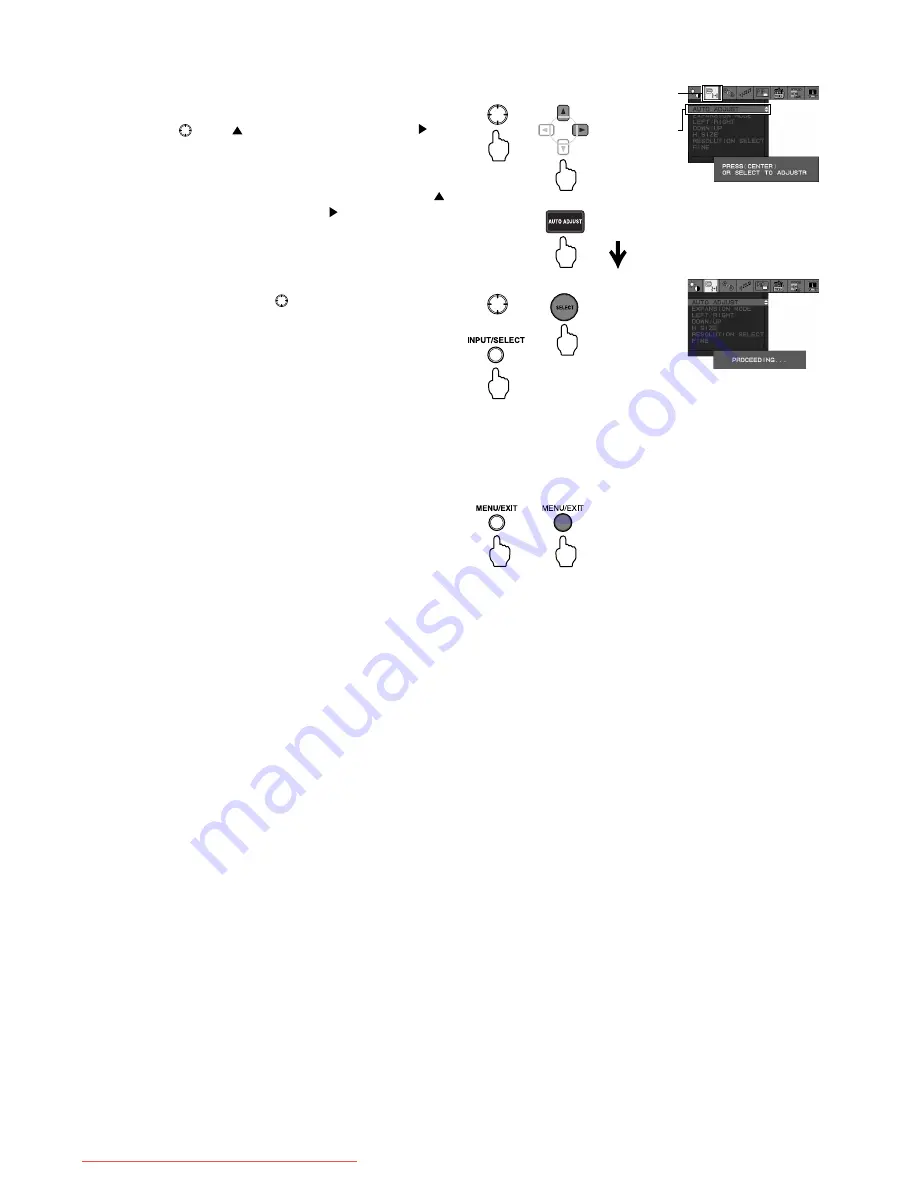
5. Perform Auto Adjust for position, horizontal size, and
phase.
1. On Monitor
After completing Auto Adjust for contrast, press the
button
in the direction five times and to the
direction once to choose [MONITOR SETTING] ->
[AUTO ADJUST].
On Remote Control
After completing Auto Adjust for contrast, press the
Control button five times and the button once to
choose [MONITOR SETTING] -> [AUTO ADJUST].
Or press the AUTO ADJUST button.
2. On Monitor
Press the middle of the
button or press the
INPUT/SELECT button.
On Remote Control
Press the SELECT button.
To match the input signal, Auto Adjust for the
horizontal display position, vertical display position,
horizontal size, and phase is performed.
When the [Adjusting…] message disappears,
Auto Adjust is complete.
Now all the Auto Adjust operations are complete.
6. Press the MENU/EXIT button on the monitor or the
remote controller to exit the OSD Screen.
Monitor
Remote Control
Monitor
Remote Control
MONITOR
SETTING
AUTO
ADJUST
Monitor
Remote Control
or
or
TIP:
• Auto Adjust may not function correctly when either: a line-based screen, such as a DOS prompt is displayed;
or the image is not displayed in full screen mode. In this case, adjust the monitor manually (Page 23 to 25).
• Auto Adjust may not function correctly depending on the type of computer or video card, or the resolution setting.
In this case, adjust the monitor manually.
• Auto Adjust may not function correctly when the displayed image is not sufficiently white. In this case, adjust the
monitor manually.
Downloaded from ManualMonitor.com Manuals


