English-17
English
Performing Auto Adjust (PC Analog Connection Only)
If the monitor is connected to a computer through an analog connection, perform Auto Adjust before using the monitor.
Then apply individual adjustment if necessary using the respective monitor controls (Page 23 to 25).
Auto Adjust can be divided into two sections: one for contrast, and the other for position, horizontal size, and phase.
Perform both Auto Adjust sections.
NOTE:
• Auto Adjust sets the display contrast, position, horizontal size, and phase automatically to the optimum.
No Auto Adjust is required when a digital connection is used.
• For details of the Auto Adjust operations, including how to display the OSD Screen, see “OSD Screen Operations”
on page 21.
1. Turn on the monitor and the computer.
2. Press the INPUT/SELECT button on the monitor, or the D-SUB button in the VIDEO INPUT area on the remote controller
to change the video input to D-Sub.
Setting Up
Monitor
Remote Control
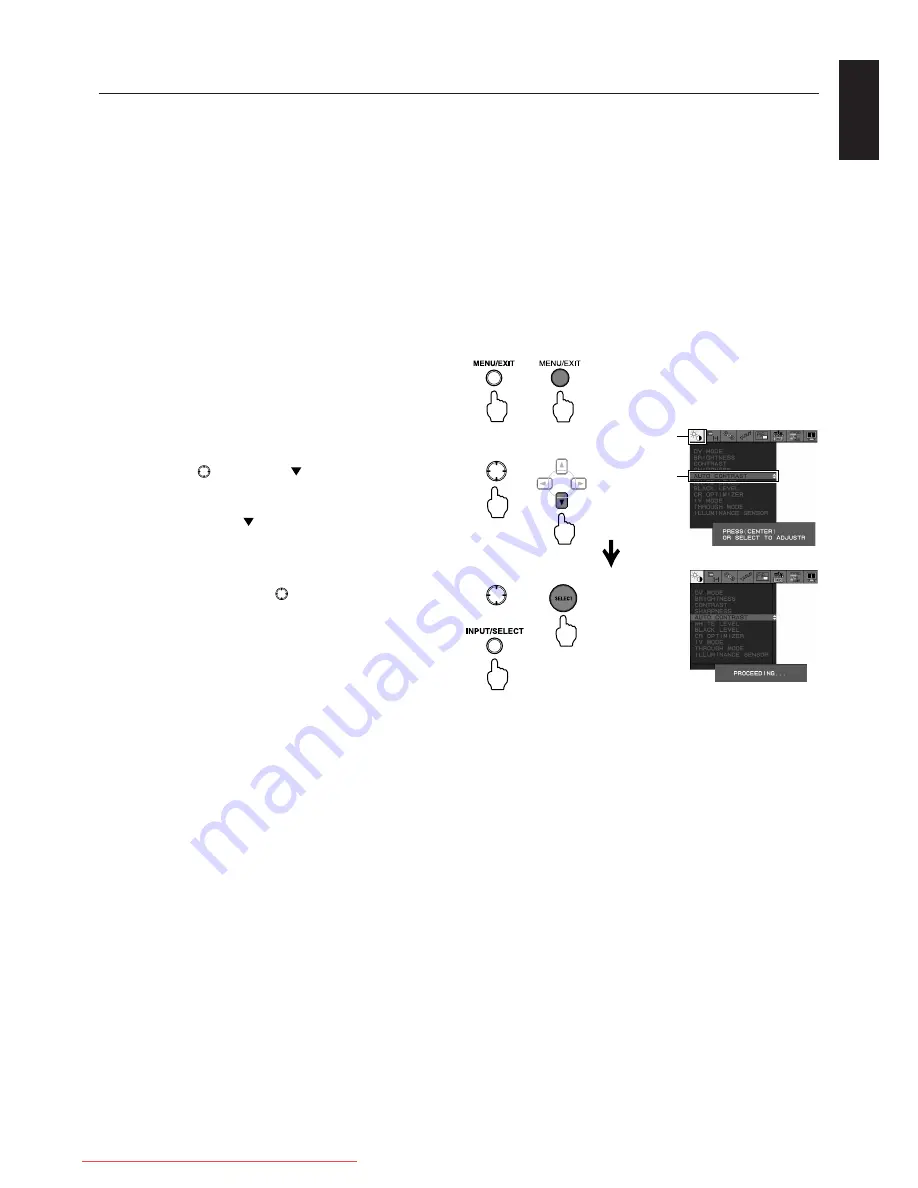
4. Perform Auto Adjust for contrast.
1. On Monitor
Press the
button to the direction five times to
choose [IMAGE SETTING] -> [AUTO CONTRAST].
On Remote Control
Press the Control button five times to choose
[IMAGE SETTING] -> [AUTO CONTRAST].
2. On Monitor
Press the middle of the
button or press the
INPUT/SELECT button.
On Remote Control
Press the SELECT button.
Start Auto Adjust for contrast to match the input
signal level.
When the [Adjusting…] message disappears,
Auto Adjust for contrast is complete.
Proceed to Step 5.
3. Press MENU/EXIT button on the monitor or the remote
controller to display the OSD Screen.
Monitor
Remote Control
VIDEO
SETTING
AUTO
CONTRAST
Monitor
Remote Control
or
Downloaded from ManualMonitor.com Manuals


