Chapter 4:
Disk Image Backup and Recovery
Tool
Introduction
This section discusses procedures on how to backup or recover the POS image. The
terminal has a
Recovery Tool
that performs a complete backup of the whole HDD/SSD.
This includes the operating system, all files, data and the database itself if it is installed
on the HDD/SSD, making an exact duplicate of everything contained on the terminal.
The Recovery Tool uses the Windows Image (
.WIM
) file format to store the OS image.
This is a file-based format for use with the ImageX and DISM tools that Microsoft
created for use with Windows Vista and later OS versions. The format can also be used
to capture and restore XP-based OS images. More information on the ImageX tool and
.WIM
format can be found at:
http://technet.microsoft.com/en-us/library/cc722145(WS.10).aspx
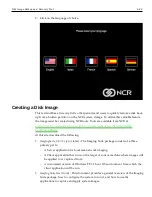
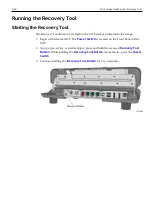
The Recovery Tool is designed to create a complete backup of, or restore, a previously
saved image to the terminal.
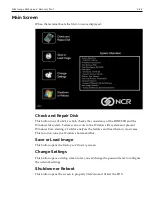
The Recovery Tool offers the following functions and features:
•
Multi-language support for the following languages EN; DE; FR; IT; ES.
•
Check and Repair Disk
•
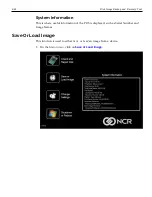
Backup the System
•
Restore the System to a previous state
•
Password Protection
•
Network support
You can save and restore your backup from different locations:
•
Network
•
USB Drive
•
Hard Drive/Solid State Device (if present on the terminal)
Summary of Contents for XR3 (7613)
Page 1: ...User Guide NCR RealPOS XR3 7613 Release 1 0 BCC5 0000 5154 Issue B...
Page 13: ...xi...
Page 20: ...Product Overview 1 7 Label Locations...
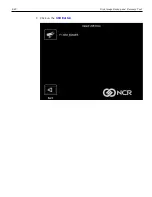
Page 62: ...4 49 Disk Image Backup and Recovery Tool 2 Click on the USB Button...
Page 69: ...Disk Image Backup and Recovery Tool 4 56 A progress bar is displayed as the image is applied...
Page 70: ...4 57 Disk Image Backup and Recovery Tool A message is displayed when the load is complete...
Page 71: ...Disk Image Backup and Recovery Tool 4 58 5 Reboot the POS...
Page 82: ...5 69 Power Management 2 Select Network Adapters Realtek PCIe GBE Family Controller 2...
Page 98: ...7 85 BIOS Updating Procedure 5 Select Make Bootable...
Page 124: ...2x20 Customer Display Interface 9 111 245 246 247 248 249 250 251 252 253 254 255...
Page 132: ...2x20 Customer Display Interface 9 119 245 246 247 248 249 250 251 252 253 254 255...
Page 140: ...2x20 Customer Display Interface 9 127 245 246 247 248 249 250 251 252 253 254 255...
Page 144: ...10 131 Wireless Adapter Switching 6 Select Create a new package OK...
Page 151: ...B 138 Touch Screen Calibration Do NOT touch the bezel with your other fingers...

