background image

Beyond the basics

2.34

Audible alarm

Whenever your fax machine receives a document from another fax machine, your
machine will sound the alarm tone alerting the person for whom the document is
intended.

Important:

 The alarm tone is sounding until either the person presses 

STOP

 or

another document is received.

Note:

Your machine does not sound the alarm during.

• 

Polling

• 

Call request

• 

Security reception

• 

Turing off this feature

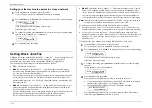
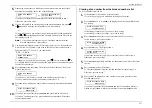
To toggle this audible alarm feature on or off:

1.

If the machine is in Fax mode, proceed to step 2.
If it is in Copy mode, press 

COPY

/

FAX

 to change to Fax mode.

2.

Press 

PROGRAM

J

, 1, 9, 

ENTER

.

Audible Alarm:  Off
Program/Enter

If you see the setting you wish, skip to step 4.

Otherwise, proceed to step 3.

3.

To change the setting, press 

PROGRAM

 once or twice until your desired choice

appears. Here, we’ve chosen “On”.

Audible Alarm:  On
Program/Enter

4.

Press 

ENTER

 to save the setting.

Using alternative telephone network service
providers

Your fax machine is fitted with a Blue key on the control panel to allow easy access to
other telephone networks such as Cable & Wireless (Mercury).

The following information describes how to program the 

Blue

 key for the Cable &

Wireless telephone network (Mercury). For other networks you will have to program
the appropriate access number in place of the 132 (Mercury residential service).

For Cable & Wireless (Mercury) proceed as follows:

Mercury access via 131 PIN code (Mercury PIN code service)

For PIN code Mercury access, please program your fax as follows:

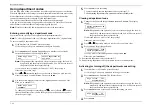
1.

If the machine is in Fax mode, proceed to step 2.
If it is in Copy mode, press 

COPY

/

FAX

 to change to Fax mode.

2.

Press 

PROGRAM

J

, 2, 0, 

ENTER

.

Dial Prefix No    03
_

The number you see in the right of the display tells you how many characters
you have entered into the Mercury number before.

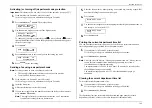
3.

Enter the Mercury access number 1, 3, 1 on the numeric keypad.

Dial Prefix No    03
131_

4.

Press 

Blue

 key on the control panel to enter a “

M

” in the display. This

instructs your fax machine to wait for a Mercury dial tone before dialling the
PIN number.

Dial Prefix No    03
131M_

5.

Now enter both parts of your PIN number (10 digits).

Dial Prefix No    03
131M1234567890_

Note:

If you wish to erase your PIN number, press 

CANCEL

 to delete all

programmed numbers before proceeding to step 6.

6.

Press 

ENTER

 to save the number and continue.

Summary of Contents for MFX-1500

Page 1: ...MFX 1500 plain paper fax machine Operating instructions ...

Page 2: ...MML item number D71 90040 61 ...

Page 3: ...Welcome ...

Page 4: ... 1 1992 Immunity In addition the machine has been safety tested to EN41003 EN60950 The MFX 1500 is a Class 1 laser product conforming to IEC 825 As an ENERGY STAR partner Muratec has determined that this product meets the ENERGY STAR guidelines for energy efficiency Copyright 1998 by Murata Muratec all rights reserved ENERGY STAR is a registered mark of the United States Environmental Protection A...

Page 5: ...se instructions Skim through them now if you d like they ll prove more helpful as time passes or just go on past them to Getting started and well get started And thanks for choosing Muratec Find your serial number and write it down Before you go any further please note that your machine s serial number is located on the bar code label as shown on the drawing at right Due to the size of your machin...

Page 6: ... problems with call waiting and voice mail 1 22 Using memory transmission 1 23 Sending using the ADF 1 24 Sending using the FBS 1 25 Sending a fax with on hook dialling or a handset manual transmission 1 26 Cancelling sending a document 1 27 If the call doesn t go through redialling 1 27 Redialling manually 1 27 Making redial settings 1 27 Cancelling memory transmission or automatic redial an intr...

Page 7: ...ng or cancelling delayed commands 2 21 Reviewing or cancelling parts of a broadcast 2 22 Printing a delayed command list 2 22 Printing a stored document 2 22 Batch transmission 2 23 Creating or modifying a batch box 2 23 Erasing an empty batch box 2 24 Printing a list of your batch boxes 2 25 Storing a document for batch transmission 2 25 Printing a list of stored batch documents 2 25 Printing a d...

Page 8: ...etin box 2 56 Storing a document 2 56 Printing a stored document 2 56 Erasing a document stored in a bulletin box 2 57 Using a security box 2 58 Printing a document 2 58 F Code transmission and polling 2 59 F Code transmission 2 59 F Code database polling 2 60 Programmable one touch keys 2 61 Programming a delayed transmission 2 61 Programming a broadcast 2 62 Programming a SecureMail transmission...

Page 9: ...Getting started A quick and friendly trip through the basics of your Muratec fax machine ...

Page 10: ...tereo systems are measured by watts per channel so fax machines are measured by resolution and greyscale So let s talk about these for a moment Resolution refers to the sharpness of a fax transmission An international agency has defined three specific levels of resolution Normal 8 dots mm 3 85 lines mm Fine 8 dots mm 7 7 lines mm Superfine 8 dots mm 15 7 lines mm Similarly one can judge a fax tran...

Page 11: ... memory configuration for up to 100 hours The machine s backup battery must have been charged for at least 24 hours Before you attach or remove the AC power cord from the power outlet make sure that your hands are dry To avoid paper jams do not load wrinkled or curled paper in the machine This refers to both original documents and paper for printing Keep liquids and other cleaners away from your m...

Page 12: ...ur authorised dealer installs your fax machine Printing supplies Drum cartridge Toner cartridge Fuser cleaner Note Be sure to save the box or boxes and packing materials for reshipment Optional products You may wish also to consult your authorised dealer about the following options for your fax machine Telephone handset Lets you use the machine to make voice calls and use your machine s other tele...

Page 13: ... Multipurpose tray One of two locations where you put the recording paper the paper cassette is the other Holds only one sheet either A4 A5 A5R or B5 size paper 8 Top cover release Pull up on this to open the top cover 9 Top cover Opens to provide access for changing the toner and drum cartridge or occasionally fixing printout jams 10 Book cover Opens to scan an original document using the flatbed...

Page 14: ...t a second telephone to your machine this is where you plug in the cord 19 PHONE1 jack Where you plug in the optional handset 20 AC power socket jack Where you plug in the AC power cord 21 AC power switch Turns your fax machine on and off 22 Paper tray Holds up the printout fax or copy after it emerges 23 Printed document exit Where the printout fax or copy emerges 24 Handset optional Used for voi...

Page 15: ...achine is performing communication 5 REVIEW COMMANDS Press to review or alter pending fax commands 6 MONITOR CALL During on hook dialling turns the monitor speaker off or on When you re sending a fax activates the call request feature 7 ALARM light If glowing indicates a problem has occurred during fax communication or your fax machine encounters a problem printing a fax or copy Check the display ...

Page 16: ...produces a special pause character which can be useful during the dialling of long distance numbers Or in Copy mode PAPER SIZE Selects the printout paper you want to use 22 ENTER Much as STOP is a Whoa key ENTER is a Go key It confirms user settings begins operations and moves through command levels 23 In Fax mode DIALLING OPTIONS Press this to insert special symbols into telephone numbers see pag...

Page 17: ...tructions just as easy In that spirit let s make sure there s no confusion about how to program your machine correctly To press 0 zero 1 2 3 4 5 6 7 8 9 or Use The numeric keypad Tip At no other time within this manual will we refer to the letters printed below the numeric keys such as the abc by the 2 key They are there only for your greater convenience in using your fax machine as a telephone To...

Page 18: ...d Away from heavy equipment Do not set up your fax near a television radio or heavy equipment like air conditioners copy machine or large printers that can generate strong electromagnetic fields Electronic noise can interfere with the operation of your fax machine Please heed these powerful tips Use a standard three pronged 230 VAC outlet Make sure the outlet isn t controlled by a wall switch If i...

Page 19: ...save the screws for reshipment If you must ship your machine for some reason turn off the transport mode turn the power off and then undo the above procedure as follows Remove the seals reversing step 2 Reinstall the screws reversing step 1 Installing the printing supplies Your fax machine prints incoming faxes and copies with a high speed laser print engine The engine requires two types of printi...

Page 20: ...artridge frame Developing roller Note Do not touch the developing roller 7 Grip toner cartridge as shown to avoid pinching your fingers between the toner cartridge and the printer frame Keep the drum slot free of dust and other foreign materials 8 Gently install the toner cartridge in the printer making sure the toner cartridge s four pins fit in the slits inside the printer frame 9 Insert the fus...

Page 21: ...onnect the handset directly to a telephone wall socket Instead connect it only to your fax as these instructions describe 1 Remove the two screw caps and screws 2 Using a Phillips head screwdriver attach the handset cradle to the rear side of your machine using the screws included with the cradle 3 Plug one end of the handset cord it s curled into the PHONE1 socket on the left of your machine 4 Pl...

Page 22: ... Loading paper Of course one of your fax machine s most outstanding features is how it prints faxes and makes copies on plain paper Now everything that comes out of your fax machine is ready for distribution or archiving right from the start The following instructions tell you how to load the paper on which the fax machine makes its printouts copies and received faxes Your machine s standard paper...

Page 23: ...pen Close Top Cover Note Be sure to attach the paper size sticker to the outside of the cassette to remind you which paper size it contains 4 If you will be setting B4 or B5R sized paper in the cassette Remove the both side spacer and adjust the side paper guides by sliding either of them to the left or right to fit the paper you ll be setting Note Insert the removed spacer into the place of casse...

Page 24: ...e A4 or B4 sized paper You change the cassette springs suitable for the paper size you are installing 1 Remove the spring cap which is in the bottom side of the cassette 2 Change the springs If you wish to use the A4 or B4 sized paper insert the silver spring into the cassette If you wish to use the A5R or B5R sized paper insert the blue spring into the cassette 3 Insert the unused springs into th...

Page 25: ...you see how much paper is in the cassette without your having to open the cassette When you see the paper level indicator drop i e show more dark area make sure you have a supply of paper nearby Then when you see the Please Supply Paper message on the display you ll be ready to refill the cassette Important To avoid paper jams do not refill this tray without first removing all of any paper which m...

Page 26: ...is ready to use standby mode you will see either or Fax mode Copy mode If the machine beeps its ALARM light glows and the display shows an error message this means there is a problem of some sort Please consult Just in case beginning on page 3 1 Turn off the transport mode Important Be sure you do not turn the power on until after you remove the transport screws See Removing the transport screws p...

Page 27: ...ortant If you don t hear a dial tone make sure your fax machine is plugged into a working phone line 2 If the volume you hear is satisfactory skip to step 4 Otherwise proceed to step 3 3 Adjust the volume as you wish To turn the volume up press To turn the volume down press The LCD indicates the volume Here are the possible settings Volume off Low setting Medium setting Loudest setting 4 Press MON...

Page 28: ...ame and a fax number The name must not be longer than 22 characters Note Incidentally the fax industry term for this text is Transmit Terminal Identifier TTI Another term Subscriber ID refers to just the fax number in the TTI Using EasyStart to enter initial settings Important Be sure your fax machine has paper before you begin EasyStart since this feature can print a handy settings list at the co...

Page 29: ...ls enter the desired characters shown on the one touch keypad In Beyond the basics we ll show you how to use the CODE function at CODE to enter a wide variety of characters see page 2 3 For now however become familiar with the ALPHABET key Note If you make a mistake or want to erase characters entered in a previous setting press CANCEL to erase leftward Or if you want to change just one character ...

Page 30: ...E on the control panel is ideal for maps moderately complicated drawings financial or hand written documents Superfine resolution S FINE on the control panel S Fine on the display reproduces the detail of extremely complicated drawings or line art Greyscale mode HALFTONE on the control panel Gray on the display captures shades in photographs and drawings Note If you send a fax in superfine certain...

Page 31: ...for how to change this setting For example assuming the pause is at the factory setting pressing 9 REDIAL PAUSE 1 9 7 2 4 0 3 2 0 0 9 dials 9 5 second pause 19724032009 Important Each pause uses two of the characters you re allowed in a number Changing the pause length The pause is set by the factory to last five seconds but you can set it to last as long as ten seconds if necessary If you find th...

Page 32: ...TRANSMIT However see the Important item below After completing the communication your fax machine will return to your desired transmission setting Note Although it s probably best to decide to transmit from memory be aware that certain types of documents can quickly exhaust even your machine s large memory supply Obviously documents with large numbers of pages qualify so do documents with lots of ...

Page 33: ...toggle switch on or off memory transmission 8 Now enter the fax number In fax terms you re calling the remote fax on its remote fax number Use the numeric keypad to enter the number Press Start 919725552009_ As you can see you also enter any access codes such as a 9 for dialling out from an office telephone system or 1 for long distance along with the number just as you would for a regular phone c...

Page 34: ...ou don t catch your hands possibly injuring them When a thick document such as a book is on the FBS do not press strongly from the top of the book cover This may break the contact glass and cause an injury 5 Press BOOK DOC SIZE to select the document size A4 B4 A5R or B5R B5 A5 B4 Enter Scan Size A4 6 Adjust resolution and contrast if necessary If these are OK skip to step 7 Otherwise as desired P...

Page 35: ...andset Here s how 1 If the machine is already in Fax mode skip to step 2 If the machine is in Copy mode press COPY FAX to change to Fax mode 2 Insert the document into the ADF 3 Adjust resolution and contrast if necessary If these are OK skip to step 4 Otherwise as desired Press RESOLUTION to change the resolution Press CONTRAST then press or to change the contrast 4 Obtain a dial tone You can do ...

Page 36: ...lay error messages For more information see pages 3 7 3 12 Redialling manually You always can redial fax or voice calls manually and again you must redial manually if you dialled by using either the monitor speaker or a handset To redial a fax call manually without using either the monitor speaker or an optional handset 1 Confirm that the document is still in the feeder and that your desired resol...

Page 37: ...to check on review each command currently pending in your machine s memory but also to detect a command if you decide not to go ahead with the command and send the document 1 If the machine is in Fax mode proceed to step 2 If it is in Copy mode press COPY FAX to change to Fax mode 2 Press REVIEW COMMANDS once The LCD shows the first command indicated by its command number and the phone number the ...

Page 38: ...monitor function is only for on hook dialling Your fax machine does not have a speakerphone Tel Ready mode when Auto Answer is off Use it if You intend to use the same line for both fax and phone calls and You re using on that line at least one other phone which is not connected to your fax machine and You have installed an optional handset on your fax machine In this mode Your fax machine never a...

Page 39: ... Fax Ready and Tel Ready modes To select Fax Tel Ready 1 Press COPY FAX to change to the Fax mode if the machine isn t the fax mode 2 Press PROGRAM I and then ENTER five times The LCD will show your current reception mode Fax Ready Program Enter 3 To change the reception mode press PROGRAM repeatedly until Fax Tel Ready appears Fax Tel Ready Program Enter 4 Press ENTER to save the setting 5 Press ...

Page 40: ... the telephone has a hold feature put the phone on hold and then hang up the handset 2 Go to your fax machine 3 Press MONITOR CALL 4 Press START 5 Return to the telephone If you didn t put the phone on hold in step 1 hang up its handset Tel Fax Ready mode Use it if You re using the machine as not only your fax machine but also a telephone In this mode Your fax machine will answer all calls after a...

Page 41: ... Set your answering machine to answer calls after no more than two rings Consult the answering machine s instructions if necessary Note Your answering machine may have a toll saver feature which causes the machine to allow only one ring if it has messages waiting However since some versions of this feature allow as many as four rings if there aren t messages waiting using this feature may cause pr...

Page 42: ...idn t put the phone on hold in step 1 hang up its handset When the paper runs out Getting the word from your machine When your fax machine runs out of paper the machine beeps the REPLACE PAPER light glows and the display indicates the Please Supply Paper message Of course your fax machine cannot print fax messages or copies without paper However Receiving when fresh out of paper If your machine ru...

Page 43: ...ated optional paper cassette is attached Tray Enter C3 A4 100 C2 B4 100 Copy Ready Num 1 C1 A4 100 You may also choose from either the standard paper cassette C1 or the Multipurpose tray T If your machine also has either or both of the two optional cassettes you may also choose C2 or C3 To use the Multipurpose tray press ENTER while the display shows Copy Ready Num 1 Tray Enter Then press PAPER SI...

Page 44: ... display will show Copy Ready Num 1 C1 A4 100 Of course you always can make manual changes in the reduction rate see page 1 37 and paper source see page 1 34 4 Adjust resolution and contrast if necessary Press RESOLUTION to change the resolution Press CONTRAST then press or to change the contrast Note For copying your only resolution choices are either superfine or halftone mode 5 Set the reductio...

Page 45: ...r off the sorting of copies as desired 10 Press START to begin the copying process Note To stop the copying before it is through press STOP Note Thanks to your machine s Triple Access feature see page 2 36 for more copying doesn t keep you incommunicado while in progress you can start a fax or voice call and even receive a voice call during copying When using the Multipurpose tray When you need to...

Page 46: ...nt or reduction for copying Your fax machine is capable of enlargement and reduction when copying Note The copy enlargement and reduction rate setting is available only for copying not for faxing Important Copy enlargement is available only for copying using the FBS it is not available for copying using the ADF To change the reduction or enlargement rate for copying either select a pre set rate or...

Page 47: ...y So to limit the use of your fax machine to only sending and receiving faxes in other words to activate copy protection 1 If the machine is in Fax mode skip to step 2 Otherwise press COPY FAX to change to Fax mode 2 Press PROGRAM J 0 3 ENTER Copy Protect Off Program Enter 3 Press PROGRAM to turn on copy protection Copy Protect On Program Enter 4 Press ENTER Copy Protect Complete While this settin...

Page 48: ...Beyond the basics We ve covered the musts Now let s explore the goodies ...

Page 49: ... everything just the way you want it 2 2 Autodialler 2 7 It s a great phone too 2 16 Broadcasting 2 17 Delayed transmission 2 20 Batch transmission 2 23 Special features 2 27 Keeping things secure 2 37 F Code communication 2 50 Programmable one touch keys 2 61 ...

Page 50: ...edly until your chosen mode appears In this example we ve chosen fine resolution Primary Fine Program Enter 4 Press ENTER to save the setting The display asks which contrast setting you wish to select Contrast Normal Program Enter If the setting you see is acceptable skip to step 6 Otherwise proceed to step 5 5 To change the setting press PROGRAM repeatedly until your chosen mode appears In this e...

Page 51: ...ttings for printing faxes You can set three parameters for printing received fax messages Print reduction rate Reduction margin Half page reception You set all three in the same operation see next page but each deserves its own brief explanation Print reduction rate Print reduction lets you set the machine to reduce a large incoming document to a size which will fit on your paper This setting does...

Page 52: ...ows the currently set print reduction rate Prnt Reduc Rate Auto Program Enter If the setting you see is acceptable skip to step 4 Otherwise proceed to step 3 3 To change the setting press PROGRAM repeatedly until your chosen reduction setting appears In this example we ve chosen 91 Prnt Reduc Rate 91 Program Enter 4 Press ENTER to save the setting The display shows the current settings for the red...

Page 53: ...opy mode press COPY FAX to change to Fax mode 2 Press PROGRAM J 0 7 ENTER The display shows the current ECM setting ECM Mode On Program Enter If the setting you see is acceptable skip to step 4 Otherwise proceed to step 3 3 To change the setting press PROGRAM once or twice until your chosen setting appears In this example we ve chosen OFF ECM Mode Off Program Enter 4 Press ENTER to save the settin...

Page 54: ...to standby mode and then press PROGRAM again to go to the next language in the cycle Printing your settings After you have your machine set as you want have it print a settings list We recommend this particularly if you ll be sharing the machine with other users who might change the settings for one reason or another With this list you can quickly confirm that all settings are as you want without ...

Page 55: ... this extremely handy feature Special dialling characters Which number do you find easier to read 919725552009 or 9 1 972 555 2009 Obviously it s the second one The hyphen or dash character separates the number into its various parts in this example a 9 for outside line access a 1 for long distance access the area code and the phone number Imagine how much more important this can be if you also ha...

Page 56: ...umber Here we ve selected 02 and the display shows either Select One Touch 02 No Number Stored or Select One Touch 02 9 1 555 987 6543 4 If you change your mind and wish to select a different one touch key just press that key before going on step 5 5 Press ENTER Depending on whether you already have a number entered for this one touch number the display now shows either 02 Fax Number _ or 02 Fax N...

Page 57: ...r leftward or to move it rightward to that character and press CANCEL to erase it Then re enter until the name is just as you want it 12 Press ENTER to save the setting and continue 13 The display now shows either 02 Group No _ or 02 Group No 2 6_ You may now designate up to 32 call groups to which this number will belong If necessary review Considering call groups page 2 8 If you do not wish to c...

Page 58: ...feeds the document through its scanner transmitting as it goes The display shows the Location ID and the document s width and resolution settings Katz s Cat Care A4 Normal Note If the number doesn t have a Location ID the number appears One touch phone dialling To dial a phone call using a one touch number you must have an optional handset attached to your machine Contact your authorised Muratec d...

Page 59: ...tifier code Here we ve entered 005 and the display shows either Enter Speed Dial No 005 No Number Stored or Enter Speed Dial No 005 9 555 397 0123 4 If you change your mind and wish to select a different speed dial number just repeat step 2 until the desired number appears then go on to step 5 5 Press ENTER Depending on whether you already have a number entered for this speed dial number the displ...

Page 60: ...NCEL to erase leftward Or if you want to change just one character in the name press to move the cursor leftward or to move it rightward to that character and press CANCEL to erase it Then re enter until the name is just as you want it 12 Press ENTER to save the setting and continue 13 The display now shows 005 Group No _ or 005 Group No 1 4 12_ You may now designate up to 32 call groups to which ...

Page 61: ...memory To review memory transmission see page 1 23 If you specified non memory transmission ADF only Your fax machine dials the other fax machine When the other machine answers your fax feeds the document through its scanner transmitting as it goes The display shows the Location ID and the document width and resolution settings Shipping Receiving A4 Normal Note If the speed dial number doesn t hav...

Page 62: ...each belongs The directory divides the call groups into four banks 00 09 10 19 20 29 and 30 32 00 means a number is in all call groups For example the directory might show No Location 00 10 20 30 S001 And Sew It G 2 4 S002 QP Enterpris 7 0 1 S003 Katz Cat Car 0 2 01 Carson List 4 0 4 02 London Office 1 03 e e gummings 2 In this list speed dial number S001 is in call groups 2 and 4 speed dial numbe...

Page 63: ...y is showing the name you want to dial press START If there is a document in the feeder your machine will dial a fax call to the selected autodialler number If there isn t a document in the feeder your machine will activate the monitor speaker and dial a regular phone call Remember that to make a regular phone call from your machine you must have attached an optional handset At this point you may ...

Page 64: ...e dialling 1 Press MONITOR CALL You ll hear a dial tone unless you have set your speaker volume to off see page 1 18 and the display will show Tel Mode _ 2 Dial the number you want You may use either the numeric keypad a one touch key or a speed dial number Note Remember your fax machine s monitor speaker is not a speakerphone so be sure to pick up the handset if the other person answers Note You ...

Page 65: ...after the last fax number Note If you enter characters by mistake just press CANCEL to clear them before proceeding 6 Press START Your fax machine will scan the document into memory and then send it to each number or call group you ve entered The main idea is when it s time within an operation for entering the fax number to which you re to send your document you enter multiple numbers until you ve...

Page 66: ...lays the document to each fax number in each call group you specified This is the relay broadcast you initiated Setting it up or initiating the initiation For you to perform relay broadcast initiation three things must be true The remote fax machine must be a Muratec fax machine with hub capability Note If you re not sure whether the unit to which you want to transmit is a true hub unit please con...

Page 67: ...itiating the relay broadcast Then press ENTER 9 Press START If in step 7 you chose an immediate relay broadcast initiation your fax machine will begin dialling the remote hub machine However if you requested a delayed command the machine will display Reserved on the display s top line this means the command is in memory Broadcast news or making changes If you need to make changes in a broadcast af...

Page 68: ...16 5 Use the numeric keypad to enter the day of the month and the time when you want the fax to perform the delayed transmission Note To move the cursor to a specific digit press to move the cursor leftward or to move it rightward to that digit Here we ve set the transmission to occur on the 11th at 11 05 PM Delayed Enter Time 11 23 05 6 When the date and time entry is as you wish press ENTER to s...

Page 69: ...uch as G03 will appear instead of the phone number See Considering call groups pages 2 8 C00 G03 Program Cancel If the command is to perform a broadcast Broadcast will appear instead of the phone number See Broadcasting pages 2 17 2 19 C00 Broadcast Program Cancel If the command is to perform a batch transmission the display will show its batch box number such as B01 rather than the command number...

Page 70: ... or she has left for the night and you have no idea why the machine is reserved and how long it ll stay that way Fortunately your machine can print a command list which tells you The command s identification number The phone number or remote location The start time which appears in the same DD HH MM format you saw in the previous instructions for actually setting up a delayed transmission command ...

Page 71: ...Stored or Select Batch Box 3 9 555 2110 4 If you change your mind and wish to select a different batch box just use the numeric keypad to enter the correct batch box number before going on step 5 5 Press ENTER The display now shows either 3 Fax Number _ or 3 Fax Number 9 555 2110_ 6 Use the numeric keypad to enter the fax number exactly as your machine should dial it including whatever access code...

Page 72: ...e character in the name press to move the cursor leftward or to move it rightward to that character and press CANCEL to erase it Then re enter until the name is just as you want it 12 Press ENTER to save the batch box information To create or modify another batch box repeat steps 3 12 To finish press STOP Erasing an empty batch box You can erase an empty batch box if a box has documents stored in ...

Page 73: ... many documents are in this batch box Your machine numbers files 00 39 You need to know a file s number to erase or print it on your fax See also Printing a list of stored batch documents next column 6 Press START If it wasn t already doing so due to a previous command the machine will display Reserved on the top line of the display This means the document is stored in memory Printing a list of st...

Page 74: ...NTER The display will show Erase Batch Doc Enter File No _ 5 Use the numeric keypad to enter the document s two digit file number 00 39 If the file number is 00 09 be sure to enter the leading zero 6 Press ENTER The fax machine now gives you one last chance to change your mind about the erasure Erase Batch Doc Check Program Enter Important To quit the operation without erasing this particular docu...

Page 75: ...to tell for sure is to send a transmission with obviously the cover page feature activated see right column to the specific thermal paper machine in question and see what happens Toggling the cover page 1 If the machine is in Fax mode proceed to step 2 If it is in Copy mode press COPY FAX to change to Fax mode 2 Press PROGRAM K 1 ENTER The display shows Cover Page Off Program Enter 3 To tell the f...

Page 76: ...hat character and press CANCEL to erase it Then re enter until the message is just as you want it 4 When the message is as you want it press ENTER to save it Printing the cover page To confirm that the cover page is as you wish it s easy to print a sample cover page from your fax machine Just press PROGRAM K 3 ENTER Managing your fax with its journal and reports Setting the activity journal Just a...

Page 77: ...pages Result of the call Either OK or an error code see pages 3 10 3 12 To set the printing of either or both of these reports 1 If the machine is in Fax mode proceed to step 2 If it is in Copy mode press COPY FAX to change to Fax mode 2 Press PROGRAM G 3 ENTER The display will show TCR Selected Program Enter If you see the report you wish to set skip to step 4 Otherwise proceed to step 3 3 To cha...

Page 78: ... fax machine 1 Make sure that the polling document is actually set in the remote machine 2 Press COMMUNICATION OPTIONS four times and then press ENTER twice The display will show Enter Fax Number _ 3 Enter the remote machine s number by either pressing a one touch key entering a speed dial number or just dialling the number normally through the numeric keypad To perform regular polling now skip to...

Page 79: ...enter the time when your machine should finish the continuous polling Here we ve set it for 3 00 PM Cont Polling End Time 15 00 Note If you set an end time earlier than the start time you entered in step 3 the continuous polling will end at the selected end time tomorrow Note To move the cursor to a specific digit press to move the cursor leftward or to move it rightward to that digit 6 When the e...

Page 80: ...mode press COPY FAX to change to Fax mode 2 Press PROGRAM D 2 ENTER The display will show Erase Polling Doc File No _ If erasing a document set up for regular polling skip to step 4 If erasing a document set up for database polling proceed to step 3 3 Use the numeric keypad to enter a one or two digit database file number to identify the stored document 4 Press ENTER Your fax machine will erase th...

Page 81: ... and to hang up his her handset Don t hang up yours yet 3 When you hear fax tones press START and now hang up your fax s optional handset Your machine will receive and print out the document Responding to a call request If someone requests a call from you during a fax communication you ll hear a long ring after the receiving machine has received each page To answer the call request 1 Lift your mac...

Page 82: ...e networks such as Cable Wireless Mercury The following information describes how to program the Blue key for the Cable Wireless telephone network Mercury For other networks you will have to program the appropriate access number in place of the 132 Mercury residential service For Cable Wireless Mercury proceed as follows Mercury access via 131 PIN code Mercury PIN code service For PIN code Mercury...

Page 83: ...g 132 and dialling the full national number It is not necessary to enter your PIN number because the telephone exchange can transfer your telephone number electronically to Mercury for billing For 132 Mercury access and to avoid the need to dial 132 before each and every call Please program your fax as follows 1 If the machine is in Fax mode proceed to step 2 If it is in Copy mode press COPY FAX t...

Page 84: ...service Enter the telephone number on the numeric keypad Notes You must enter the full National Code telephone number when dialling telephone numbers via the Mercury network Your fax machine will not display your Mercury PIN number when dialling or sound it through the monitor speaker this a Mercury requirement You can not enter the Blue key followed by the one touch or speed dial button see below...

Page 85: ...4 If you are creating the passcode use the numeric keypad to enter 0000 If you are modifying an existing passcode enter the existing passcode 5 Press ENTER 6 Enter the desired four digit passcode Here we ve entered 6296 Protect Passcode New Passcode 6296 7 Press ENTER to save the passcode Note Anytime you want to turn off the passcode change the passcode back to 0000 by repeating steps 1 7 and ent...

Page 86: ... your eyes only Important For this feature to work you must have pre set the passcode see page 2 37 to something besides 0000 and of course you must know the passcode Note In the following instructions your machine s display shortens the word Transmission to Tx and the word Receive to Rx Activating security reception 1 If the machine is in Fax mode proceed to step 2 If it is in Copy mode press COP...

Page 87: ...as it s necessary with security reception see pages 2 38 2 39 Or for that matter you may wish to send secure documents to someone else and not worry about whether an unauthorised person near that person s fax might happen to see the documents That s why your fax machine has Muratec s time tested SecureMail feature SecureMail uses some of your fax s memory as paperless electronic mailboxes Your mac...

Page 88: ...revious setting press CANCEL to erase leftward Or if you want to change just one character in the name press to move the cursor leftward or to move it rightward to that character and press CANCEL to erase it Then re enter until the name is just as you want it 8 Press ENTER to save the mailbox information The display now shows S Mail No 5 Enter I D Code 0000 The machine is asking for the SecureMail...

Page 89: ...shows Print SecureMail Enter I D Code Note If the mailbox has received no document No Document Stored message will show on the display and your fax return to standby mode 5 Use the numeric keypad to enter the mailbox s four digit ID code Here we ve entered 2345 Print SecureMail Enter I D Code 2345 6 Press ENTER If you ve entered the correct ID code your fax machine will print all documents in and ...

Page 90: ... 1 If that s true for you you ll probably wish to keep that PIN confidential so unauthorised persons can t discover and use the PIN number Fortunately your fax s PIN mask feature makes such confidentiality possible With the PIN mask activated you can dial a fax number plus a PIN but the PIN will not appear in a journal error message printout delayed command list or even TCR where an unauthorised u...

Page 91: ...etting speed dial number 001 001 PIN Number _ 4 Use the numeric keypad including either or if necessary to enter the desired PIN up to eight characters in length 001 PIN Number 1057_ 5 Press ENTER to save the PIN Note If you press ENTER without entering the PIN the fax machine beeps indicates Invalid Number on the display and then returns you to step 3 Now you may autodial the number as usual Impo...

Page 92: ...3 2 26 for more on batch transmission Note If the PIN mask feature is off you dial normally If you ve specified Mode1 or Mode2 Important Any autodialler number you use with batch transmission must include the PIN To review how to include this information in an autodialler number review the Mode 1 instructions under Autodialling while using the PIN mask page 2 43 Before sending a batch transmission...

Page 93: ...e display shows the current setting Security Tx Off Program Enter If the setting you see is acceptable skip to step 4 Otherwise proceed to step 3 3 To change the setting press PROGRAM once or twice until your chosen setting appears In this example we ve chosen On Security Tx On Program Enter 4 Press ENTER to save the setting Setting for use of a closed network For maximum communications security u...

Page 94: ... 3 the display calls it Mode3 This combines Modes 1 and 2 this is for use if for example you do wish to send a document to but do not wish to receive from a fax machine whose phone number is stored in your autodialler If so store the same last eight digits at least four digits of the phone number as your autodialler into the blocked numbers list so that you can activate this mode Note In the Block...

Page 95: ...h to enter another fax number repeat steps 5 8 9 Press STOP The display now asks whether you want to print blocked numbers list Print BlockJunk Dial Enter Stop 10 If you do want to print the list press ENTER and your machine will print it If you don t want to print a list press STOP and your machine will return to normal standby mode Clearing a fax number from the blocked numbers list To clear a n...

Page 96: ...ss ENTER 4 Use the numeric keypad to enter the four digit department code 0000 9999 Here we ve entered 1555 Enter Dept Code 001 1555 To change only one digit repeatedly press to move leftward or to move rightward until the cursor is under the digit then use the numeric keypad to enter the correct digit 5 Press ENTER to save the setting To enter or modify another department code repeat steps 3 5 To...

Page 97: ...ggle affects only a transmission from the ADF Transmission from the FBS is always memory transmission 5 Enter the fax number by either pressing a one touch key entering a speed dial number or dialling from the numeric keypad 6 Press START Enter Dept Code _ 7 Use the numeric keypad to enter the appropriate four digit department code In this example we ve entered 1555 Enter Dept Code 1555_ 8 Press S...

Page 98: ...g F Code boxes Before you set up an F Code box You must decide how your callers will use this box as a bulletin box or a security box see Which type of box in the next column If the other person has set a password only inform that person he or she must store a sub address before your communications may use this feature Each fax machine in the transaction yours and the other one must store an ITU T...

Page 99: ... box s name skip to step 10 9 A F Code box s name may be up to 16 characters in length You enter the name the same way you entered your fax name during EasyStart We ll review the process here If you re changing a previously entered name see the note at the end of this step Important As in EasyStart you enter letters and other non numeric characters through the one touch keys 03 Box Name Upper _ Th...

Page 100: ... will make your F Code communications much more secure Important Again this is the password for ITU T compatible F Code fax transactions It s not the passcode the machine can use to control user access to the F Code box for as an example making settings You ll make that setting a few steps down the line Depending on whether you already have a password entered for your F Code box the display displa...

Page 101: ...e If document writing is Off and your machine receives a new document into this box it won t erase any documents currently stored there Your machine can store up to 30 documents not pages in each box Make your choice and press ENTER to proceed to the next setting Erasure of transmitted documents the final setting for the bulletin box determines whether the machine erases a document from the box af...

Page 102: ... 23 Press ENTER to save the settings The display now shows 03 Set F Code Box F Code Passcode 0000 The machine is asking for your security box s four digit security passcode This passcode affects only the box s security box capabilities and is not the same passcode you entered in steps 6 7 If you set this passcode you subsequently will have to enter the passcode before you can make any changes to t...

Page 103: ...ect F Code Box Box In Use Review the Important item before step 1 above 6 Use the numeric keypad to enter the proper four digit passcode Here we ve entered 2345 03 Erase F Code Box F Code Passcode 2345 7 Press ENTER If you entered an invalid passcode in step 6 the fax machine will reject the attempt and abort this operation If you entered the correct passcode in step 6 the display will show 03 Era...

Page 104: ...R Now the display shows Add Document On Program Enter This is the Add Document setting It determines what will happen when you add this document to this bulletin box With the setting at On your machine will not erase the documents from the bulletin box when you add this document With the setting at Off your machine will erase the documents when you add this document If the setting you see is accep...

Page 105: ...ax mode proceed to step 2 If it is in Copy mode press COPY FAX to change to Fax mode 2 Press PROGRAM P 6 The display will show P6 Erase F Code Doc Program Enter 3 Press ENTER Select F Code Box 01 Murata Machinery If this box holds the document you want to erase skip to step 5 Otherwise proceed to step 4 4 Use the numeric keypad to enter the number 01 50 of the bulletin box currently holding the do...

Page 106: ...it Note For this operation to work two things must be true You must know the security box s number You must know the four digit passcode for the security box To print a received message from a security box 1 If the machine is in Fax mode proceed to step 2 If it is in Copy mode press COPY FAX to change to Fax mode 2 Press PROGRAM P 4 The display shows P4 Print F Code Doc Program Enter 3 Press ENTER...

Page 107: ...an ITU T sub address must exist on the remote fax It doesn t have to have a password If the other machine hasn t at least one box with a sub address F Code communication will be impossible You must know the ITU T sub address and if applicable password information for the mailbox on the remote machine F Code transmission 1 Press COPY FAX to change to Fax mode if necessary 2 Insert the document 3 Ad...

Page 108: ... we ve entered 123456 Enter Sub Address 123456_ 5 Press ENTER The display will show Enter Password _ 6 Use the numeric keypad to enter the appropriate password number In this example we ve entered 654321 Enter password 654321_ Note If you know that this sub address does not have a password skip to step 8 7 Press ENTER The display will show Enter Fax Number _ 8 Enter the fax number either by pressi...

Page 109: ... The operation it should perform When The date s and time s when you want it to perform the operation Programming a delayed transmission Note To erase a programmable one touch key refer to page 2 71 To program a delayed transmission into a programmable one touch key 1 Change to the Fax mode then press PROGRAM C 1 ENTER The display either shows Select Program No 73 No Number Stored or indicates a c...

Page 110: ...ther key s programming go back to step 2 Programming a broadcast Note To erase a programmable one touch key refer to page 2 71 Programming a broadcast is very similar to programming a delayed transmission except that rather than specifying just one phone number you set up multiple numbers to which the transmission should go To program a broadcast into a programmable one touch key 1 Change to the F...

Page 111: ... Delayed Enter Time 00 17 05 8 Press ENTER ENTER 9 The display now shows the next programmable one touch key If you do not wish to enter or change any other key s programming press STOP to return your machine to its usual standby mode If you do wish to enter or change this key s programming go back to step 3 If you wish to enter or change another key s programming go back to step 2 Programming a S...

Page 112: ...e following ways Option 1 Perform the command once at a certain time on a certain day of the month For example Do this at 5 05 PM on the 30th To select this option use the numeric keypad to enter the date and time when the fax should perform the command Delayed Enter Time 30 17 05 Option 2 Perform the command at a certain time each day you press the key For example Do this at 5 05 PM today To sele...

Page 113: ...up You can specify up to 10 separate groups for each relay broadcast initiation between the entry of each new group press GROUP DIAL to insert a comma but do not insert a comma after the last group number For example here we ve entered 0 4 GROUP DIAL 1 1 GROUP DIAL 2 4 Relay Tx Group No 1 24_ Note The display shows only four characters of the group number Important Again do not insert a comma afte...

Page 114: ...haracters in length 76 Fax Number 9 5550629_ Your display can show only 20 characters at a time To view characters beyond those 20 such as with an international long distance numbers press to scroll leftward or to scroll rightward Important Do not press ENTER Note If you make a mistake or want to erase characters entered in a previous setting press CANCEL to erase leftward Or if you want to change...

Page 115: ...r than batch transmission has already been programmed you must first erase the key see page 2 71 Then return to these instructions and select that key If a batch transmission is already programmed into this key you can change the batch box number in step 6 But you can t change the key to another kind of command To do that you must first erase the key and then program that key as described elsewher...

Page 116: ...y go back to step 2 before going on to step 4 4 Press ENTER The display now shows either 74 Fax Number _ or 74 Fax Number 9 5557312_ 5 Use the numeric keypad to enter the number exactly as your machine should dial it including whatever codes your phone system may require The number can be up to 40 characters in length 76 Fax Number 9 5550629_ Your display can show only 20 characters at a time To v...

Page 117: ...ammable one touch key refer to page 2 71 Note For F Code polling to work two things must be true The document which you re polling must exist on the remote machine in an F Code box You must know the remote fax s ITU T sub address and if applicable password number for each box you wish to poll To program a F Code transmitting operation into a programmable one touch key 1 Press PROGRAM C 1 ENTER The...

Page 118: ...e a mistake press CANCEL to back up then enter the correct number When the entry is complete press ENTER 11 If you want the transmission to begin immediately every time you press the key press ENTER again and skip to step 14 If you want to delay the transmission perhaps to take advantage of lower phone rates press COMMUNICATION OPTIONS ENTER 12 There s a choice to make Instruct your fax to carry o...

Page 119: ...chine is in Fax mode proceed to step 2 If it is in Copy mode press COPY FAX to change to Fax mode 2 Change to the Fax mode then press PROGRAM C 2 ENTER The display shows something like Select Program No 73 Delayed If 73 is the key you want to erase skip to step 3 However our examples from here will say 74 rather than 73 3 Press the programmable one touch key you want to erase Here we ve selected 7...

Page 120: ...Just in case Now here s how to care for your machine Also we ll suggest procedures to try in case of trouble Finally the Glossary will explain fax terms you may encounter ...

Page 121: ...Just in case 3 1 What s inside in this section Clearing paper jams 3 2 Print quality problems 3 5 Communications problems 3 7 Caring for your fax machine 3 13 Common questions 3 15 Glossary 3 18 ...

Page 122: ...tion anyway instead you ll have to perform the job again from scratch 2 The display will show which page i e which page number is jammed To continue scanning from the jammed page forward keeping in mind the Note at the end of step 1 above press START after clearing the jam P 2 Reset Document Press Start Note If you wait more than 60 seconds without pressing any key the machine will begin to send o...

Page 123: ... light Later if you have to remove the cartridge from the fax immediately wrap it in a thick cloth to protect it from light 4 Remove the jammed paper CAUTION The fuser unit becomes very hot Do not touch the fuser unit when you are removing a paper jam Note Avoid getting unfixed toner on your hands and clothes 5 Re set the toner and drum cartridge 6 Gently close the printer cover 7 Gently close the...

Page 124: ...If a printout jams inside at a paper cassette s side cover 1 Remove the multipurpose tray 2 Open the side cover 3 Carefully remove the jammed sheet s from the machine 4 Close the side cover back into its normal position ...

Page 125: ...he toner cartridge Your fax machine s printer may be due for a service check Call your authorised Muratec dealer Printouts are too light The toner cartridge may be out of or very low in toner Remove the toner cartridge and shake it a few times to redistribute the toner inside If the problem persists replace the toner cartridge The toner cartridge may be defective Remove and check the toner cartrid...

Page 126: ...s fail please contact your authorised Muratec dealer Printouts have toner smudges The toner may be unevenly distributed inside the toner cartridge Remove the toner cartridge and shake it a few times to redistribute the toner inside If the problem persists replace the cartridge The toner cartridge or drum cartridge may be defective Remove and check the cartridges for damage If the problem persists ...

Page 127: ...ry the transmission being sure to enter the correct number of pages if you use the page numbering function What you see on the display What it means What to do Call For Service The scanner lamp is dim or inoperable Make repeated copies to help evaporate any internal moisture If that doesn t resolve the problem call your authorised Muratec dealer Check Rx Paper Size You tried to load the different ...

Page 128: ... all the groups Determine the correct call group identifier number and enter it instead What you see on the display What it means What to do Enter No 1 99 You entered a number greater than 99 while trying to print a database polling document Your machine can store 100 files numbered 0 99 for database polling Determine the file s correct number and enter it or You tried to request greater than 99 c...

Page 129: ...en retry protecting the operation or department code What you see on the display What it means What to do No PIN Number You selected Mode1 in the PIN mask feature and tried to call an autodialler number in which no PIN has been entered Enter a PIN then try again No Report You requested an activity journal or confirmation report but your fax machine has no record of any fax jobs having occurred No ...

Page 130: ...her F Code box Enter a different sub address What you see on the display What it means What to do Toner Low Your fax machine is almost out of toner Contact your authorised Muratec dealer to purchase a new toner cartridge if you don t already have one Too Many Characters You attempted to enter too many numbers or other characters in the current operation Press CANCEL to delete the extra characters ...

Page 131: ... The sending fax machine is incompatible or had a document feeder program during transmission R 3 4 Poor phone line conditions may have prevented your fax from properly printing some or all of the pages it received R 3 5 Poor line conditions prevented reception R 4 2 Either the line disconnected before transmission or the transmitting fax machine needs maintenance R 4 4 The fax machine has reached...

Page 132: ...r Message Possible Meanings Check condition of remote fax Remote machine malfunctioned No handshake signals from remote fax Wrong phone number reached Repeat transmission Poor phone line conditions No handshake signals from remote fax Document misfeed or miscount Unable to reach remote machine after attempting specified number of redial tries Line is busy Remote machine s line was busy Remote mach...

Page 133: ...r fax machine They re sealed for a purpose to protect your safety and the machine This tip applies only to cleaning external surfaces such as the cover and handset use a mild cleaning solution sprayed onto a lint free towel or cloth Always use a lint free cloth or lint free swabs moistened with alcohol to wipe gently components inside your machine See also the next step In areas you can t reach wi...

Page 134: ...ry important to printout quality So if you notice poor printout quality whether on received faxes or on copies it may mean that your machine requires service Review Print quality problems pages 3 5 3 6 and see whether any of the proposed solutions helps your machine If none do please call your authorised Muratec dealer Cleaning the LED print head If you find your fax recipients complaining that th...

Page 135: ...ss START and if you re using the handset hang up to send a fax Q I just sent a fax However the number that appeared in my machine s display during the transmission wasn t the number I dialled Why A That number you saw is programmed into the remote fax machine by the user Some users perhaps for privacy s sake prefer different numbers to appear than the ones they re really using and frankly some peo...

Page 136: ...roduce themselves to each other and agree on the parameters of the call The specification time is based on the use of normal resolution mode You may be using fine superfine or greyscale transmission each of which takes longer than normal mode Reports Q I called the number 010 555 555 1212 but not all of the digits appear on my transmit confirmation report TCR Why didn t the whole number appear How...

Page 137: ...ine sends the document On the other end of the line The remote fax machine receives the code The remote fax machine uncompresses and deciphers the code turning it into a representation of the scan your machine made That s how your machine unwraps the document The remote fax machine prints the representation Now the recipient can use the document and that s how fax works The only difference between...

Page 138: ...s spaces between lines and paragraphs and even spaces within letters such as e and o However drawings and photographs have a much higher black density sometimes approaching 100 The higher a page s black density the more slowly a fax machine can send it bps Bits per second Used to express the speed of transmission of data Because fax transmission treats a document as a graphic image rather than as ...

Page 139: ...th greyscale abilities interpret photographs in levels of grey between white and black The transmitting fax machine must have greyscale ability to send a photographic image accurately but the receiving machine does not need it to print the image Group 3 Refers to fax machines that use digital encoding These units transmit one page in less than one minute and produce resolution of 203 98 203 196 or...

Page 140: ...er limit access to fax operations in general as well as certain settings and even documents readied for polling in the latter case only calling machines whose users enter the proper passcode will be able to poll the document PBX or PABX Private branch exchange privately owned telephone equipment serving a particular building business or area Many PBX systems use digital transmission lines which un...

Page 141: ...number See also Autodialling and One touch dialling Station ID Also called Location ID or Receive ID An Autodialler feature which lets the fax user enter a descriptive name to correspond with the number in an Autodialler entry For example rather than entering only 01483 301900 one can enter that number and a name such as Guildford Office Many Muratec models with this feature allow entry of both up...

Page 142: ...Appendix and index ...

Page 143: ...opying only or 208 mm copying or faxing selectable Scanning method Flatbed CCD Memory capacity Standard 2 MB approximately 158 pages Total possible with optional upgrades 10 MB approximately 798 pages Memory backup 100 hours in the standard memory configuration Printing method Dry electrophotographic LED process Consumables yield Drum cartridge 10 000 pages Toner cartridge 10 000 pages Recording p...

Page 144: ...es printouts 3 10 Confidential communication See F Code and SecureMail Confirmation reports 2 29 2 30 Confirmation stamp 2 6 Consumables order sheet 3 14 3 22 Continuous polling See Polling Contrast 1 21 1 22 Control panel 1 4 1 6 1 7 1 8 Copying 1 34 1 38 Copy reduction 1 37 Cover page 2 27 2 28 D Database polling See F Code and Polling Date and time setting 1 19 Delayed transmission 2 20 2 22 Di...

Page 145: ...ee also Programmable one touch keys Out of paper reception 1 33 P Page numbering 2 33 Paper cassette loading 1 13 1 16 Paper for printouts loading 1 13 1 16 Pause character entering 1 22 2 7 PBX using with 3 16 Phone and electrical requirements 1 9 PIN masking 2 42 2 44 Polling 2 30 2 32 Being polled 2 32 Continuous 2 31 Database F Code 2 59 2 60 2 69 2 70 Muratec proprietary 2 30 2 31 2 66 2 67 P...

Page 146: ... 2 11 2 14 Stamp transmission confirmation 2 6 Subscriber ID 1 19 Superfine resolution 1 1 1 21 2 2 Surge suppresser 1 9 T TCRs transmit confirmation reports 2 29 2 30 Telephone features 2 16 Tel Fax ready mode 1 31 Time and date setting 1 19 Toner and drum cartridges installing 1 10 1 11 Transmission See Sending faxes Triple Access 2 36 Troubleshooting 3 2 3 14 Transmit Terminal Identifier TTI 1 ...

Page 147: ...rogress monitor h Ringer volume control i The connection of approved apparatus into the socket for associated telephones Any other usage will invalidate the approval if as a result it ceases to conform to the standards against which approval was granted IMPORTANT This apparatus is capable of dialling 999 Emergency Services via an associated telephone 2 CONDITIONS OF USE 2 1 The approval number for...

Page 148: ...s only suitable for the connection of compatible equipment In case of difficulty please contact your supplier 4 5 PS100 The PS100 optional Parallel Printer Port option if connected is a SELV CIRCUIT SAFETY EXTRA LOW VOLTAGE CIRCUIT and as such is only suitable for the connection of compatible equipment In case of difficulty please contact your supplier 5 AUTO DIALLER OPERATION 5 1 The auto dialler...

Page 149: ...ise them of your connection b Where necessary request the installation of a suitable BT connection socket To THE TELEPHONE MANAGER At I We have purchased a Muratec MFX1500 facsimile machine Approval number 607941 and intend to use the equipment in your area I We do do not require the installation of a BT all socket for this equipment for PSTN connection Signed Name Tel ...

Reviews: