Hardware Preparation and Installation
2-2
MVME166 Single Board Computer Installation Guide
2
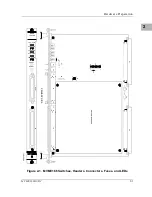
Figure 2-1 illustrates the placement of the switches, jumper headers,
connectors, and LED indicators on the MVME166. The MVME166 has been
factory tested and is shipped with the factory jumper settings described in the
following sections. The MVME166 operates with its required and factory-
installed Debug Monitor, MVME166Bug (166Bug), with these factory jumper
settings. Settings can be changed for the following headers:
❏
SCSI terminator selection (J2)
❏
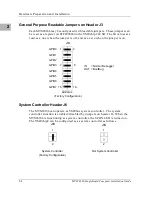
General purpose readable register (J3)
❏
System controller selection (J6)
❏
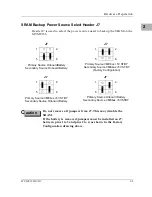
SRAM backup power source selection (J7)
SCSI Terminator Enable Header J2
The MVME166 provides terminators for the SCSI bus. The SCSI terminators
are enabled/disabled by jumpers on header J2. The SCSI terminators may be
configured as follows.
J2
1
Onboard SCSI Bus Terminator Enabled
(Factory Configuration)
2
J2
1
Onboard SCSI Bus Terminator Disabled
2
Summary of Contents for MVME166
Page 1: ...MVME166 Single Board Computer Installation Guide MVME166IG D2 ...
Page 12: ...xii ...
Page 14: ...xiv ...
Page 46: ...Hardware Preparation and Installation 2 10 MVME166 Single Board Computer Installation Guide 2 ...
Page 70: ...Debugger General Information 3 24 MVME166 Single Board Computer Installation Guide 3 ...
Page 114: ...Disk Tape Controller Data B 6 MVME166 Single Board Computer Installation Guide B ...
Page 116: ...Network Controller Data C 2 MVME166 Single Board Computer Installation Guide C ...

