Getting Started
2-7
Figure 2.7
“
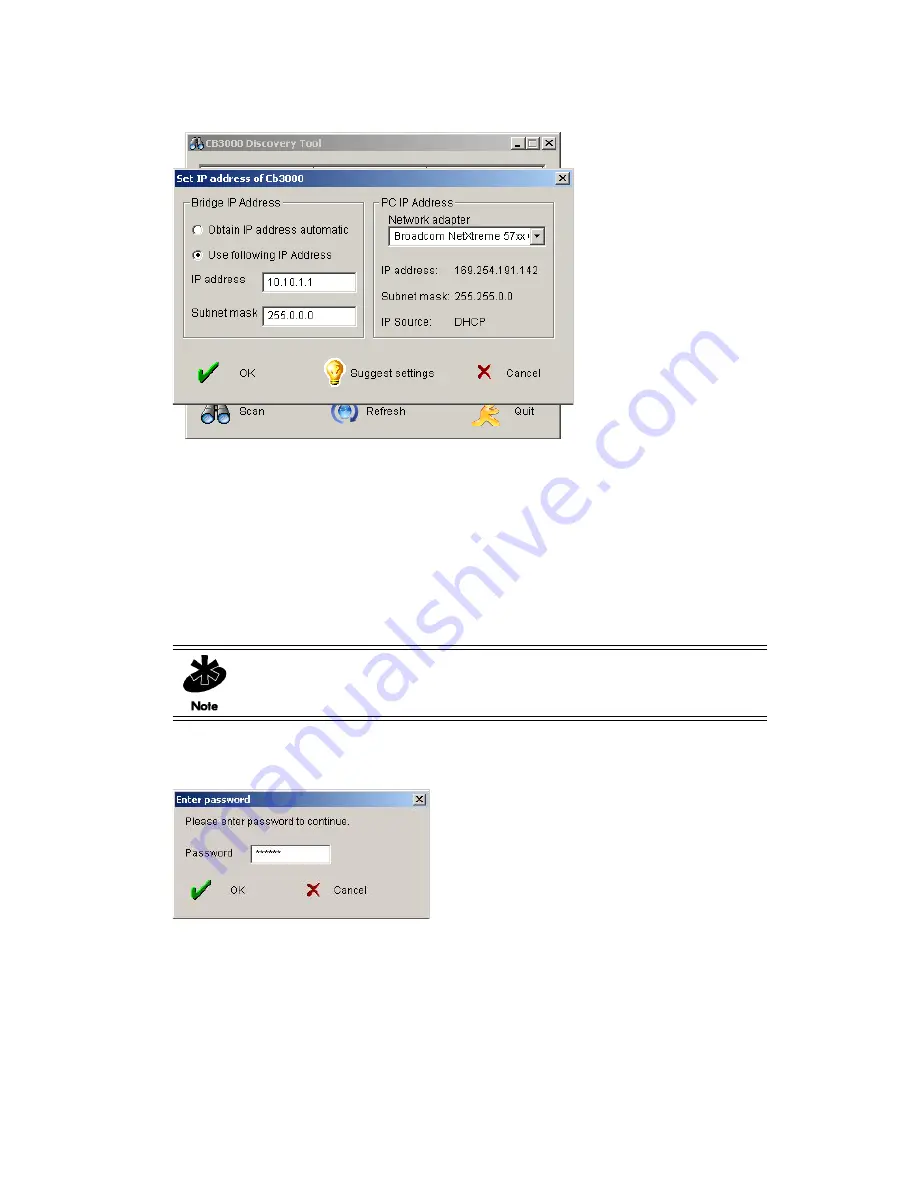
Set IP address of CB3000 screen
3. By default, the
Use following IP Address
option is selected. You must enter the IP address for the CB3000
and the Subnet mask for the network in their respective text boxes.
To obtain an IP address automatically from a DHCP server, select the
Obtain IP address automatically
option.
4. If the PC you are connecting this CB3000 to has more than one network adapter, you can choose to select
the network adapter to connect to. To do so, select the appropriate network adapter from the
Network
adapter
drop-down list box.
5. Click the
OK
button to save the changes and close the dialog box. You are prompted for the password for
the ‘
admin
’ account for the CB3000.
Figure 2.8 Confirm IP Change by providing password here.
6. The information is saved to the CB3000. The Discovery Tool refreshes itself and the new IP address of
the CB3000 displays.
NOTE:
You can use the
Suggest settings
button on the Discovery tool to suggest
the IP address and Subnet mask appropriate to the device you are connecting the
CB3000 to.
Summary of Contents for CB3000 - Client Bridge - Wireless Access Point
Page 1: ...M CB3000 Client Bridge User s Guide ...
Page 24: ...2 12 CB3000 Client Bridge User s Guide ...
Page 65: ...Management Options 4 7 Figure 4 4 View Log Screen ...
Page 74: ...4 16 CB3000 Client Bridge User s Guide ...
Page 90: ...5 16 CB3000 Client Bridge User s Guide ...
Page 94: ...B 2 CB3000 Client Bridge User s Guide ...
Page 96: ...C 2 CB3000 Client Bridge User s Guide ...
Page 104: ...D 8 CB3000 Client Bridge User s Guide ...
Page 105: ......


