44
7. Use the
button
to select the side of the
vehicle.
8. Select the
Horizontal
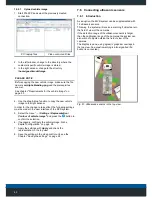
Position
slider and
use the
keys to
adjust the sensor
position according to
Fig. 52.
Fig. 55: Adjusting the sensor position
PLEASE NOTE
The horizontal position of the sensors is measured by the
coordinate origin of the respective vehicle side (see also
Fig. 52).
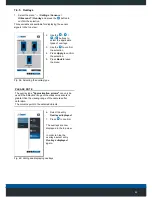
The blind zone, the
continuous tone range and
the measuring range can
be specified for each
sensor.
9. Use the respective
sliders to set the
applicable values.
10. Press
Apply
to confirm
the selection.
11. Configure additional
sensors according to
steps 5 to 13.
Fig. 56: Setting the sensor range
When using the value
blind zone
, signals from stationary
components on the vehicle (e.g., trailer coupling) can be
suppressed.
PLEASE NOTE
Within the blind range, signals from objects or persons
are also suppressed.
Therefore, do not select the blind range too large!
The
permanent value range
determines the distance at
which objects trigger a continuous tone of the internal
buzzer (if installed).
7.6.4 Editing/deleting sensors
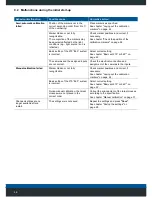
1.
Select the menu “
... / Settings / Sensors /
Ultrasound” / Configuring sensors
and press the
button to confirm the selection.
2. Use the
button
to select the applicable
sensor.
3. Use the
button to
confirm the selection.
Fig. 57: Selecting a sensor
Overview of the pre-set
sensor parameters.
• Press
Delete
to delete
a sensor.
• Press
Edit
in order to
repeat the
configuration of the
sensor.
Fig. 58: Deleting/editing a sensor


