Morley-IAS
996-203-000-2, Rev. 02
A7 - 2
-
To enter a panel ID (in the range 1 to 99) either use the numeric pushbuttons to enter the address or
the
/
keys - the first press of either key will enter an ID of ‘0’ (not on network) which increments/
decrements with each press of the
/
keys. Press the
pushbutton to confirm the panel’s ID
number entry. The Network Options menu is displayed once more.
-
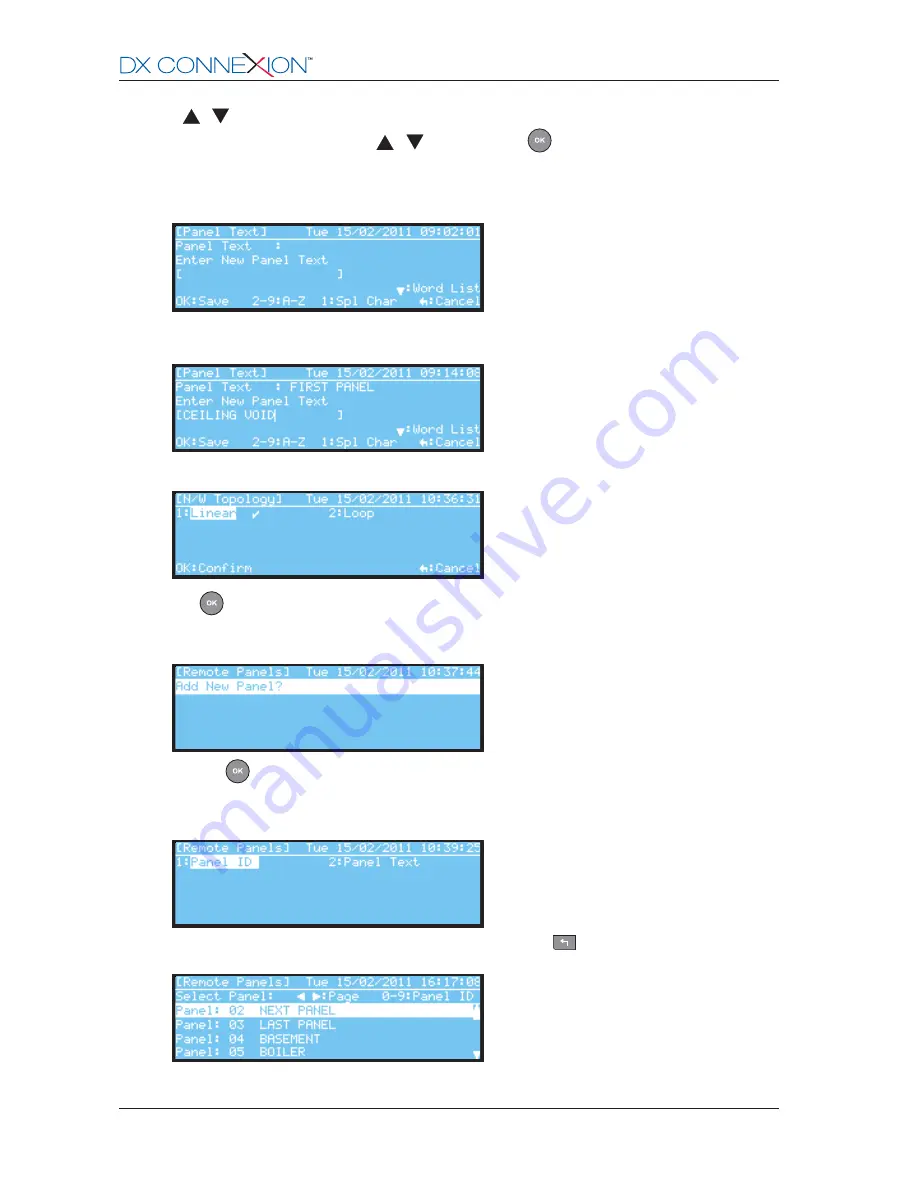
The panel can also have an alphanumeric network identity (optional). To enter an alphanumeric
identity select option ‘2: Panel Text’. Identity names of up to 20 characters may be entered.
-
In the example below the ‘Word List’ text entry option was used to give the panel the name ‘CEILING
VOID’.
-
Network Topology. Select the type of network being used, Linear or Loop.
-
Press
to confirm the type of network topology used.
-
Remote Panels. Use this option to create a list of all the other panels on the network. When this
screen is displayed an ‘Add New Panel?’ prompt is highlighted as below:
-
Press the
pushbutton.The ‘Panel ID’ and ‘Panel Text’ options are displayed once more. Use
these options to add every networked panel that this panel should know about. If any panels on the
network are not included in this list this panel will not indicate any alarm of fault conditions related to
those panels or respond to any control actions.
-
When every panel on the network has been added, press the
key to display the list of remote
panels; the local panel, of course, is not included in this list.
-
To remove a panel from this list, simply change its ID to ‘0’. In this case, the local panel is no longer
able to respond to alarm or fault events originating from that remote panel.
www.acornfiresecurity.com
www.acornfiresecurity.com


