(7) Troubleshooting
(8) Maintenance, inspection and part replacement
CAUTION
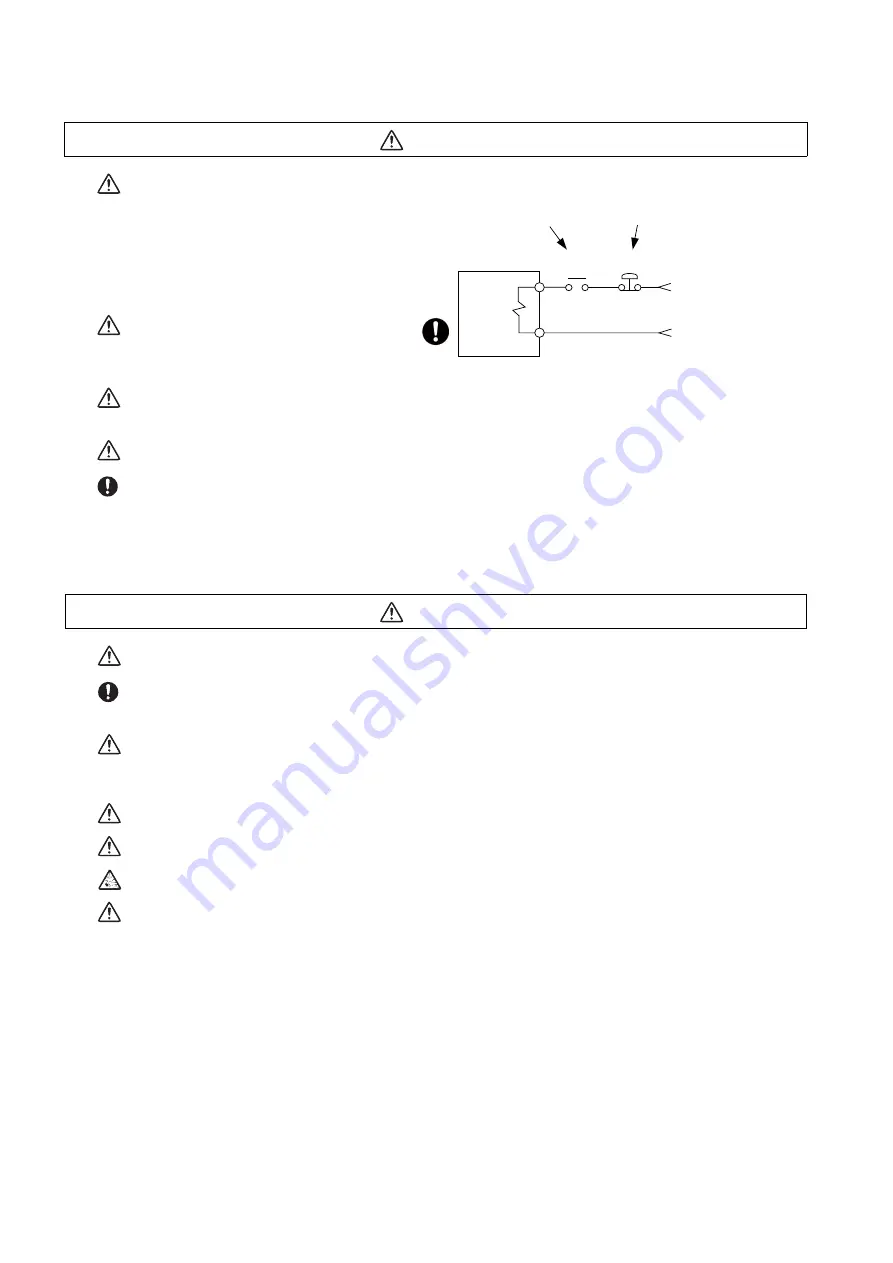
Use a motor with electromagnetic brakes or
establish an external brake mechanism for
the purpose of holding; this serves as
countermeasures for possible hazardous
situation caused by power failure or
product fault.
Use a double circuit structure for the
electromagnetic brake’s operation circuit
so that the brakes will activate even when
the external emergency stop signal is
issued.
The machine could suddenly restart when the power is restored after an instantaneous power failure, so
stay away from the machine. (Design the machine so that the operator safety can be ensured even if the
machine restarts.)
To secure the absolute position, do not shut off the servo drive unit’s control power supply when its battery
voltage drops (warning 9F) in the servo drive unit side.
If the battery voltage drop warning alarm occurs in the controller side, make sure to back up the machining
programs, tool data and parameters, etc. with the input/output device before replacing the battery.
Depending on the level of voltage drop, memory loss could have happened. In that case, reload all the data
backed up before the alarm occurrence.
CAUTION
Periodically back up the programs, tool data and parameters to avoid potential data loss. Also, back up
those data before maintenance and inspections.
When replacing the battery on the controller side, the machining programs, tool data and parameters
should be backed up with the input/output device beforehand. In case the memory is damaged in replacing
the batteries, reload all the data backed up before replacing the battery.
The electrolytic capacitor’s capacity will drop due to deterioration. To prevent secondary damage due to
capacitor’s faults, Mitsubishi recommends the electrolytic capacitor to be replaced approx. every five
years even when used in a normal environment. Contact the Service Center or Service Station for
replacements.
Do not perform a megger test (insulation resistance measurement) during inspection.
Do not replace parts or devices while the power is ON.
Do not short-circuit, charge, overheat, incinerate or disassemble the battery.
There may be a unit filled with substitute Freon in the heat radiating fins of the 37kW or smaller unit. Be
careful not to break the heat radiating fins during maintenance or replacement.
MBR
EMG
Motor
Electro-
magnetic
brake
Shut off with motor
brake control output
Shut off with CNC brake
control PLC output
24VDC
Summary of Contents for M80 series
Page 1: ......
Page 4: ......
Page 9: ......
Page 21: ......
Page 23: ......
Page 25: ......
Page 27: ......
Page 29: ......
Page 37: ......
Page 38: ...1 IB 1501269 F 1 System Basic Configuration...
Page 40: ...3 IB 1501269 F 2 General Connection Diagram...
Page 44: ...7 IB 1501269 F 3 List of Configuration...
Page 53: ...M800S M80 Series Connection and Setup Manual 3 List of Configuration 16 IB 1501269 F...
Page 54: ...17 IB 1501269 F 4 General Specifications...
Page 185: ...M800S M80 Series Connection and Setup Manual 4 General Specifications 148 IB 1501269 F...
Page 186: ...149 IB 1501269 F 5 Installation...
Page 211: ...M800S M80 Series Connection and Setup Manual 5 Installation 174 IB 1501269 F...
Page 212: ...175 IB 1501269 F 6 Precautions for Connecting...
Page 219: ...M800S M80 Series Connection and Setup Manual 6 Precautions for Connecting 182 IB 1501269 F...
Page 220: ...183 IB 1501269 F 7 Connection of Control Unit...
Page 245: ...M800S M80 Series Connection and Setup Manual 7 Connection of Control Unit 208 IB 1501269 F...
Page 246: ...209 IB 1501269 F 8 Connection of Keyboard Unit...
Page 248: ...211 IB 1501269 F 9 Connection of Operation Panel I O Unit...
Page 262: ...225 IB 1501269 F 10 Connection of Remote I O Unit...
Page 289: ...M800S M80 Series Connection and Setup Manual 10 Connection of Remote I O Unit 252 IB 1501269 F...
Page 290: ...253 IB 1501269 F 11 Connection of Manual Pulse Generator...
Page 294: ...257 IB 1501269 F 12 Connection of Synchronous Feed Encoder...
Page 296: ...259 IB 1501269 F 13 Connection of MITSUBISHI CNC Machine Operation Panel...
Page 308: ...271 IB 1501269 F 14 Connection of Handy Terminal...
Page 310: ...273 IB 1501269 F 15 Cable...
Page 349: ...M800S M80 Series Connection and Setup Manual 15 Cable 312 IB 1501269 F...
Page 350: ...313 IB 1501269 F 16 Setup Outline...
Page 354: ...317 IB 1501269 F 17 Setting the Hardware...
Page 383: ...M800S M80 Series Connection and Setup Manual 17 Setting the Hardware 346 IB 1501269 F...
Page 384: ...347 IB 1501269 F 18 Setting Up with M80 M800S SETUP INSTALLER...
Page 392: ...355 IB 1501269 F 19 Setting the Parameters and Date Time...
Page 398: ...361 IB 1501269 F 20 PLC Program Writing...
Page 410: ...373 IB 1501269 F 21 Confirming the Basic Operation...
Page 416: ...379 IB 1501269 F 22 Setting the Position Detection System...
Page 440: ...403 IB 1501269 F 23 Setting the Tool Entry Prohibited Range...
Page 454: ...417 IB 1501269 F 24 Confirming the Spindle Operation...
Page 458: ...421 IB 1501269 F 25 Setting the Handy Terminal...
Page 464: ...427 IB 1501269 F 26 Setting the Deceleration Check...
Page 474: ...437 IB 1501269 F 27 Adjust S analog Screen...
Page 479: ...M800S M80 Series Connection and Setup Manual 27 Adjust S analog Screen 442 IB 1501269 F...
Page 480: ...443 IB 1501269 F 28 Device Open Parameter Screen...
Page 486: ...449 IB 1501269 F 29 SRAM Open Parameter Screen...
Page 492: ...455 IB 1501269 F 30 Data Backup and Restoration...
Page 498: ...461 IB 1501269 F 31 Appx 1 Setting the System Lock...
Page 502: ...465 IB 1501269 F 32 Appx 2 Protection Setting...
Page 510: ...473 IB 1501269 F 33 Appx 3 Displaying Original Logo On Standard Screen...
Page 512: ...475 IB 1501269 F 34 Appx 4 EMC Installation Guidelines...
Page 524: ...487 IB 1501269 F 35 Appx 5 Restrictions for Lithium Batteries...
Page 532: ...495 IB 1501269 F 36 Appx 6 Precautions for Compliance to UL c UL Standards...
Page 538: ......
Page 542: ......


