MIROxi
User Manual cod. 980265
Rev 1.6
Page 15 of 32
SpO2 sampling time
Through this function it is possible to define the time interval between the values memorised between one oximetry
parameter and the next one; use or to select the desired value ( for 2 seconds,
for 4 seconds), press OK to set
the value selected and to pass to the service menu.
Energy saving
This function enables the display to be set “always on”, or to switch off automatically. This function is valid for the sleep
oximetry test. The option “Display -OFF” will switch off the display after 5 minutes which therefore extends the battery life.
At any time during the test the display can be switched back on by pressing
. Then select the required option as
previously described with or and then OK.
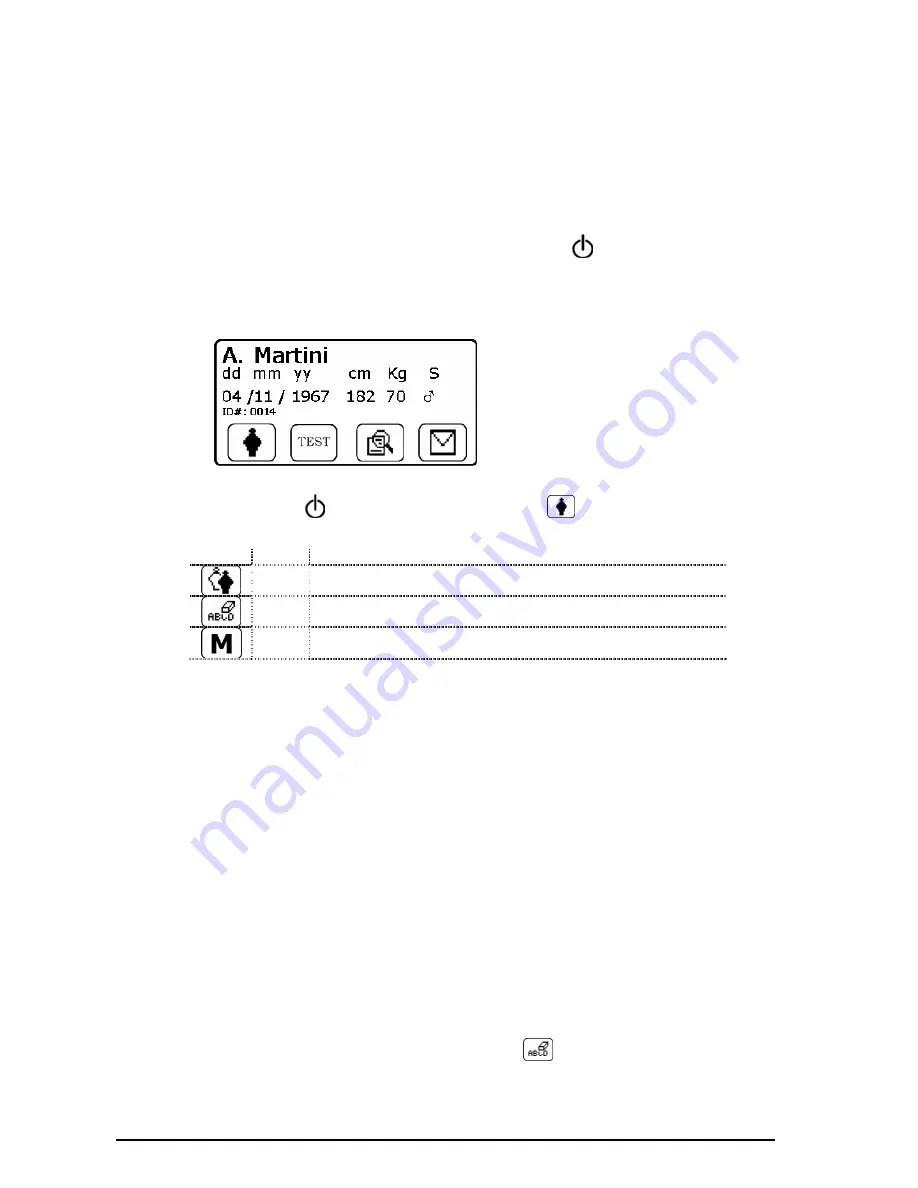
Having set the parameters (from the Service Menu) press ESC to access the second screen, and then the main screen,
as follows:
Indicates:
•
Patient name (A.Martin)
•
Date of birth (dd mm yy)
•
Height (cm)
•
Weight (kg)
•
Sex (S)
•
Patient ID code
•
Function icons
2.5 Patient Data
Switch on
MIROxi
by pressing
, or if already switched on, press
(
icon); to access the “PATIENT DATA
MANAGEMENT” screen The following table describes the functions and displayed icons:
Icon
Key
Description
To enter new patient data
To modify existing patient data
To access memory
To enter new patient data
From the “Patient Data Management” menu press to access the data input screen.
First screen (name and surname)
Use and to select required letters; confirm or delete using or . To input surname press OK. The letters can
also be selected automatically after a few seconds using the cursor.
Press OK to go to the next screen.
Second screen (date of birth, weight, height, sex)
Use or to select date of birth, use to set month, repeat to set year; continue setting data by entering patient
height, weight and sex using the same key. The arrow shown to the right of the field indicates the numerical value
that is being modified. Then use OK to go to the following screen; to return to the previous screen press , or press ESC
to exit set-up mode and go to the main screen.
Third screen (ethnic group)
Setting the correction factor: this value allows test data to be adapted according to the patient ethnic group (the “no
correction” option can also be set); press OK to complete the setting of parameters, the main screen then appears. In the
event of an error during the setting of patient data press to go back to the previous screen.
To interrupt data input press ESC, which then returns to the main screen.
Modifying patient data
In the “Patient Data Management” menu press (corresponds to the
icon). Modify data in the following screens
by using the keys as already described for entering new patient data.
To return to the main screen without changing any data press ESC.
To access memory


