Ordering Consumables
57
4
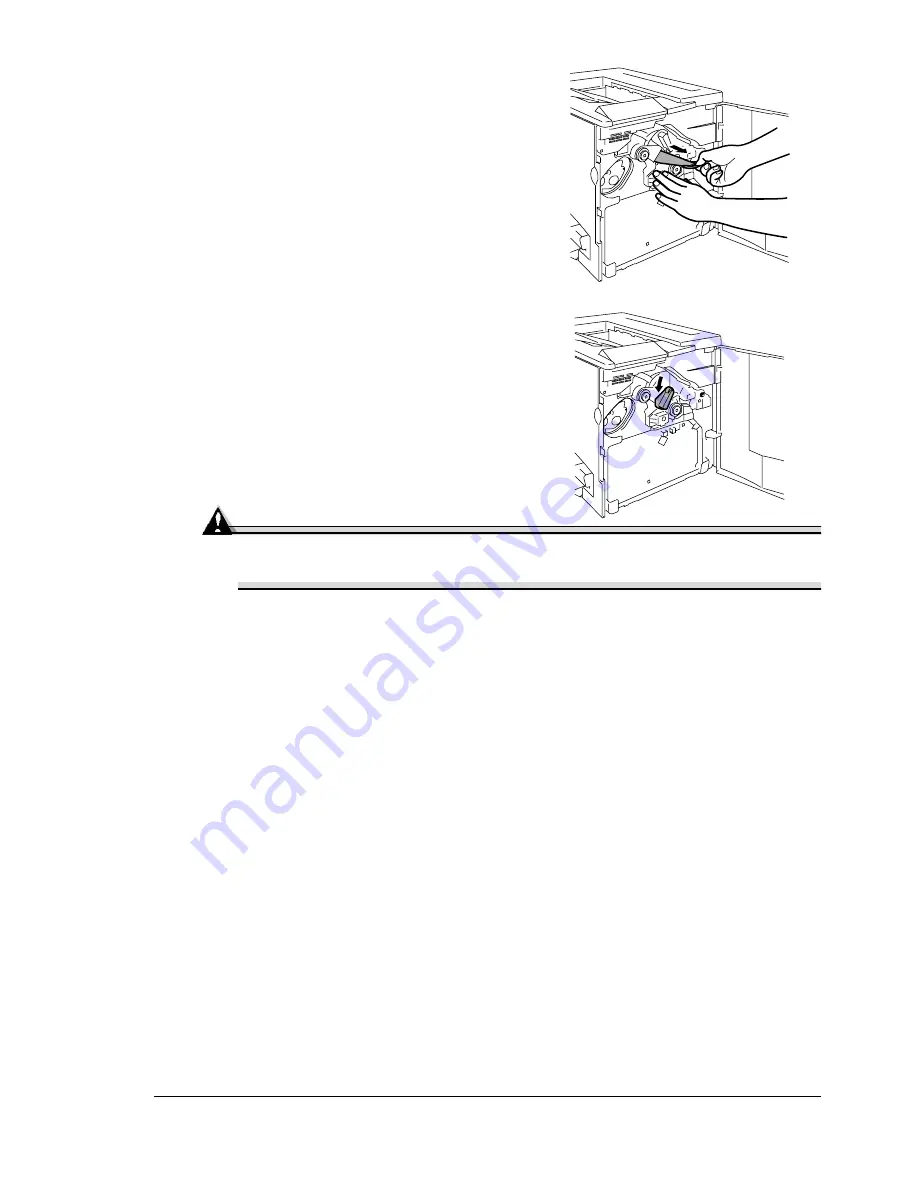
Press on the front handle of the
OPC drum cartridge with one hand
and hold the handle of the OPC
protective cover with the other hand.
5
Peel the protective cover straight
toward you.
Dispose of it properly
according to your local
regulations.
6
Rotate the transfer belt release lever
counterclockwise to its correct
position (7 o’clock).
This lowers the transfer belt.
Attention
If the transfer belt release lever is not at its correct position
(7 o’clock), the waste toner bottle cannot be installed.
7
Reinstall the waste toner bottle you removed earlier or install a new waste
toner bottle (see page 54).
8
Close the printer’s front door.
The printer must complete a 150-second calibration cycle after any
consumable has been replaced. If you open the door before the
Ready indicator on the control panel lights up and the Error indica-
tor turns off, the printer stops and repeats the calibration cycle.
Ordering Consumables
Choosing the right consumables for your printer not only increases its
reliability and performance, but also minimizes the risk of damage. For
example, only MINOLTA-QMS toner cartridges are designed to meet the
exact specifications of your MINOLTA-QMS printer, giving maximum
performance, efficiency, and long life. Toner cartridges and other
consumables for your printer are available from your local vendor or Q-SHOP
(www.q-shop.com).
See the Service & Support Guide for a list of sources of service and support
in many areas of the world. The most current worldwide information can be
found at www.minolta-qms.com.
Summary of Contents for Magicolor 2300W
Page 1: ...magicolor 2300W User s Guide 1800708 001A ...
Page 7: ...1 Software Installation ...
Page 15: ...2 Using Media ...
Page 31: ...3 Working with the Printer ...
Page 35: ...4 Working with the Printer Driver ...
Page 45: ...5 Working with the Status Display ...
Page 50: ......
Page 51: ...6 Replacing Consumables ...
Page 64: ......
Page 65: ...7 Maintaining the Printer ...
Page 74: ......
Page 75: ...8 Troubleshooting ...
Page 105: ...9 Installing Accessories ...
Page 110: ......
Page 111: ...10 Repacking the Printer ...
Page 123: ...A Technical Specifications ...
Page 150: ......


