Function Allocation of the
J
Key for Linearization and Setting/
Deleting the Preload
Purpose The
J
key is normally used for the calibration/adjustment function.
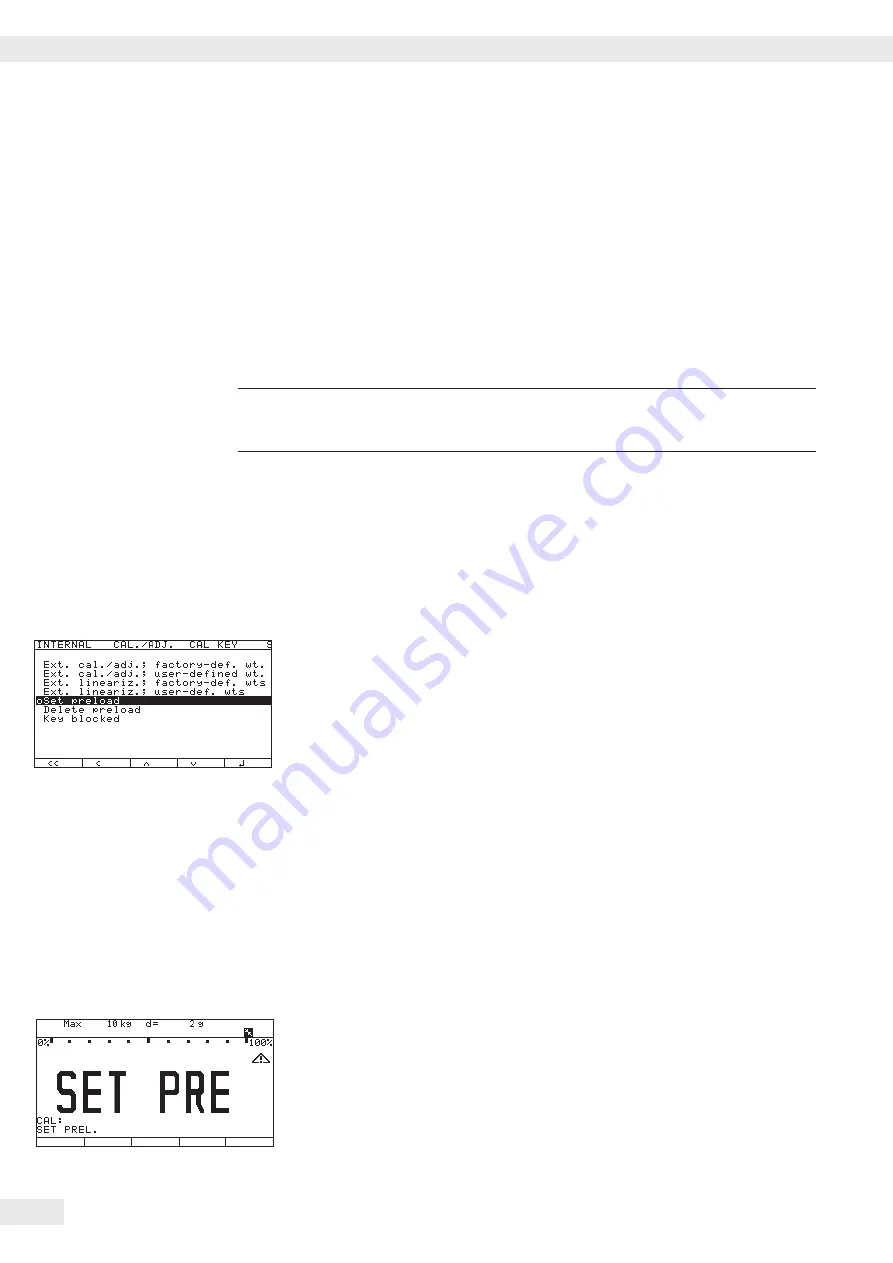
The following additional functions can be allocated to the key when the Service
mode is activated:
– External linearization with default weights
– External linearization with entered linearization weights
– Internal linearization (for external IS platforms only)
– Set preload (not possible in Legal Metrology)
– Delete preload (not possible in Legal Metrology)
3
Once linearization has been completed, or after a preload has been set or deleted
the function of the
J
key must be reallocated back to its original function in the
Setup menu, e.g. external calibration/adjustment with default weights.
Procedure
t
Remove the cap.
t
Slide the menu access switch to the left (= “open“ position).
t
Activate the Service mode, see “Service Mode.“
t
Select weighing platform “
WP 1
“ in the “
Device Parameters
“
menu item.
t
If the “
Internal
“ setting is not already activated (marked by “
o
“), select
the setting using the “
Q
“ or “
q
“ soft key and confirm with “
O
.“
y
The menu for the “
WP-1 INTERNAL
“ device parameters is displayed.
t
Use the “
Q
“ or “
q
“ soft key to select and open the “
Calibration/
adjustment
“ menu using “
O
.“
y
The “
CAL key function
“ submenu is displayed.
t
Use the “
Q
“ or “
q
“ soft key to select the corresponding menu item and confirm
with “
l
.“
y
The menu item is marked by a circle “
o
.“
Note
The functions that can be configured in the “
CAL key function
“
submenu depends on the selected weighing platform and its configuration data.
Functions that cannot be accessed are not displayed in the selection screen.
Note
The function set in the “
CAL key function
“ menu is carried out in the
normal weighing mode because when you exit the Setup menu the Service mode is
deactivated. To perform the function on a digital weighing platform (such as an IS
platform), however, it must be carried out in Service mode.
t
The procedure is as follows: after selecting the desired function and exiting
the Setup menu, reactivate Service mode again and then exit the Setup menu
immediately by pressing the
M
key or the “
oo
“ soft key.
y
The scale is now in Service mode without this being displayed.
t
Trigger the previously set function using the
J
key.
y
The display shows “
S_CAl:
“ indicating that the scale is in Service mode.
t
The corresponding menu item can be selected using the “
Select
“ soft key
and carried out using the
J
key.
t
If you cancel the function using the
(
key or by restarting the scale using
the
e
key, you will exit the Service mode.
46
Operating Instructions Combics Complete Scales
Configuring Weighing Platforms
Summary of Contents for CAW3P
Page 125: ...Operating Instructions Combics Complete Scales 125 Specifications CAS G FE ...
Page 126: ...126 Operating Instructions Combics Complete Scales Specifications ...
Page 127: ...Operating Instructions Combics Complete Scales 127 Specifications CAS G IG ...
Page 128: ...128 Operating Instructions Combics Complete Scales Specifications ...
Page 134: ...34 Operating Instructions Combics Complete Scales Specifications ...
Page 138: ...138 Operating Instructions Combics Complete Scales Declarations of Conformity ...
Page 139: ...Operating Instructions Combics Complete Scales 139 Declarations of Conformity ...
Page 140: ...40 Operating Instructions Combics Complete Scales Declarations of Conformity 1 5 ...
Page 143: ...Operating Instructions Combics Complete Scales 143 EU type examination certificate ...
Page 144: ...144 Operating Instructions Combics Complete Scales EU type examination certificate ...
Page 145: ...Operating Instructions Combics Complete Scales 145 Test Certificate ...
Page 146: ...146 Operating Instructions Combics Complete Scales 146 Evaluation Certificate ...
Page 147: ...Operating Instructions Combics Complete Scales 147 14 Evaluation Certificate ...
Page 148: ...148 Operating Instructions Combics Complete Scales Evaluation Certificate ...
Page 149: ... Operating Instructions Combics Complete Scales 149 Certificate ...
Page 153: ...Operating Instructions Combics Complete Scales 153 ...
Page 154: ...154 Operating Instructions Combics Complete Scales Plates and Markings ...
Page 155: ...Operating Instructions Combics Complete Scales 155 Plates and Markings ...
Page 156: ...156 Operating Instructions Combics Complete Scales Plates and Markings ...
Page 168: ...168 Operating Instructions Combics Complete Scales Plates and Markings ...
Page 169: ...Operating Instructions Combics Complete Scales 169 Plates and Markings ...
Page 170: ...170 Operating Instructions Combics Complete Scales Plates and Markings ...
Page 171: ...Operating Instructions Combics Complete Scales 171 Plates and Markings ...
Page 172: ...172 Operating Instructions Combics Complete Scales ...
Page 173: ...Operating Instructions Combics Complete Scales 173 Certificate ...
Page 174: ...174 Operating Instructions Combics Complete Scales ...
Page 180: ...180 Operating Instructions Combics Complete Scales Certificate US C ...
Page 181: ...Operating Instructions Combics Complete Scales 181 Certificate US C ...
Page 182: ...182 Operating Instructions Combics Complete Scales ...
Page 184: ...184 Operating Instructions Combics Complete Scales ...
Page 185: ...Operating Instructions Combics Complete Scales 185 ...
Page 186: ...186 Operating Instructions Combics Complete Scales ...
Page 187: ...Operating Instructions Combics Complete Scales 187 ...


